Read the previous #photofit columns here
I had the great privilege of shooting for Kill Cliff at Ben Bergeron's East Coast Championship last month (actually two months now). This event is the new high watermark to serve as a showcase for elite athletes. It's not a 3-day slaughter fest. It's not the CrossFit Games. It almost feels more like CrossFit camp where high level athletes are brought under the same roof for a quick competition where the stakes and pressure are much lower than they are used to dealing with. The end result? An amazing event that allows the fans to watch the highest-level athletes do their thing.
All weekend I was teamed up with my good friend Chris Nolan (@metconphotos) so we split the event coverage as Kill Cliff had more than a dozen sponsored athletes on the floor. I'll use this post as a jumping off point to discuss getting the perfect exposure at indoor competitions.

Lindsey Valenzuela Nikon D4, Nikon 70-200 2.8, f2.8, 1/500th, ISO 6400
During indoor events, arriving at a good exposure, quickly, is critical. You want to be able to focus on the event and the action, and not constantly readjusting your settings. Let's put together a run-down for how to go about setting an exposure fast, and accurately.
For indoor events, I will always shoot in full manual. I will set my own shutter, aperture, and iso. I'll keep white balance on auto. For indoor events, I'm normally struggling to get enough light to get a good exposure. As a baseline, I always want a shutter speed of 1/320 minimum, but would prefer 1/500. So what's the process I go through to lock in my settings?

Ragnheiður Sara Sigmundsdottir - Nikon D4, Sigma 120-300, 1/1000th, f2.8, ISO5000
1. Survey the room: The first step is as simple as looking around and seeing what the room you're shooting in is made up of. Are there windows? That is the most critical element, because that will mean the best light will always come from that direction, and that light may increase or dim over the course of the day. If there are windows, I'm always going to want to be mindful of shooting with those windows to my back and asking athletes to face towards the light to get the best possible results.
If there are no windows, metering actually becomes much easier because the light does not change over the day. Again, I want to survey and see where the lights are in the gym, how many there are, if they are all the same, and if their color is all the same. You need to identify whether there are "dark spots" where the ceiling lights aren't even, if bulbs are out, or if there's a fairly even coverage of light.

Mat Fraser cleaning 375lbs (he missed the jerk) Nikon D4, NIkon 70-200, 1/1000th, f2.8, ISO 5000
2. Take test shots in different positions: Once I see what sort of light I'm dealing with, I'll guess a baseline exposure -- indoors I'll start at 1/500th, f2.8, ISO 3200. I'll grab someone in a few different spots across the room and see how that exposure looks. I'll use ISO first to adjust. Obviously, if the image is too dark, I'll push up my ISO. My usual workhorse is the Nikon D4, I won't think twice about moving to 6400 or 8000, but I'd really prefer not to shoot between 10,000-12,800. There is a noticeable noise and dullness to the image that is introduced. If I move my exposure up to ISO 6400/8000 and am still not seeing much of an improvement, I'll consider slowing my shutter a bit to maybe 1/320th. What am I looking for when I say a "good exposure?" I want to see the subjects face lit to the point their eyes are clear. I want some balance between the subject and the background, but I'm not overly concerned with how bright the background is.

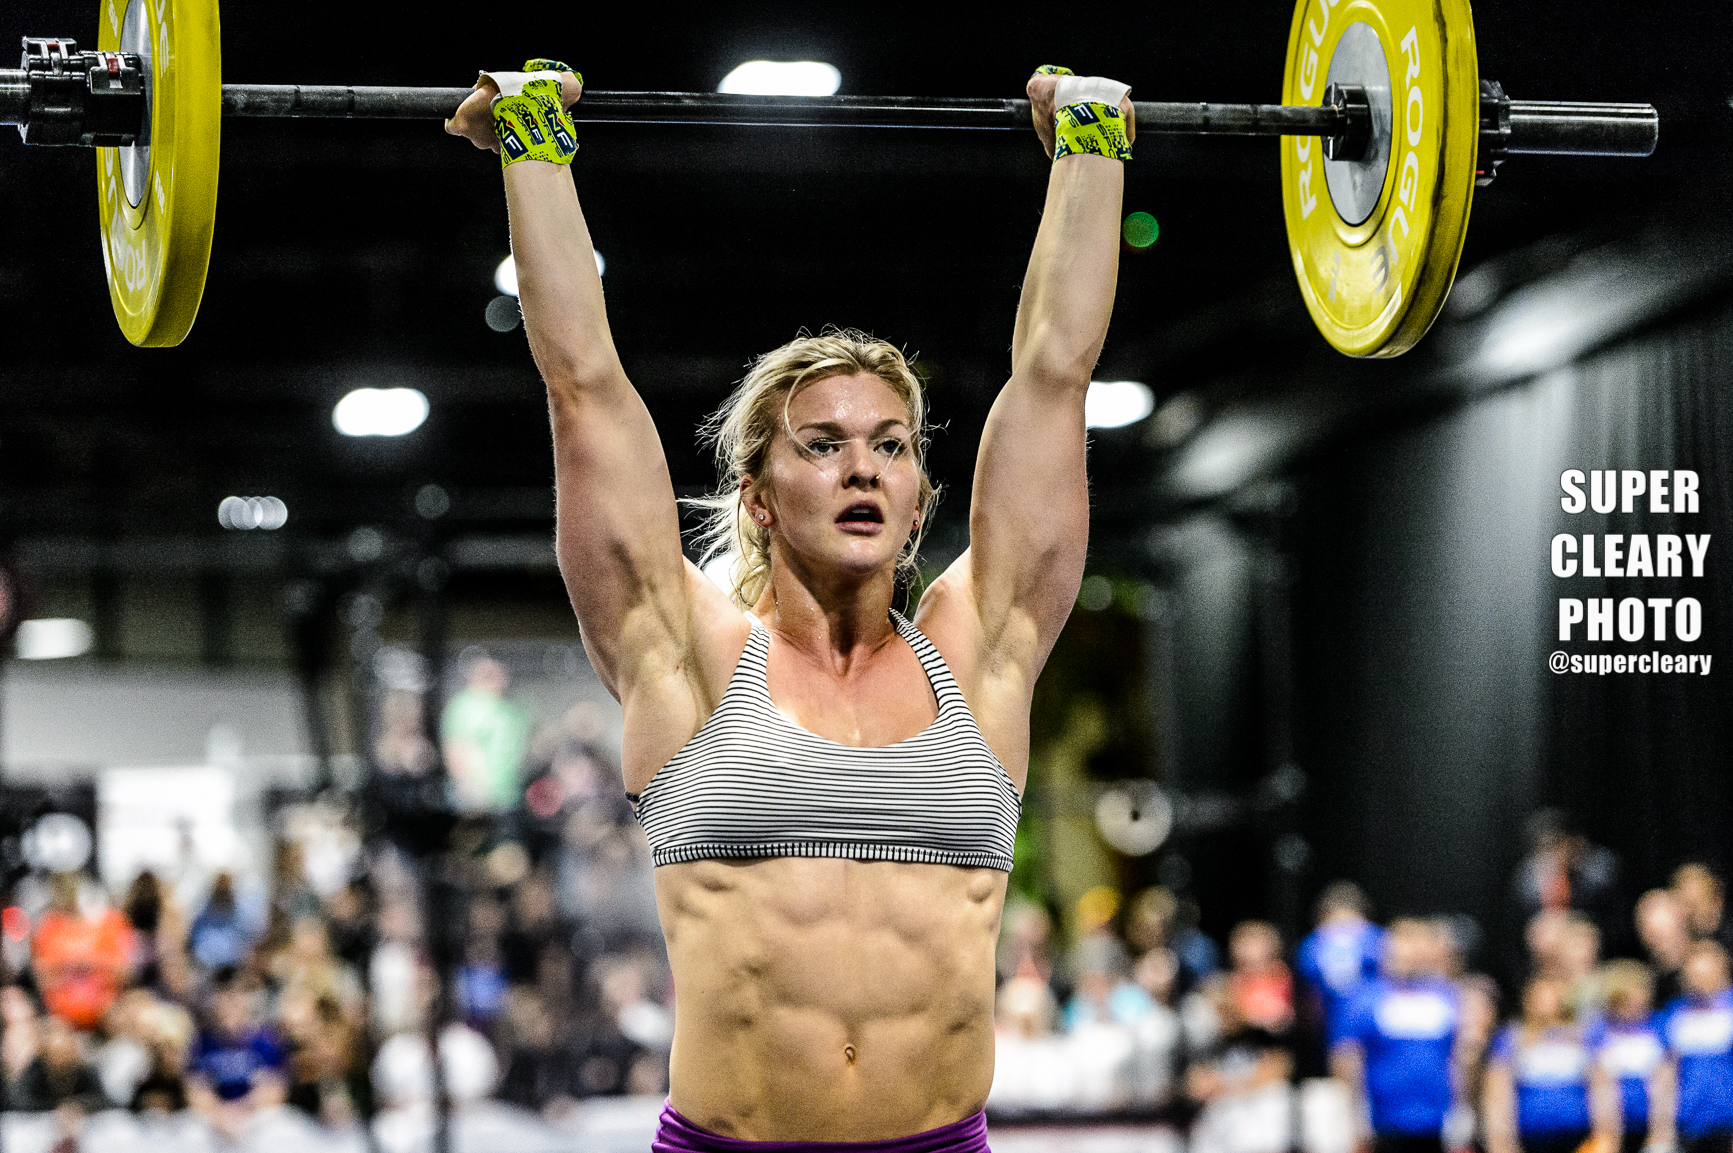
Lauren Fisher: Nikon D4, Nikon 70-200, 1/500th, ISO 8000
3. Using the in-camera meter: (for this method, set your meter system to center-weighted). Instead of just sort of "guessing" the base exposure or how to fine tune your settings, I can use the in-camera meter (those hashmarks inside the viewfinder that are usually blinking to the right or left of center. Using a center weighted meter, the camera will tell me whether whatever the focus point is on is over or under exposed.
4. Test and chimp. How are my shots coming out? Thankfully, we don't have to go to the darkroom. Cameras have this magical screen attached that we can refer to. While I don't want to remain glued to my screen, I do want to use this as a tool to make sure that the baseline setting I've decided on are still delivering consistent results. A major helper I'll use is highlights alert. Inside your camera's playback/display settings you can enable "highlight alerts" which will create blinking area in any part of the image is that is blown out and won't be able to be saved in post. Having that blinking alert on the screen is extremely helpful because I can know without extensively examining the screen that I need to dial back my exposure, just by seeing it blinking.

Rich Froning - Nikon D4, Sigma 120-300, 1/500th, F2.8, ISO 8000
5. Shoot! Now, use those settings you've locked into the camera and shoot the event. Remember what you learned when you surveyed the room -- are there dark spots? Are there bright spots? Instead of now having to worry about remetering and all that, I'll just know as I move into the darker part of the room to start compensating with ISO or shutter.
In practice:
The floor of the ECC was in the Seaport World Trade Center in Boston -- a large convention hall with even ceiling lights front to back, no windows. All the lights were the same color and brightness. Great, because that means wherever I'm shooting the exposure should be the same.
For the first event, I went out with my D4 and Sigma 120-300 2.8 (my favorite bigger event lens). I started off the same way, f2.8, 1/500th, iso 3200. After a shot, I could see that was much too dark so I went up to iso 6400. I shot about a heat's worth, looked at the results during the break and then pushed up the ISO just a little more to 8000. This gave me a solid exposure, while still maintaining a fast shutter speed that helps keeps details sharp.
Brooke Ence - Nikon D4, Nikon 70-200, 1/500th, F2.8, ISO 8000
Of course, good ol' Ben Bergeron likes to switch things up. At the end of the speed clean and jerk workout, the remaining athletes came out to work up to a 1rm clean and jerk. The lights came down, and just a spot hit the platform. So, same procedure. I shot a few frames over at the platform, even the background now went to black, I actually was able to dramatically drop my ISO from 8000 to about 3200. Again, after the first few athletes lifted, I went through the same procedure, tinkering with my ISO to get the shot just right without blowing out the highlights.
Over the course of the weekend, the only real dark spot I found was when shooting by the rig. Over there, I just made sure to slow down the shutter a bit to give me a little extra light, and then made sure to crank it back up when I returned to the middle of the floor.
So quick review. Indoor events have their pros: usually consistent lighting so you can lock in settings and then focus on the job. The downside, usually the lighting is very poor and you'll need to pull out all the stops to get a sufficient shutter speed. Go through the steps I've outlined above -- survey the room, take test images, dial it in with your meter, and then get shooting. Make sure often review your results and adjust accordingly.
If you like what you've read, please share. Feel free to post some content suggestions below so I know what you're looking for in my next post. For bookings email shaun@superclearyphoto.com. And as always, follow @supercleary on instagram and SuperClearyPhoto on Facebook.
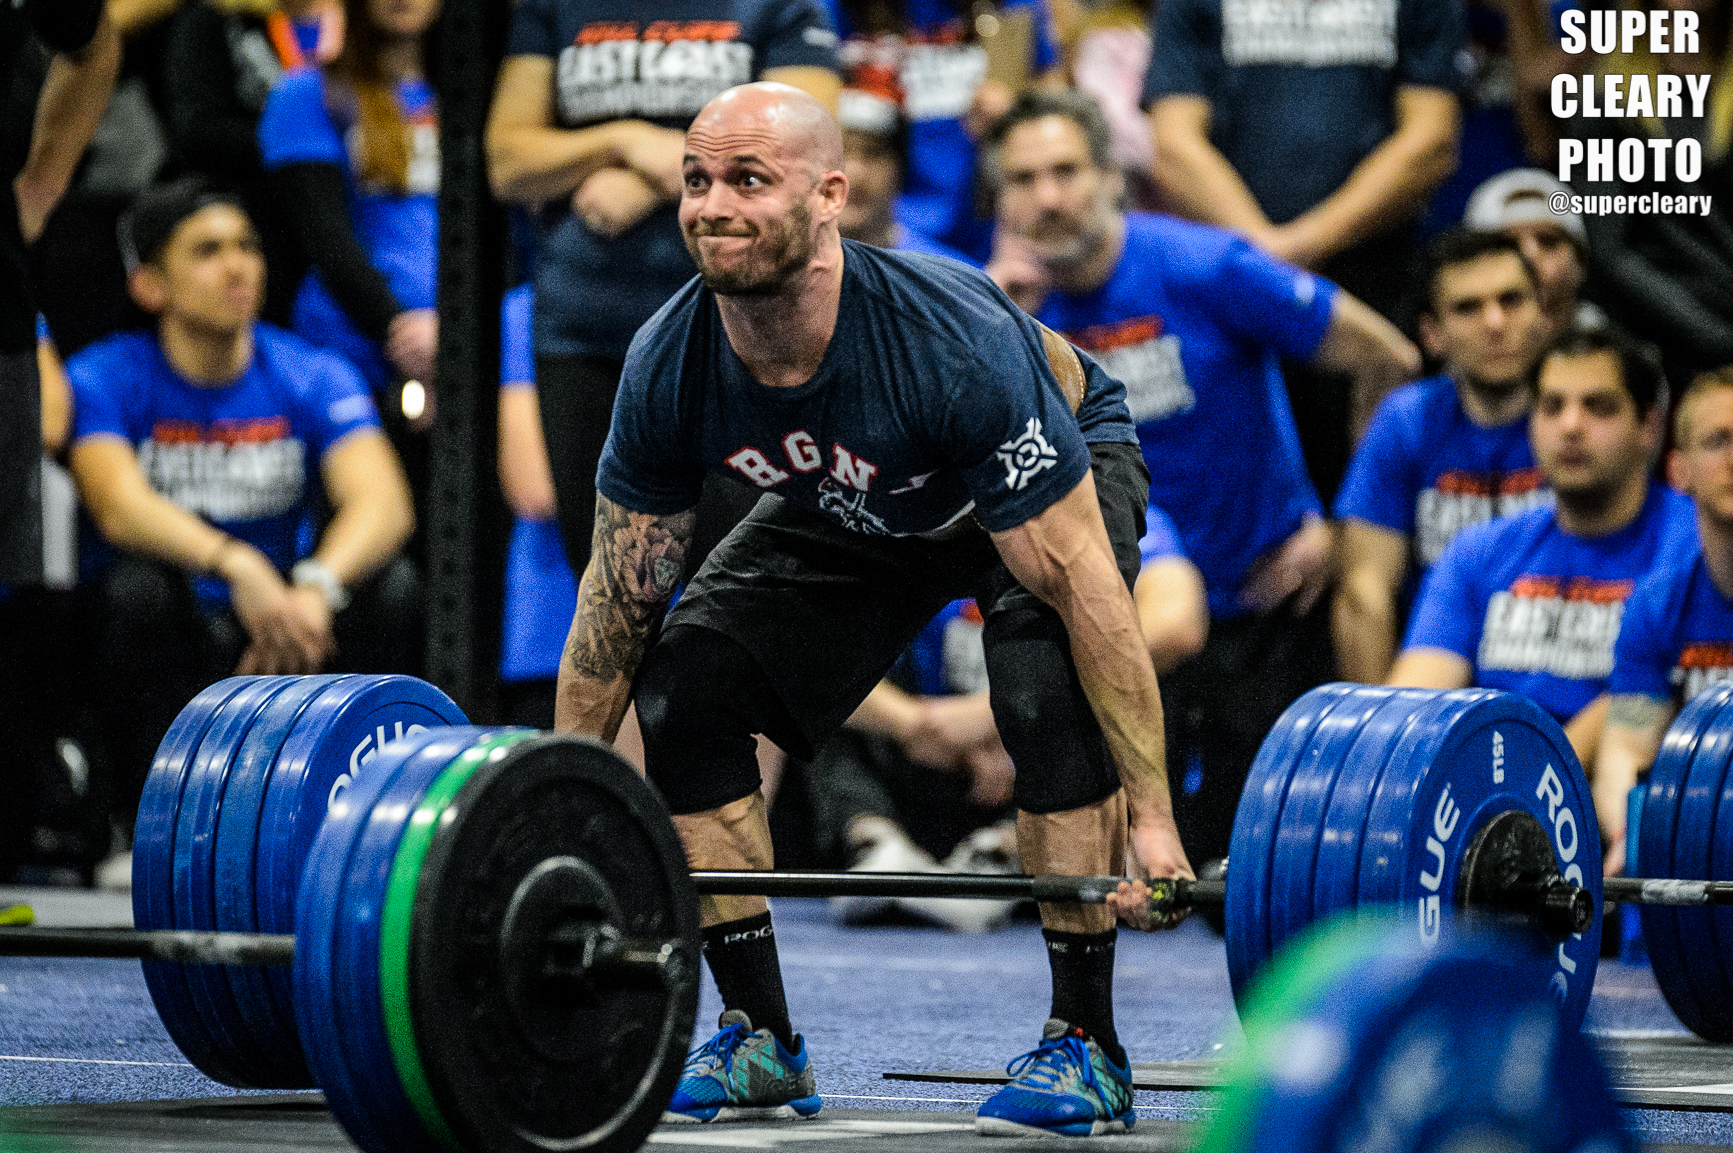
Chris Spealler hitting a 405lb deadlift - Nikon D4, Sigma 120-300, ISO 8000