• Portfolio
    • The CrossFit Games
    • Competition
    • Athletes
    • Elite Fitness
    • OCR
  • Video
  • Education
    • 1-on-1 Mentorship
    • Portfolio Overhaul
  • Sales
  • BLOG
  • ABOUT

SuperClearyPhoto

  • Portfolio
    • The CrossFit Games
    • Competition
    • Athletes
    • Elite Fitness
    • OCR
  • Video
  • Education
    • 1-on-1 Mentorship
    • Portfolio Overhaul
  • Sales
  • BLOG
  • ABOUT
  • Menu

Do You Need Pro Gear to be a Pro Photographer? (PhotoFit #21)

November 16, 2016

A few weeks ago I answered my number one asked question, how to make money shooting CrossFit.  I got a lot of great feedback and hope that got a few people some paying jobs.  This week I want to follow-up with what I think might be my second most asked question, do I need "pro" gear to be a pro?  If you don't want to read ahead, the answer is an emphatic, 'no."

Pro Gear vs. Cheap Gear

First off, what is "pro gear."  In my mind, pro gear is the stuff with the big price tag.  In terms of camera bodies, once you start getting into full frame cameras, and especially the 1DX series on the Canon side and the D4/5 series on the Nikon side you're in the "pro gear" land.  You're going to see camera gear that is very expensive as well with a better build quality.  In terms of specs, they have all the megapixels and focus points, and can do everything but take the photo for you.  What makes a pro lens?  Fixed apertures are your first clue (f2.8 lenses) as well as big price tags.  These lenses focus faster, are sharper, and are built better.

Let's be clear though with all this fancy stuff, pro cameras don't take photos for you and pro cameras don't work outside the rules of the exposure triangle.  Because of that, there is simply no replacement for knowledge.  You can put a "pro" setup in the hands of a first time photographer and they will get worse-than-iPhone quality photos.  You can put an iPhone in the hands of a pro photographer and they are going to deliver professional-level shots.  Don't believe me?  Watch the awesome series DigitalRev has put together, the Pro Photographer, Cheap Camera Challenge.

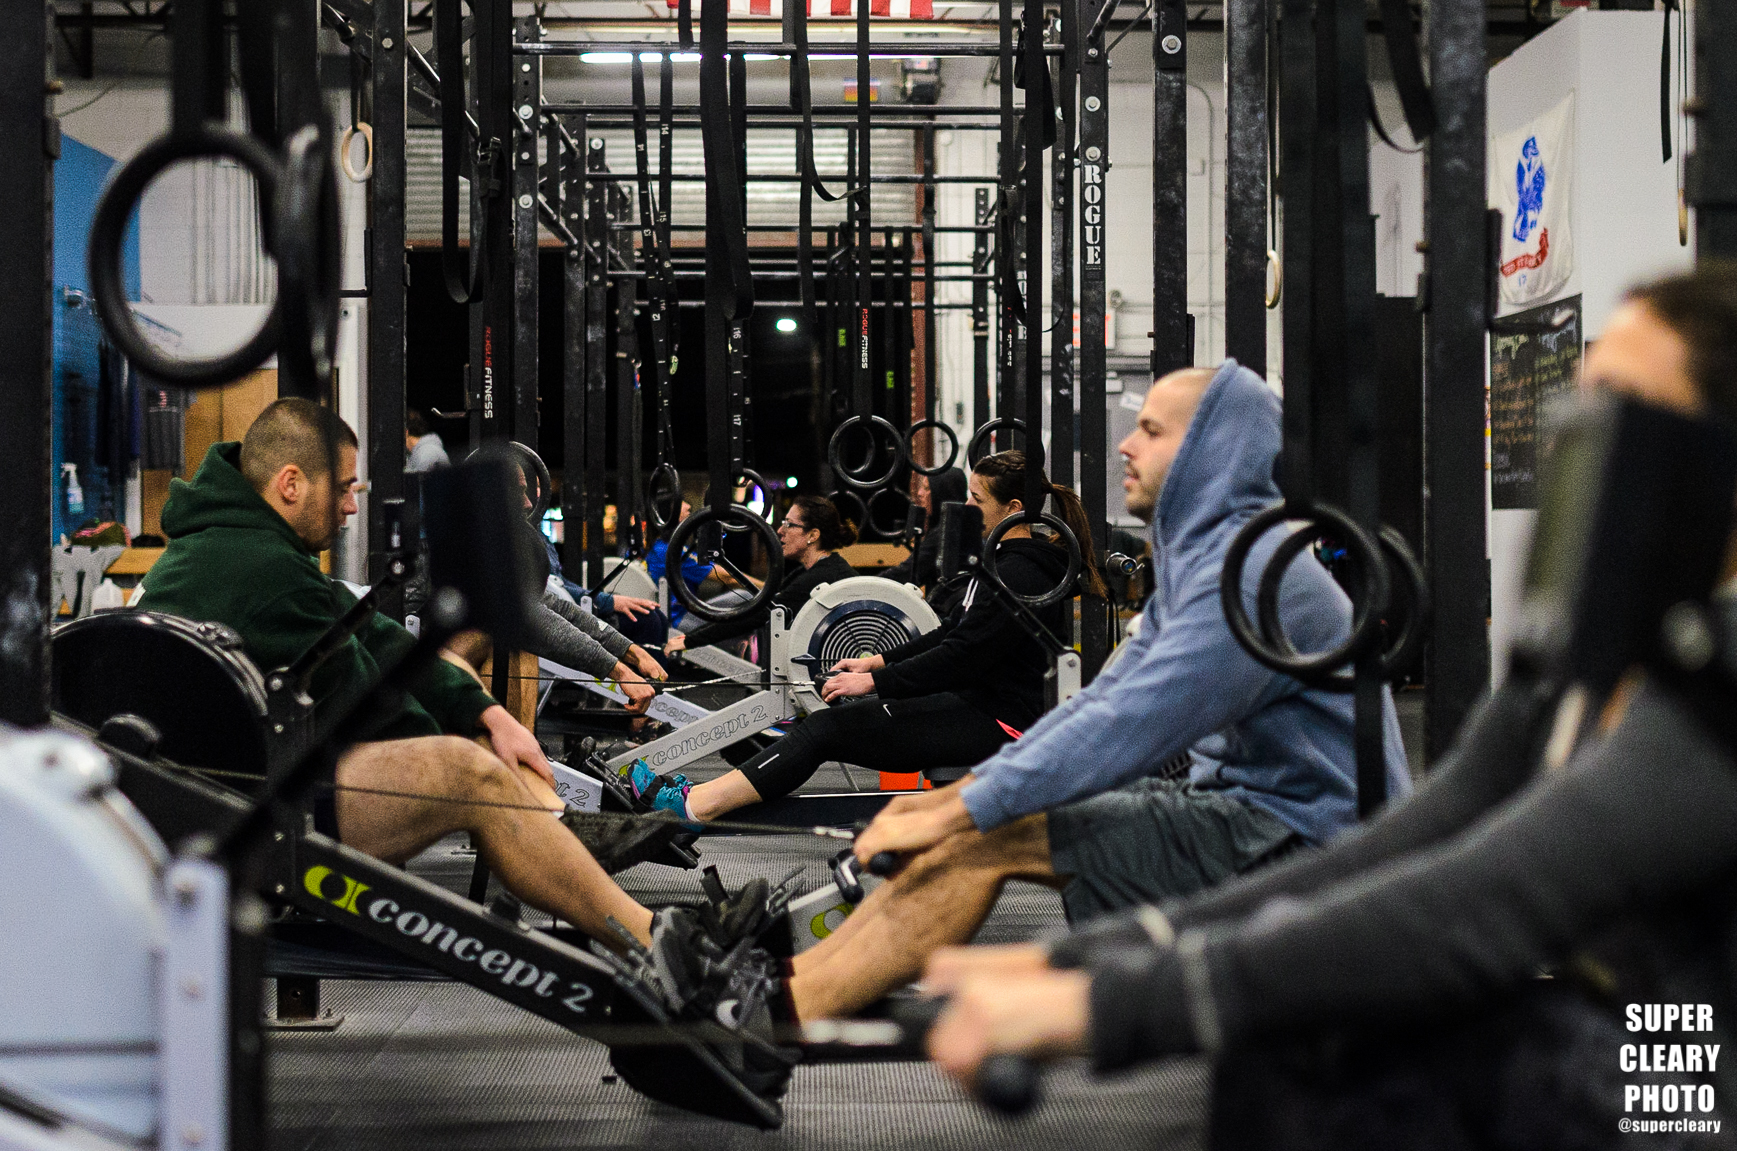
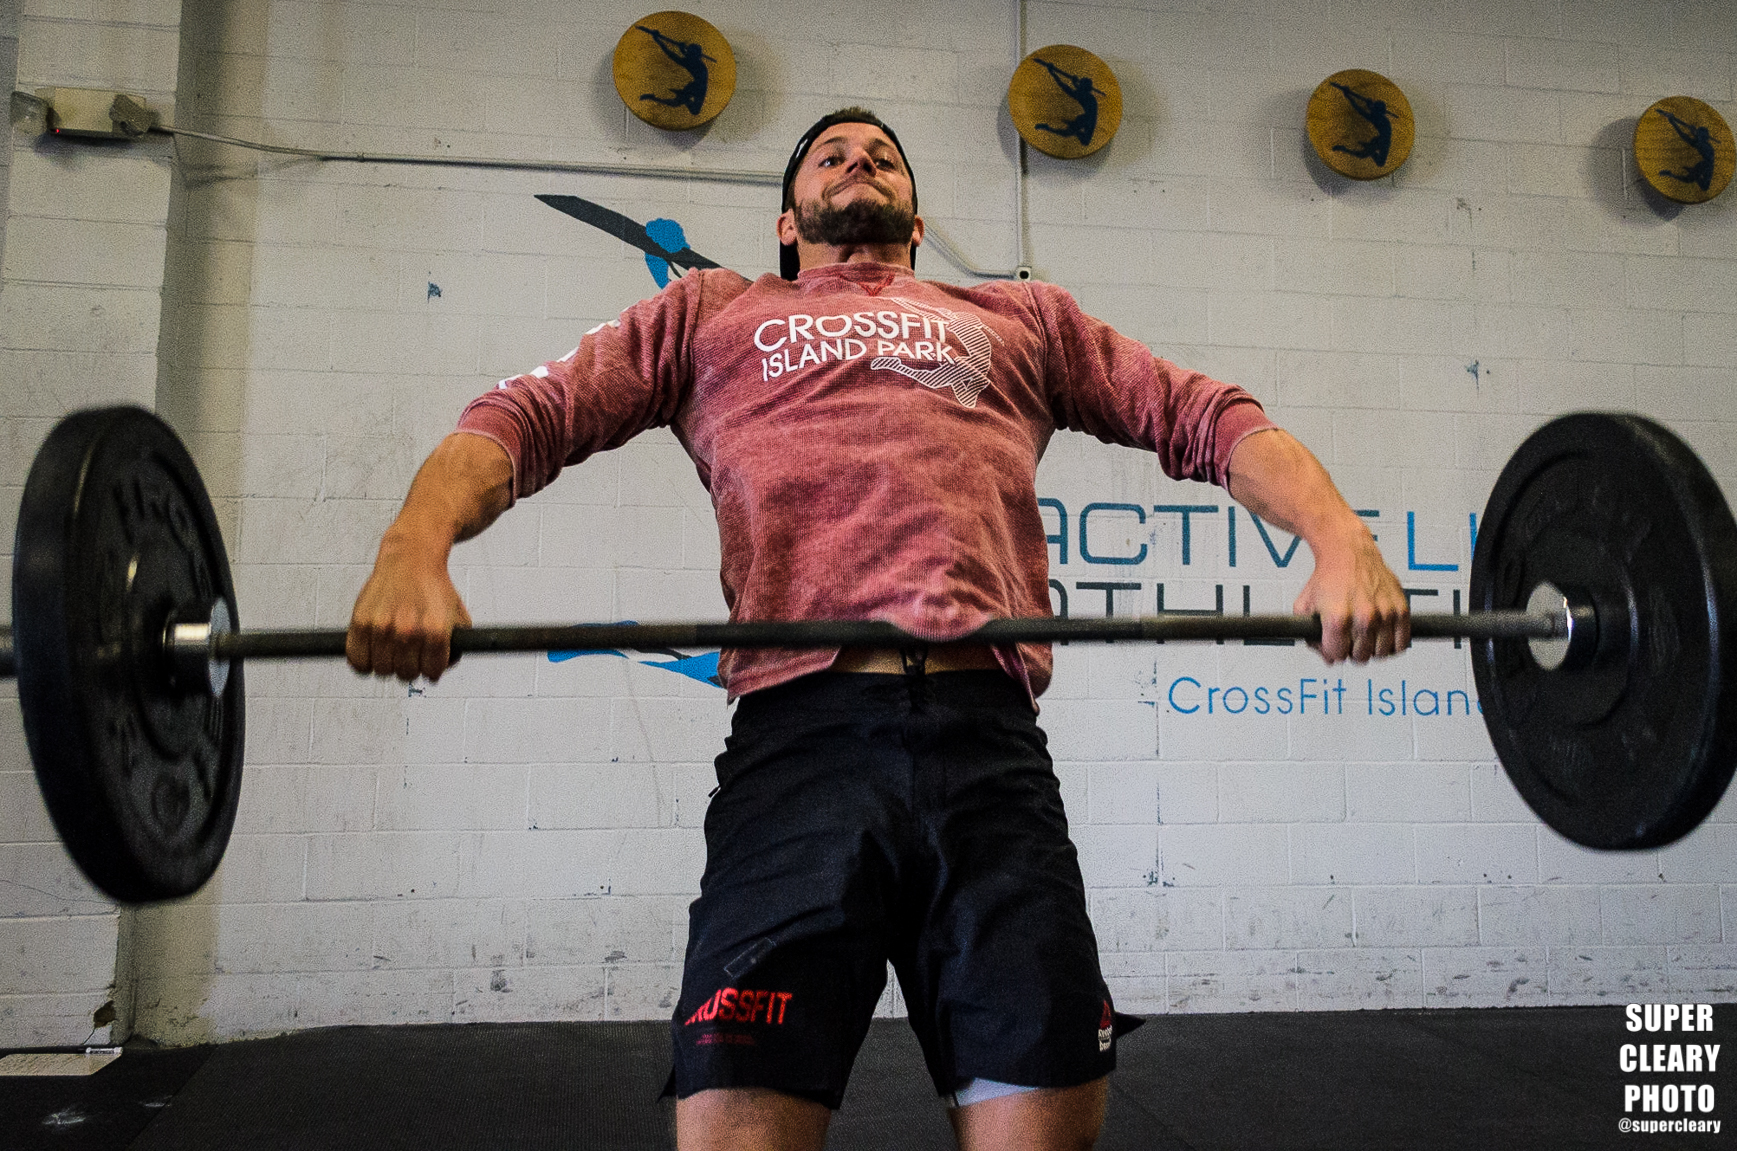
So what's the point of pro gear?  It makes life easier to get the shot.  Here's an example.  I actually was playing around with my D5100 with the kit 18-55 the other day, my first DSLR, and the camera I used to take the first photos I ever sold.  I was in the gym snapping away and needed more light, so I cranked up the ISO to 10,000.  Whoops, that camera maxes out ISO 6400 and it looks like total mud.  Fail number one.  Next one of my buddies was going to setup for a snatch.  As he went through the lift, I snapped away to try and get the whole sequence.  By the time the bar was half way over head, the camera slowed down and stopped shooting.  Error: buffer full.  Oh right, the buffer on low-end cameras fills up after a few clicks in a second when shooting RAW.  Lastly, I started trying to get some good close-ups without moving my feet, I zoomed the lens, kept snapping, and looked down and saw the photos were horrifically underexposed.  Right.... that kit lens that comes with the camera is variable aperture, so as I zoom in, the aperture closes down.

Now, switch over to my "pro camera' my Nikon D4, with a 24-70 2.8.  Even with this body over four years old now, I can crank the ISO to 12,800 and barely see any noise in my image.  I've almost never been able to fill the buffer, no matter how hard I've tried when shooting bursts during olympic lifting.  With my fancy zoom lens, the aperture is fixed so whether I'm at 24mm or 70mm the exposure stays the same.  Shooting with this camera just makes my life easier.  It doesn't get me in the right position to nail the shot, and it doesn't give me the knowledge to know how to expose the image properly. 

All that said, I could still nail the photo with the shit camera, but it is just going to take a little more effort.  That effort though, does distract from the act of creating a good image.  I'm not able to focus on composition as much, I'm not able to feel out the room as much.  I might have to compose the shot only using the center focus point because that is the only one that focuses quickly.  Because my attention become split, it means I might not be able to take the best possible image.  Further, in some situations, that crop sensor body and crappy lens might simply be in capable of working in extreme situations.  No matter how much skill someone has, if you're trying to shoot fast action in a very dark room, you are going to need a camera that can get its ISO over 10,000.  You're going to need a lens that has an aperture wider than f/4.  In that nightmare scenario, it just doesn't matter how smart you are, you need the gear to execute.

Gear Buying Tips

Let's talk about what I think of a few different setups and what you should consider getting if you're starting out.  A few basic rules.  I almost always get everything used, that includes camera bodies and lenses.  It is an easy way to save a few hundred dollars on basically new items.  I love using the Amazon marketplace for used items because you get a pretty great return policy if the gear turns out to be a lemon.  I also think you should sell anything you don't need.  Don't just let lenses and old gear depreciate.  Flip it for something newer.  

I also think you should buy the right thing once, and not just keep incrementally getting slightly better stuff.  For example, there's a 70-200 f/4 and 70/200 f2.8.  The 2.8 is one of the essential sports photographer lenses.  Everyone should work to get one in their kit.  I wouldn't ever recommend buying the f/4, even though it is so much cheaper.  Save your pennies and buy the 2.8.  The lens will pay for itself, and if you don't have the cash flow coming in from jobs, you shouldn't be buying pro gear like that anyways. 

My guiding rule which I've stuck to for five years when buying gear is this.  Does me not having this lens/camera body / light / gizmo mean I can't get a shot or mean I can't book a job?  If the answer is YES, meaning I was unable to do a job, or unable to book a job because I didn't own a piece of equipment, that's a no brainer.  Amazon prime, buy buy buy.  If the answer is no, I'm not going to buy it.  The only reason I may want it is as a toy or because I'm obsessed with camera gear.  Either one of those answers is not a way to run a business.  

So what sort of gear should you get to start off and what gear should you work towards? Lenses are more important than bodies.  Better lenses on cheaper cameras deliver better results than cheaper lenses on better cameras.  Because of that, I basically don't care what camera body you get.  New ones come out every year at all price points.  Once you start having a stable income from photography -- even a few hundred bucks a month, get a full frame camera.  The quality jump is huge.

Lenses.  These do not change any where near as quick as bodies and you'll use the same lenses many years if you buy quality.  The two best lenses to get right away are the 50mm 1.8 and 35 1.8.  These prime lenses are fantastic and extremely cheap.  Shooting in an indoor environment, that 1.8 will allow you to get a ton of extra light in the camera and allow you to make up for camera bodies that don't have high ISO capabilities.  You will also have to force yourself to learn what composition is and how to zoom with your feet.  Buy Sigma lenses.  What they are putting out now is incredible, and rival the Nikon/Canon equivalents in many regards and are generally half the price.

From there, the two essential lenses all sports photographers should have are the 24-70 2.8 and 70-200 2.8.  If you mostly shoot indoors, go for the 24-70 first, if you're mostly outdoors go for the 70-200 first.  With one zoom lens and a prime lens to cover yourself in extreme lowlight situations you have a kit that you can do anything from sports to portraits.  What you can't get overnight is practice, experience, and knowledge.  That's what you really need to invest in to get the most out of the gear you have.

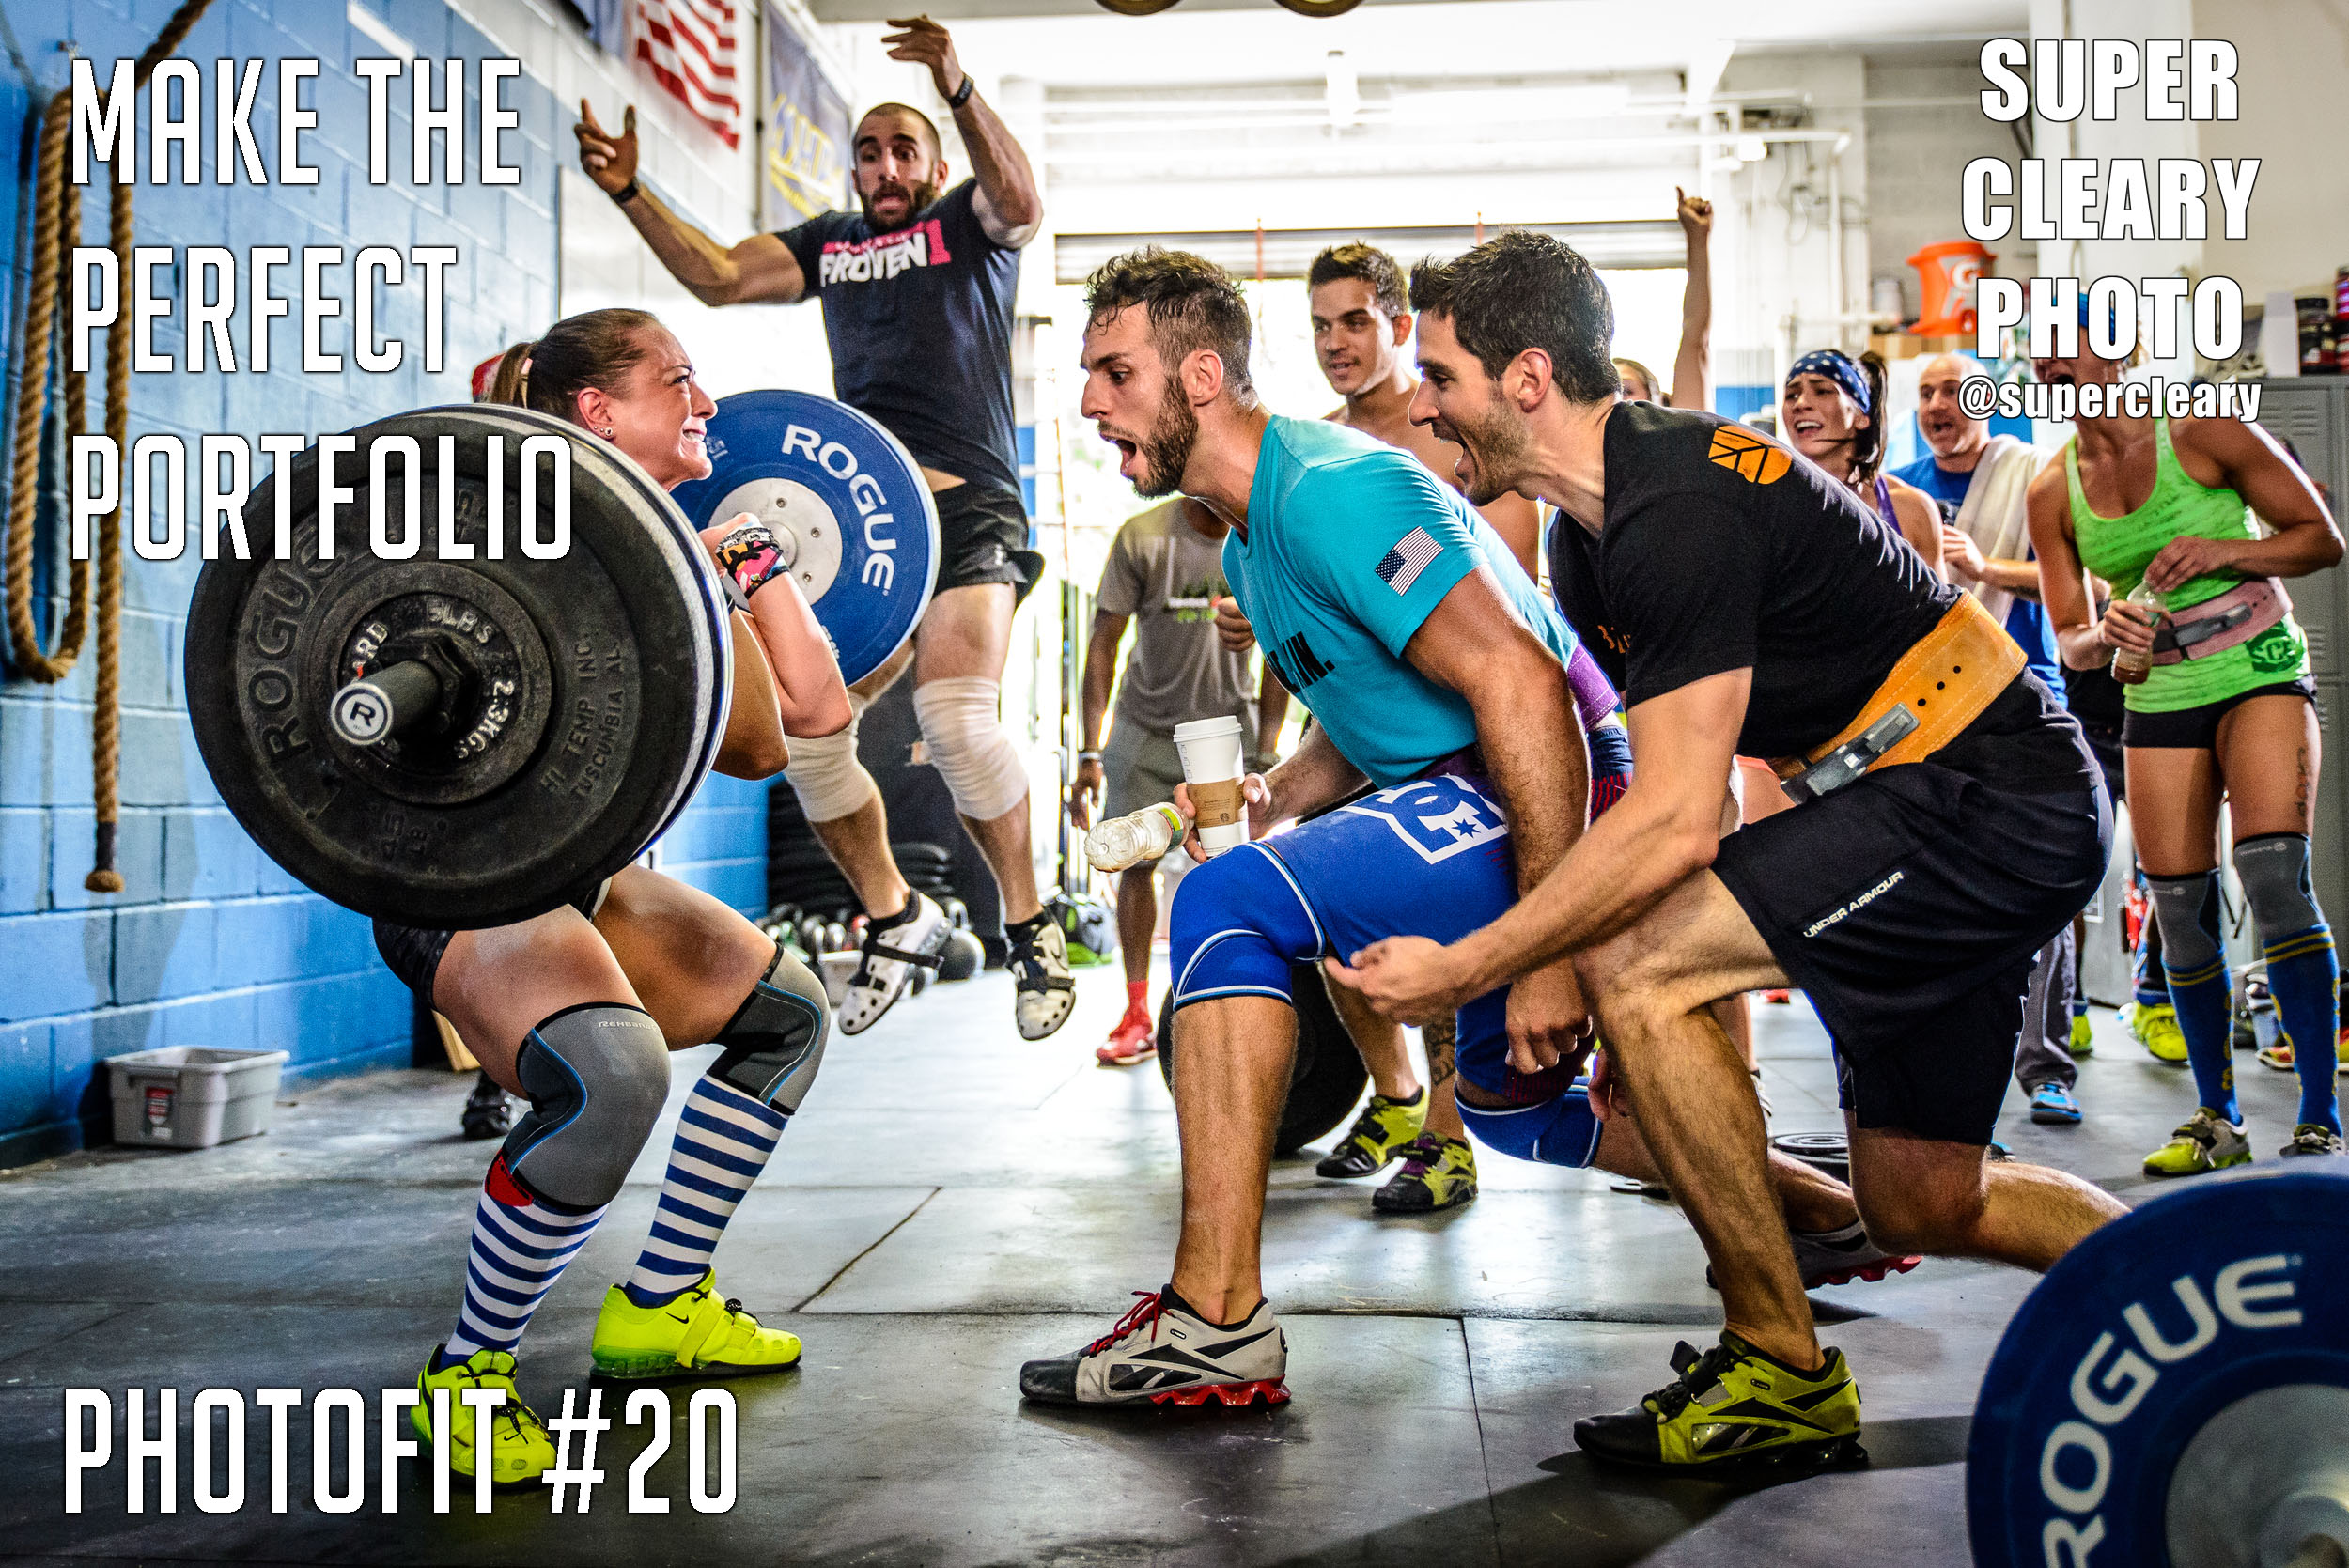
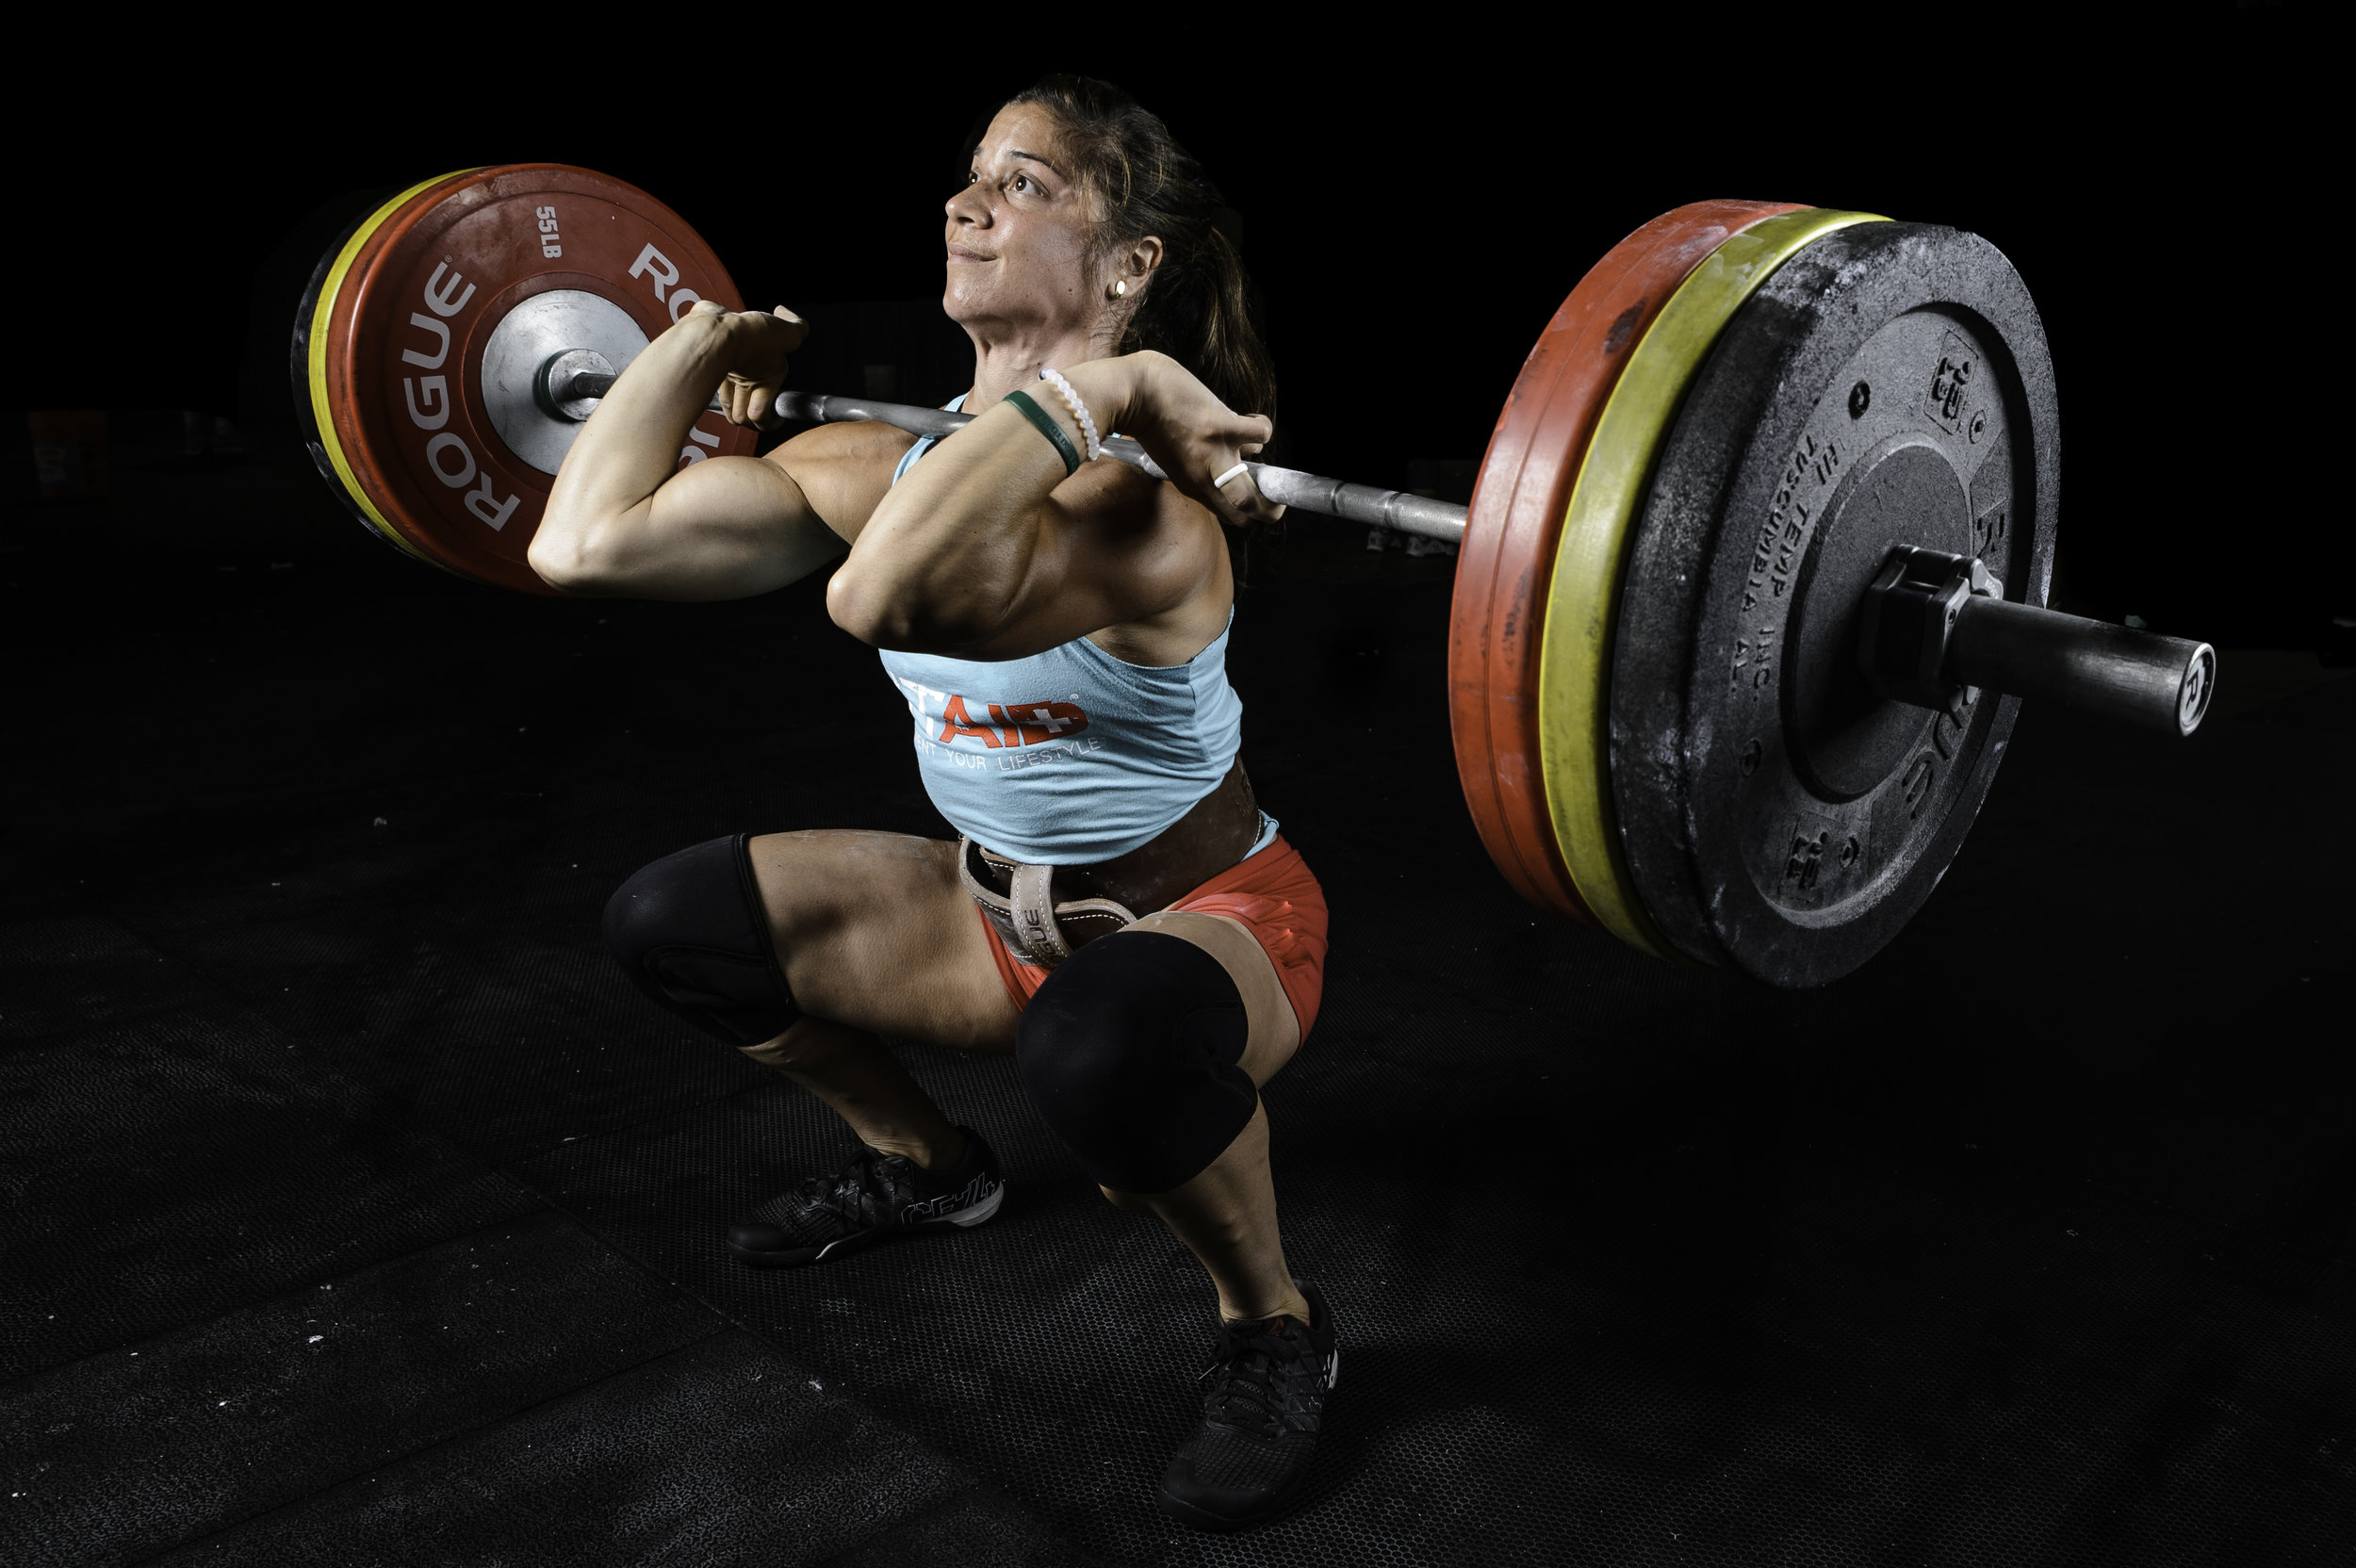
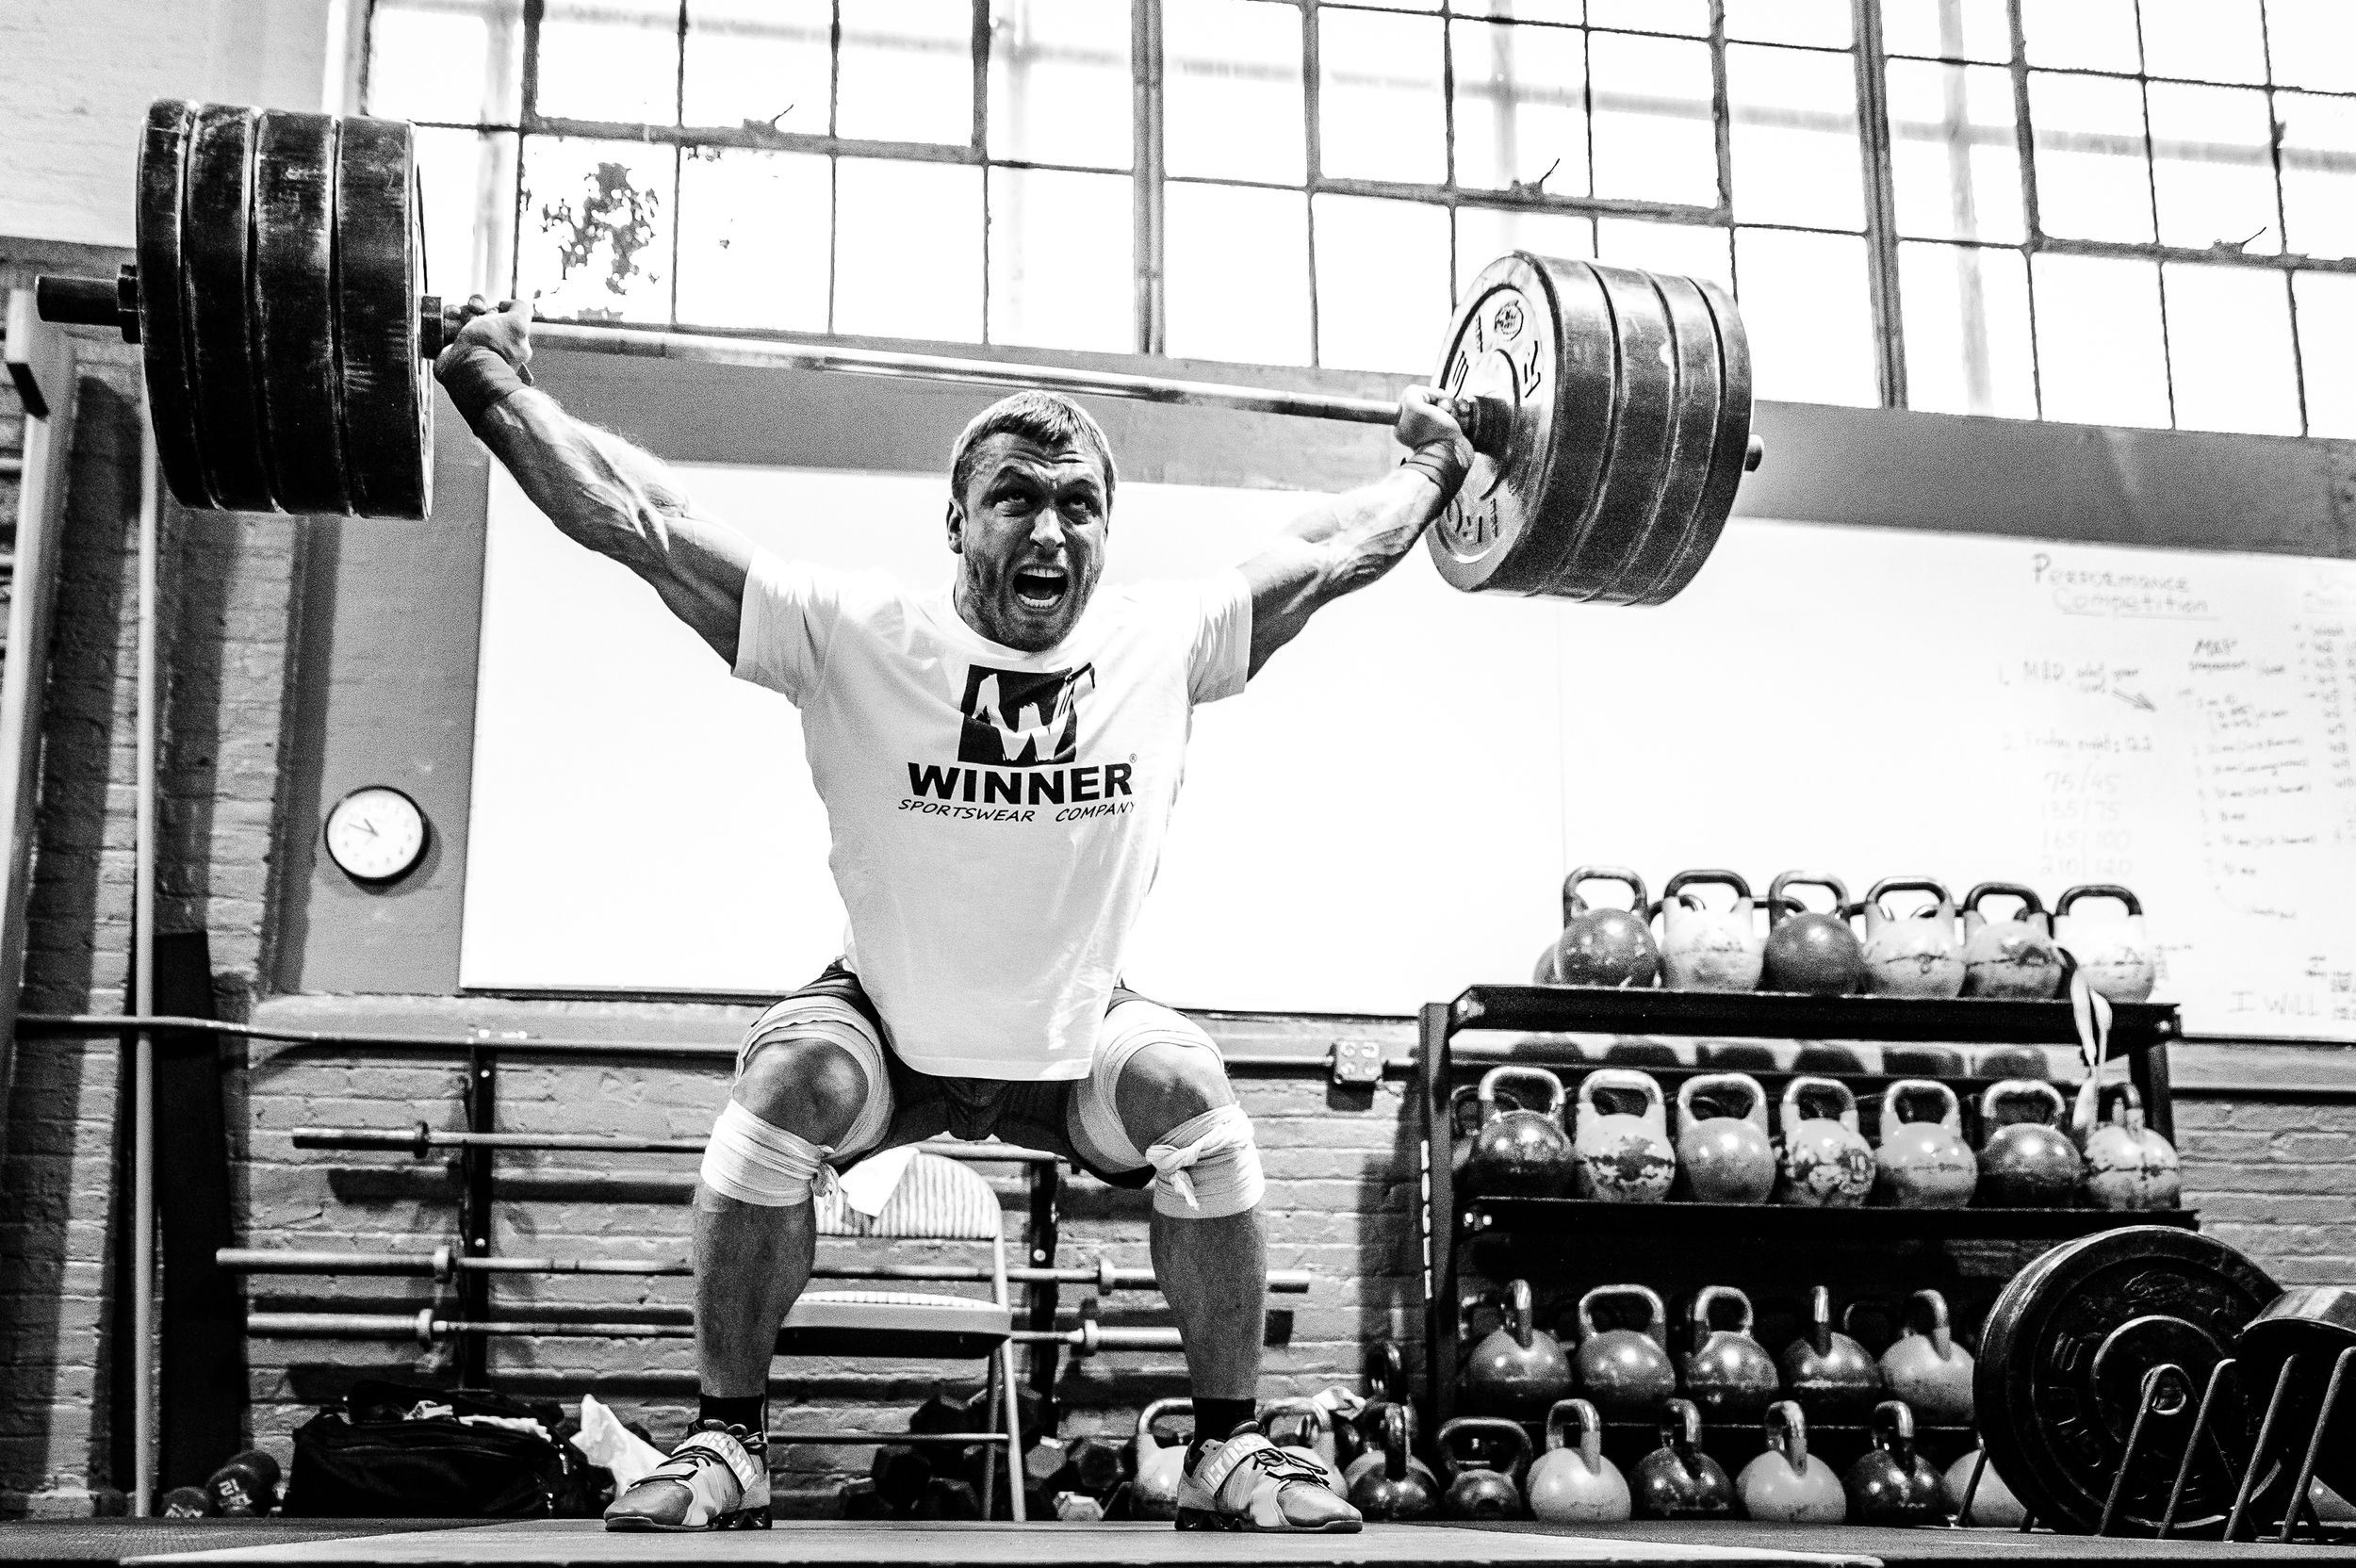
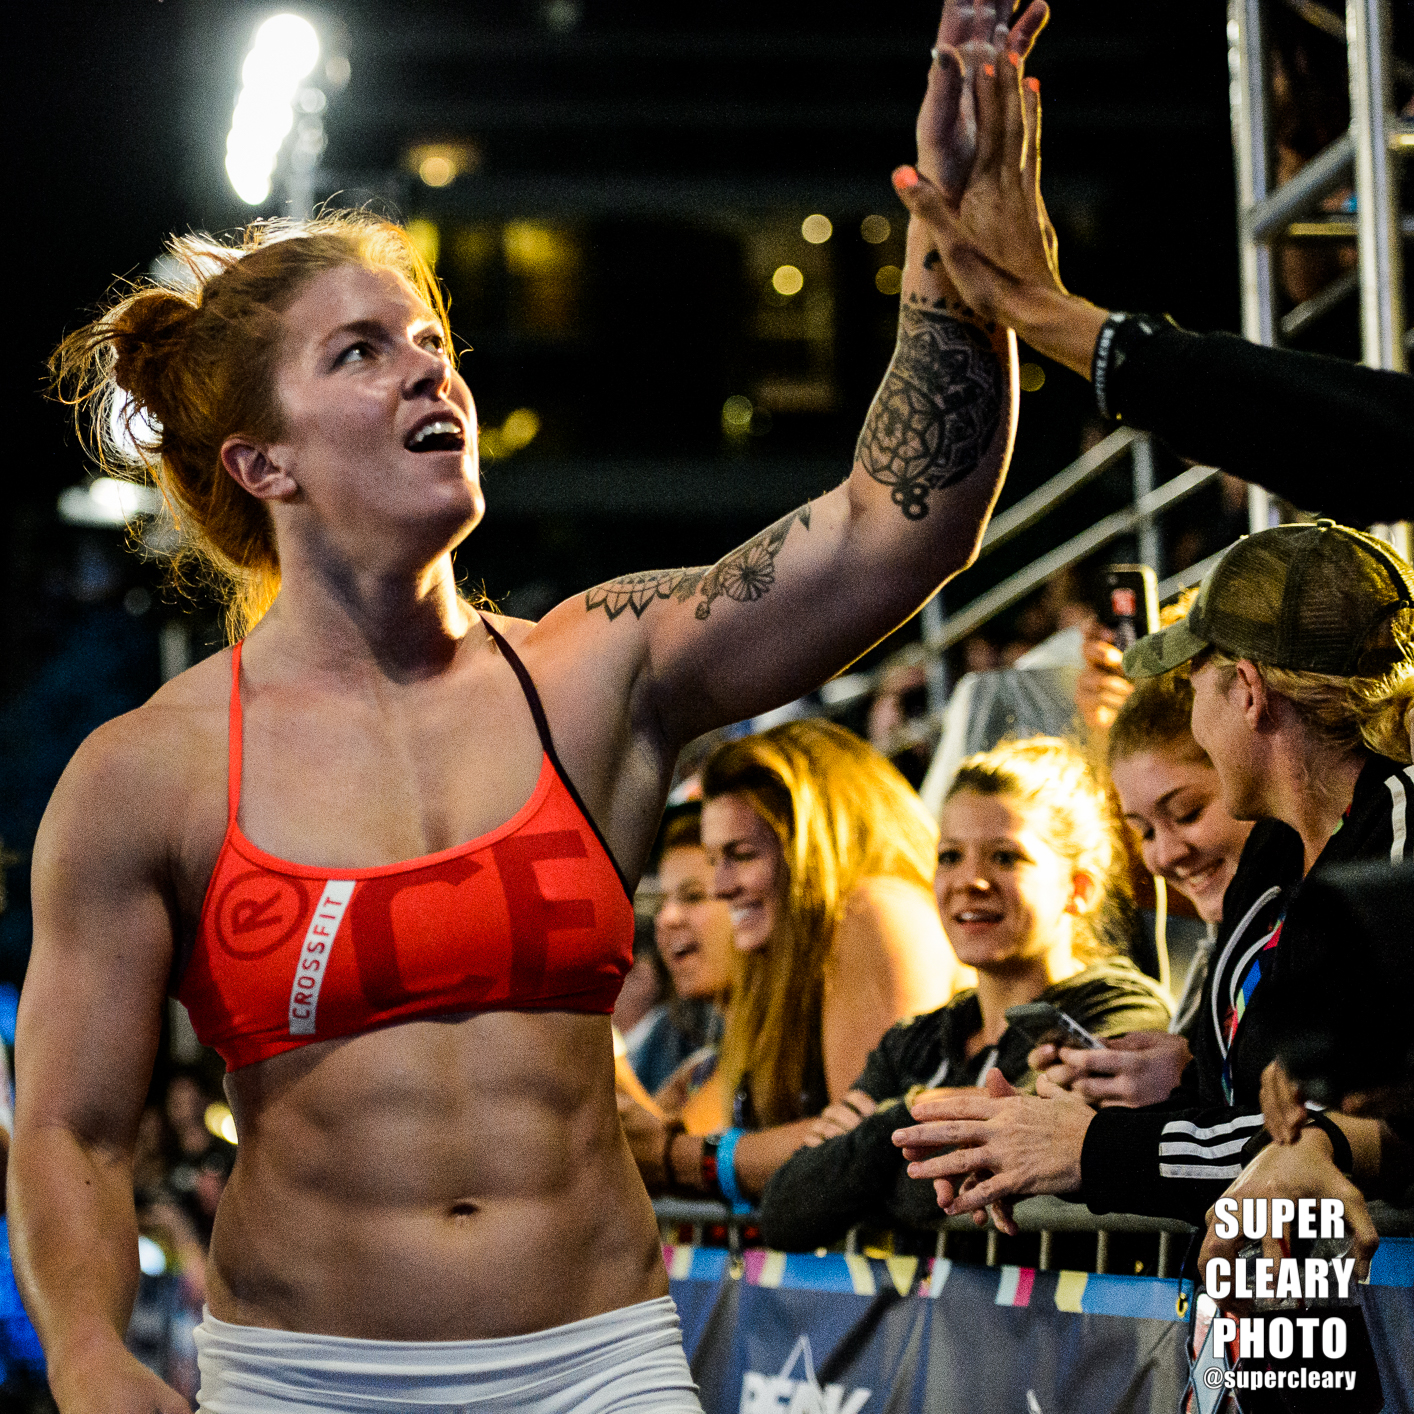
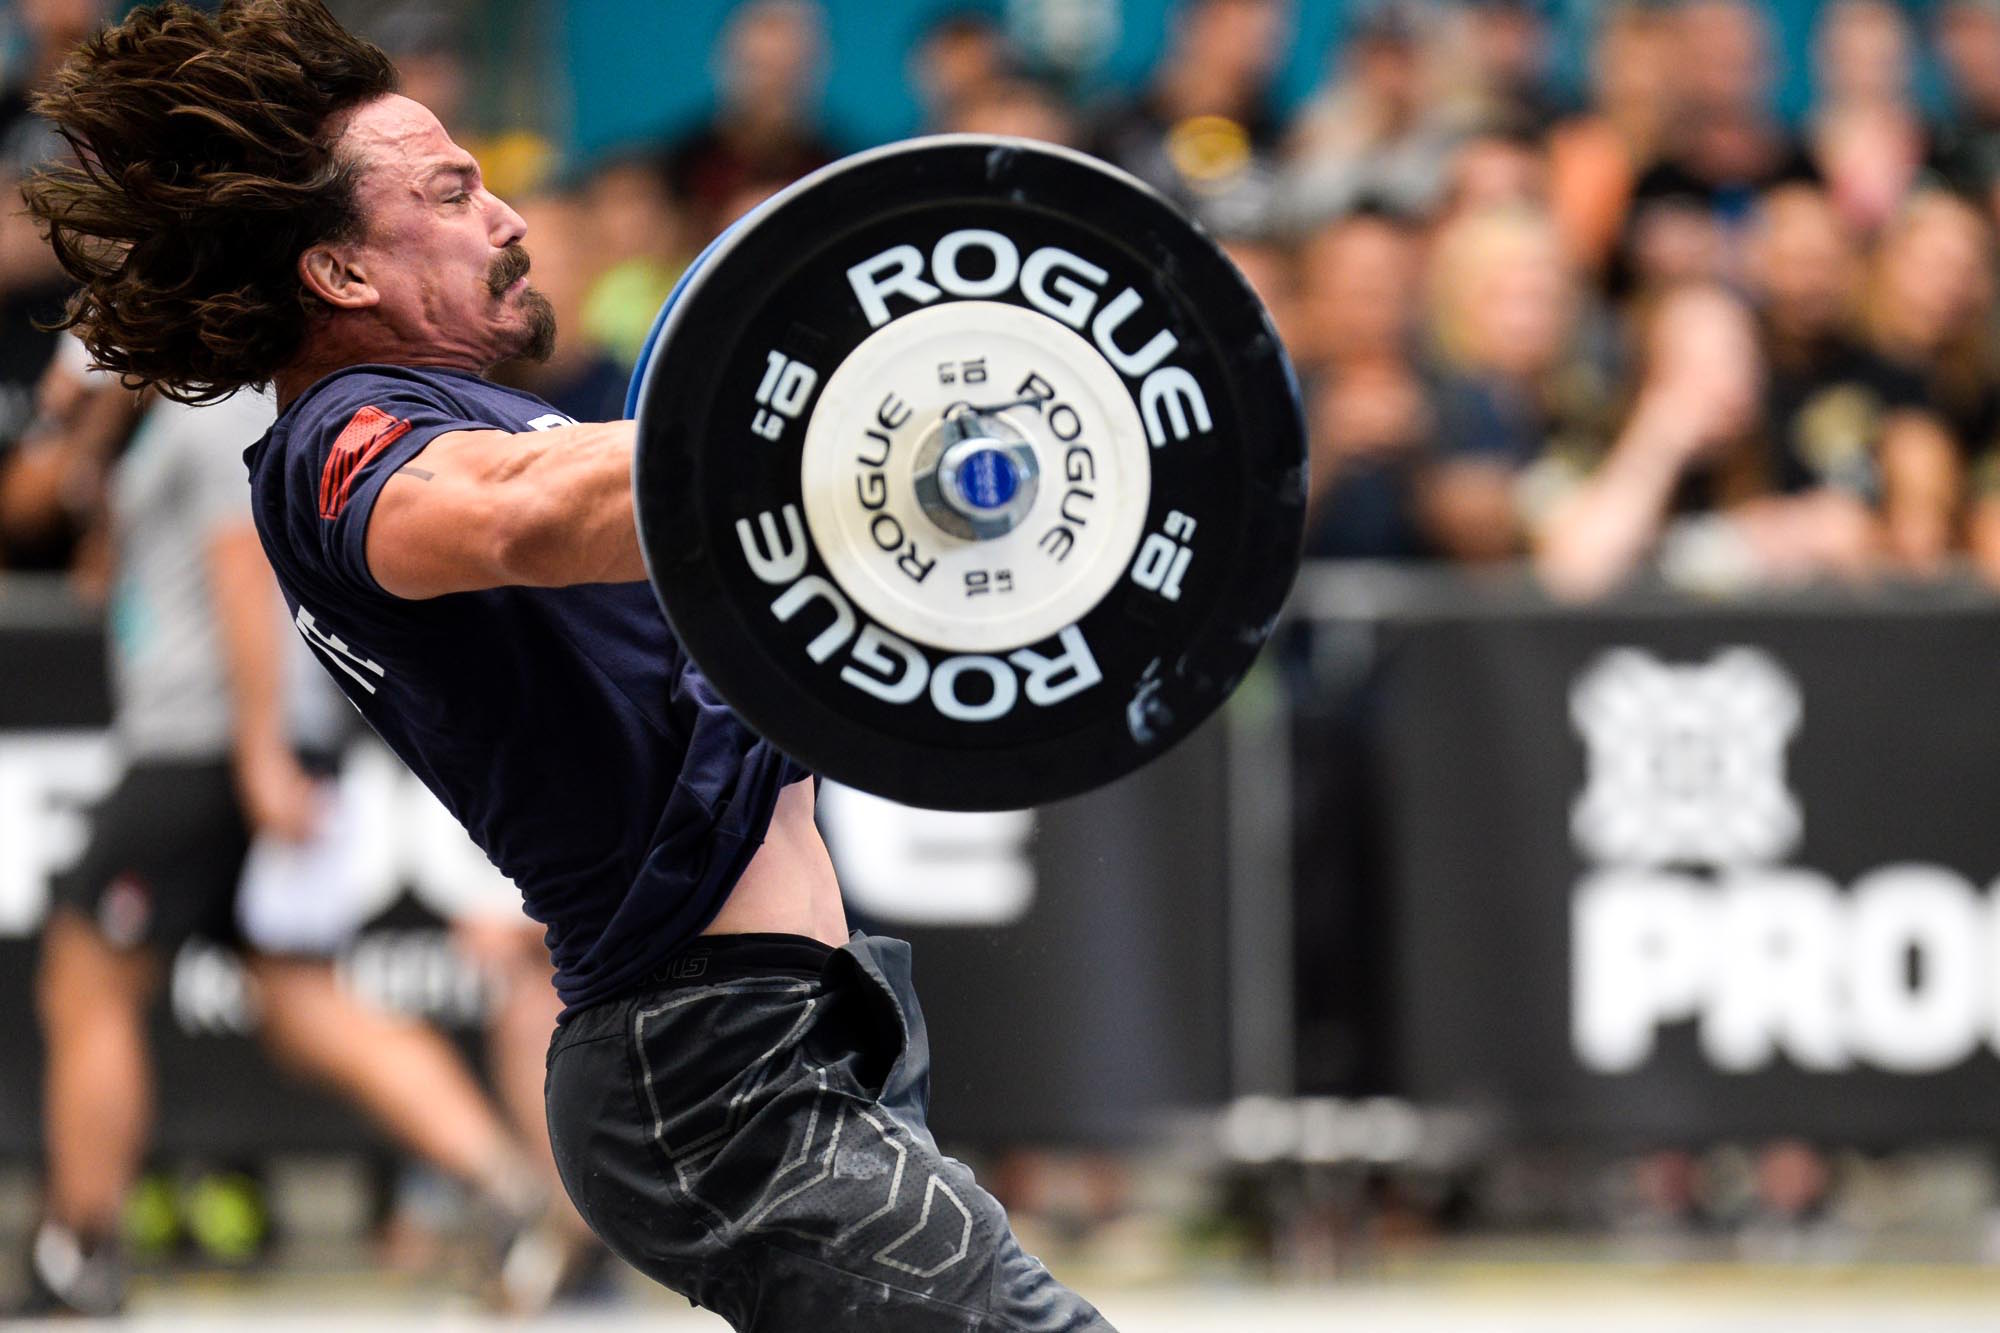
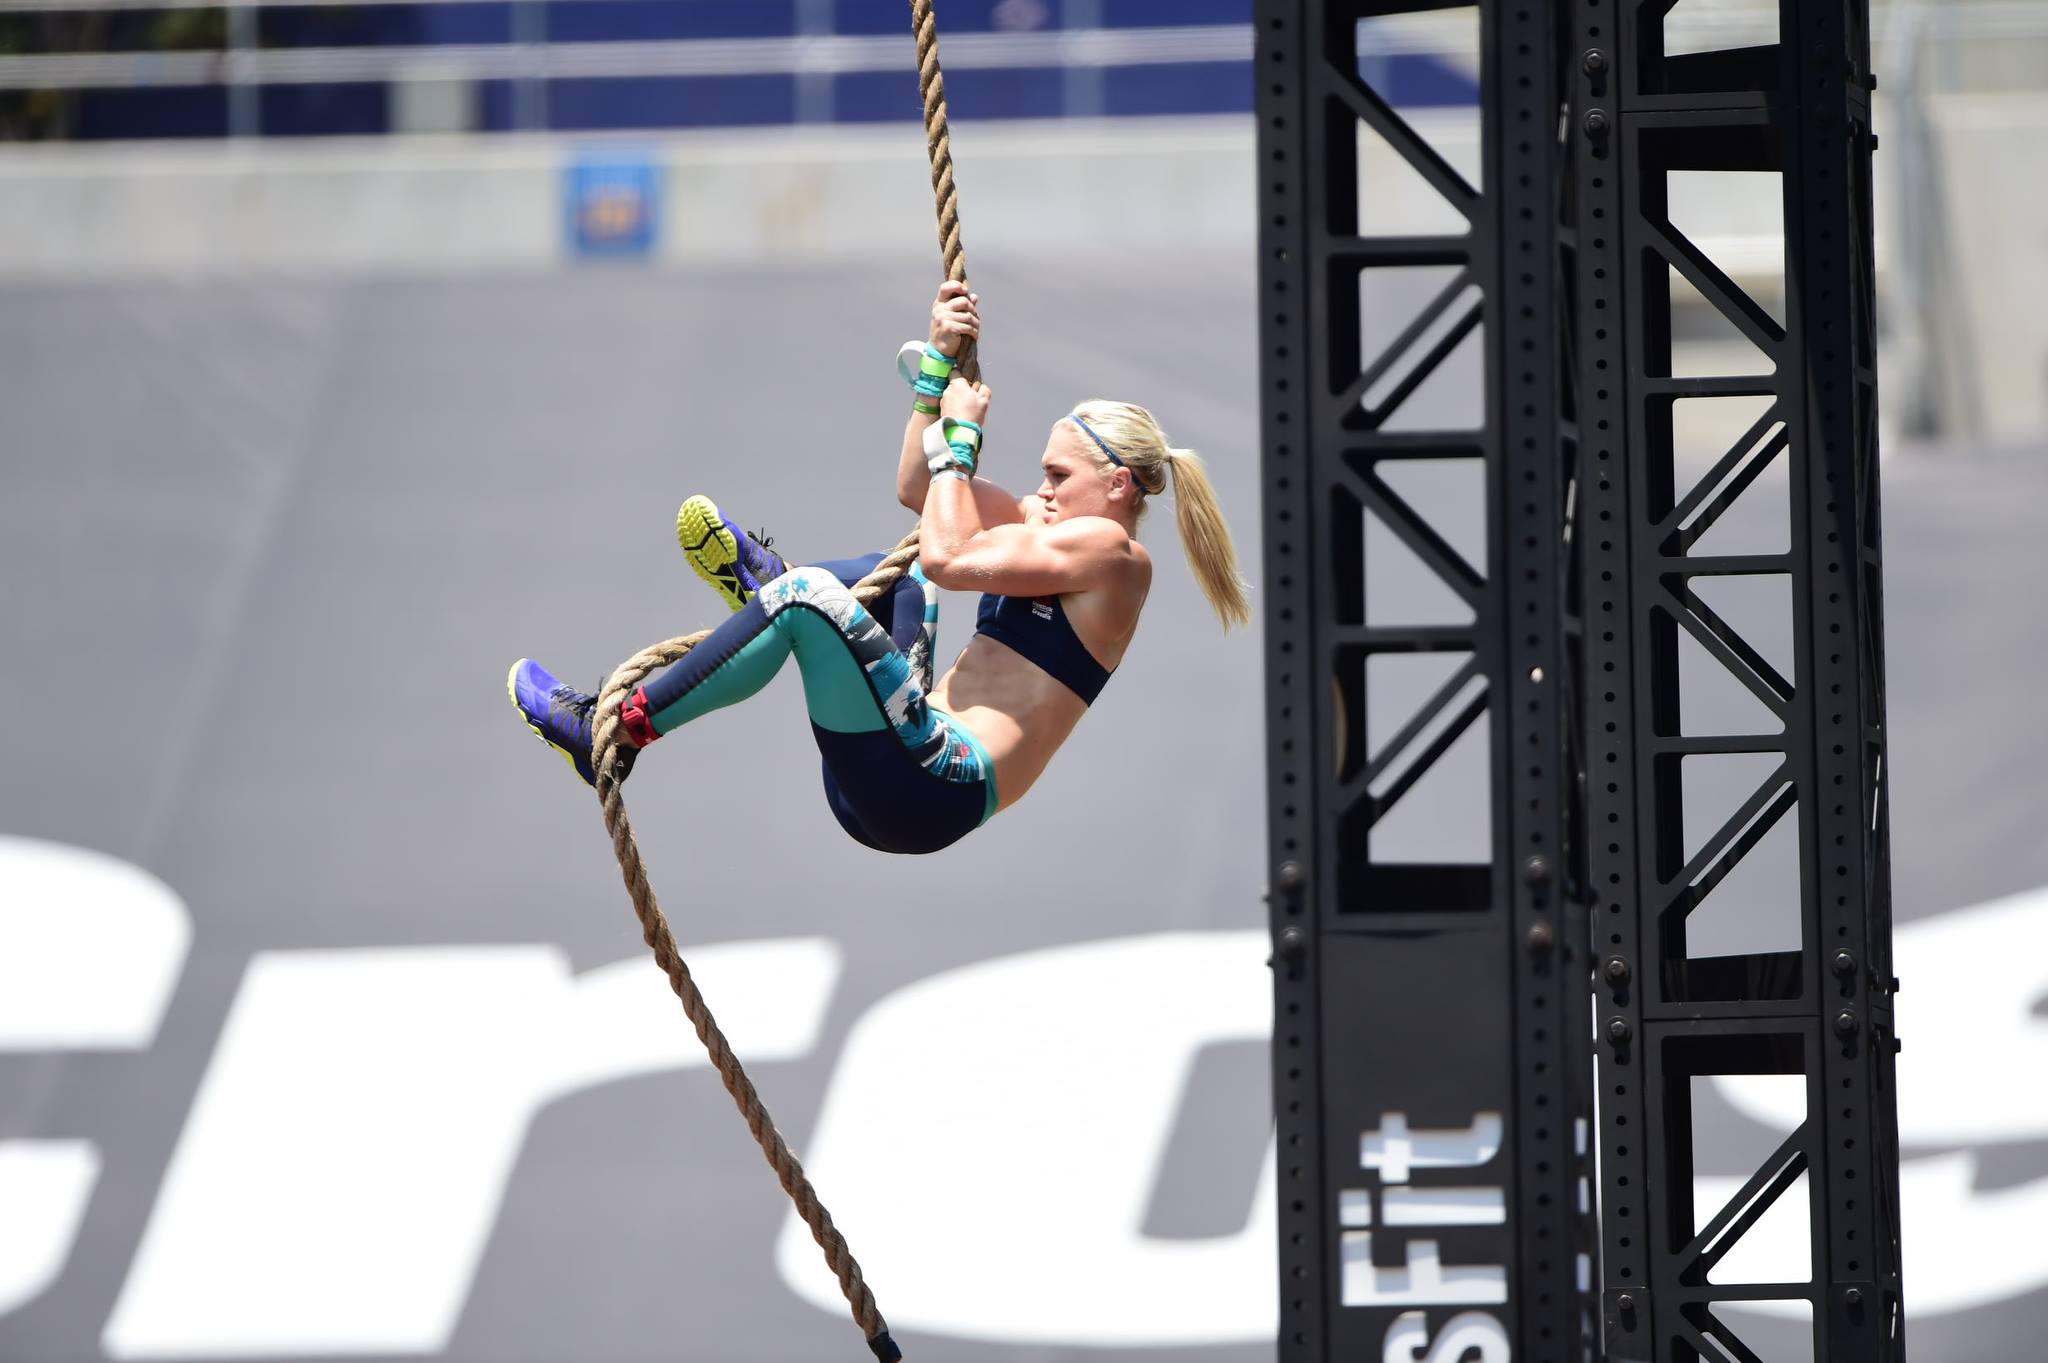
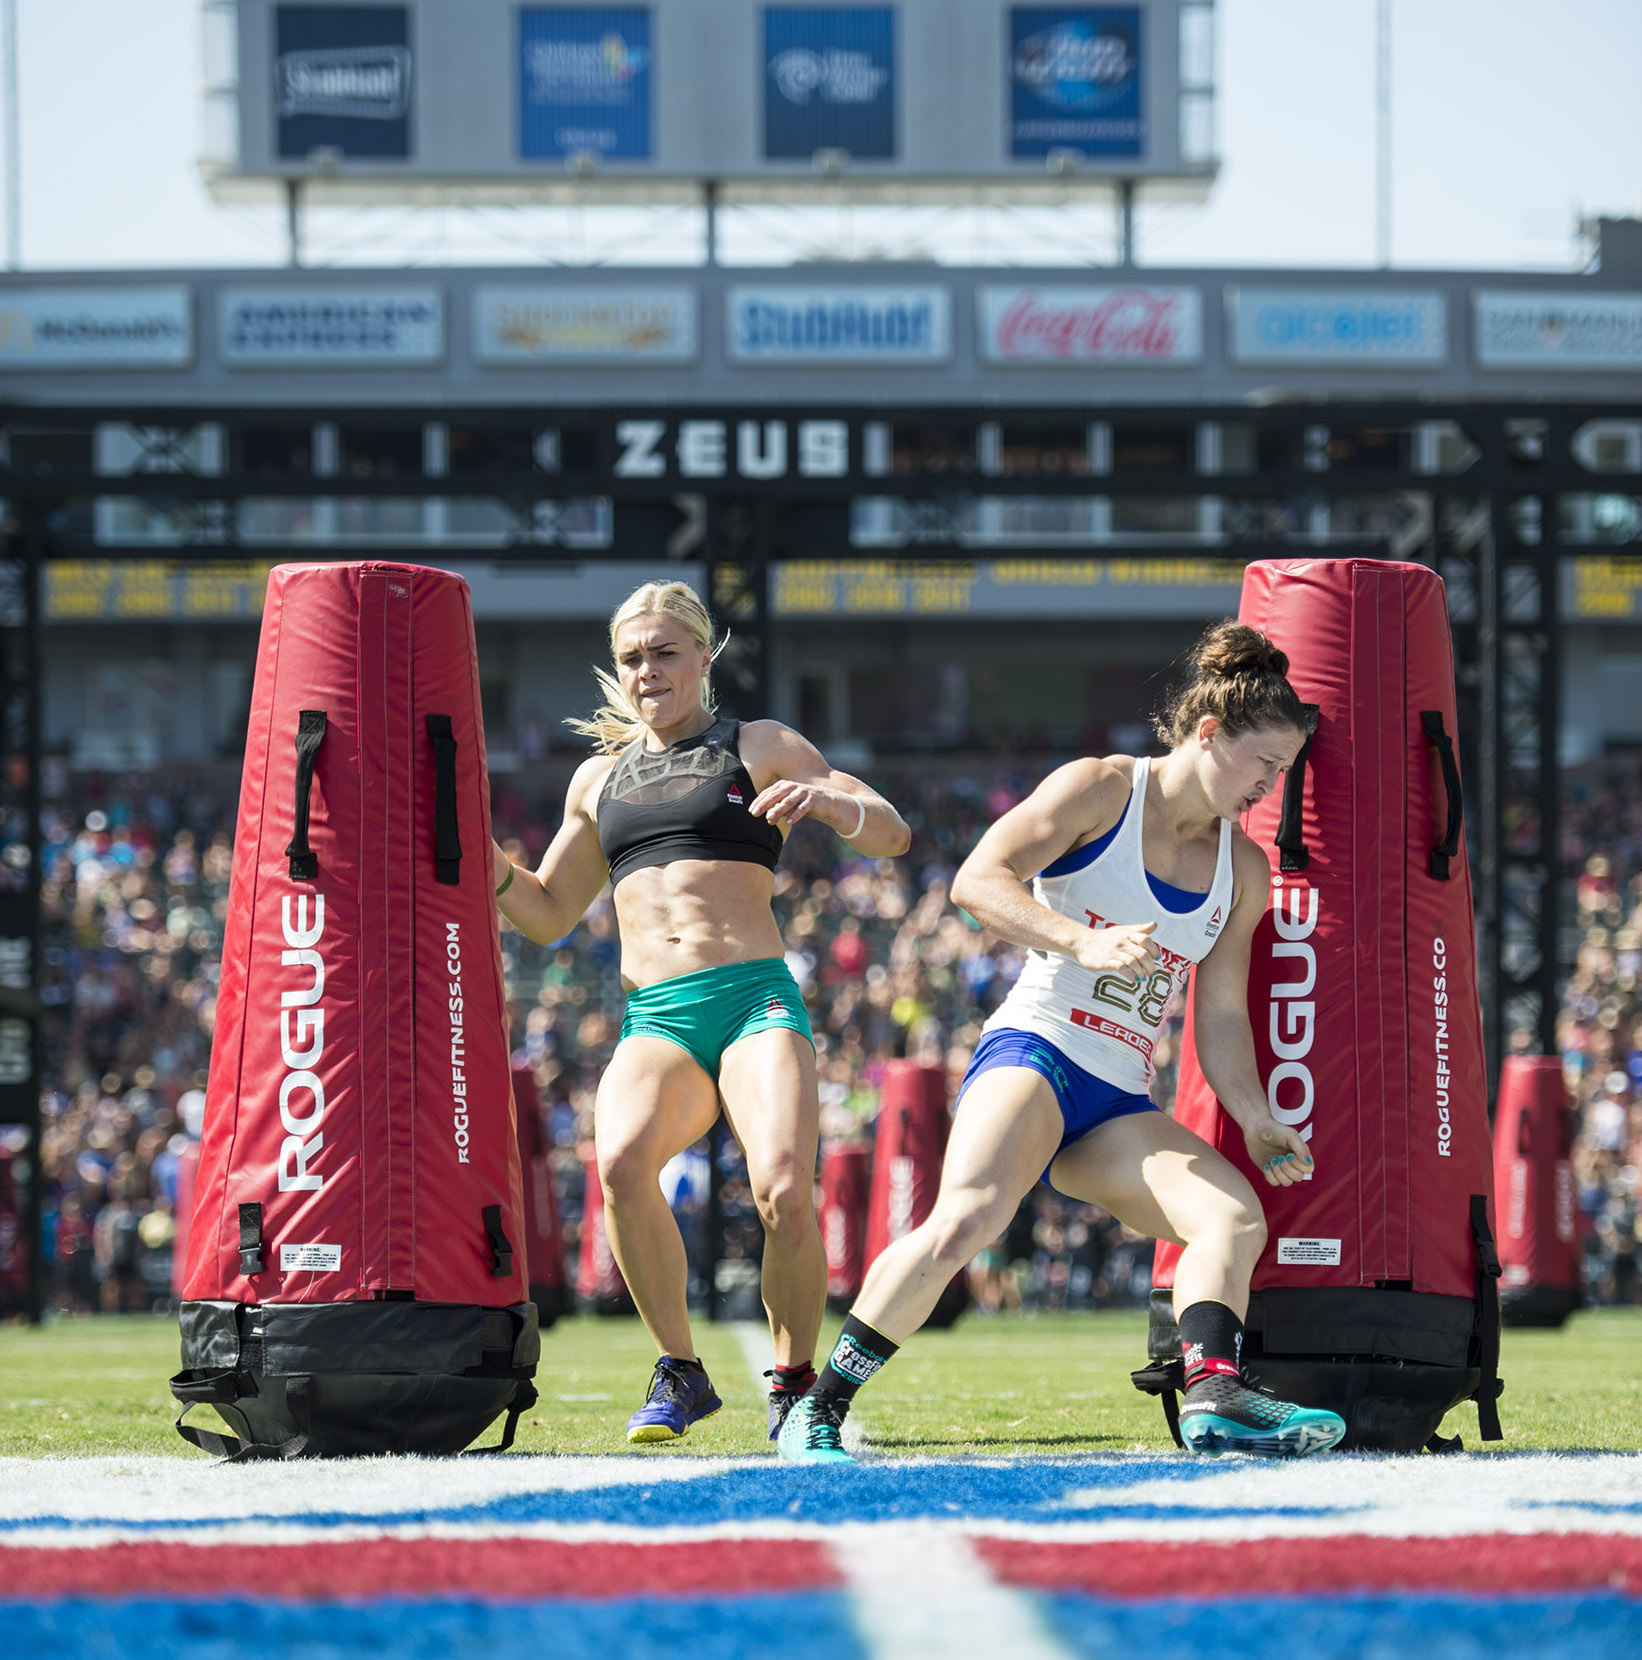
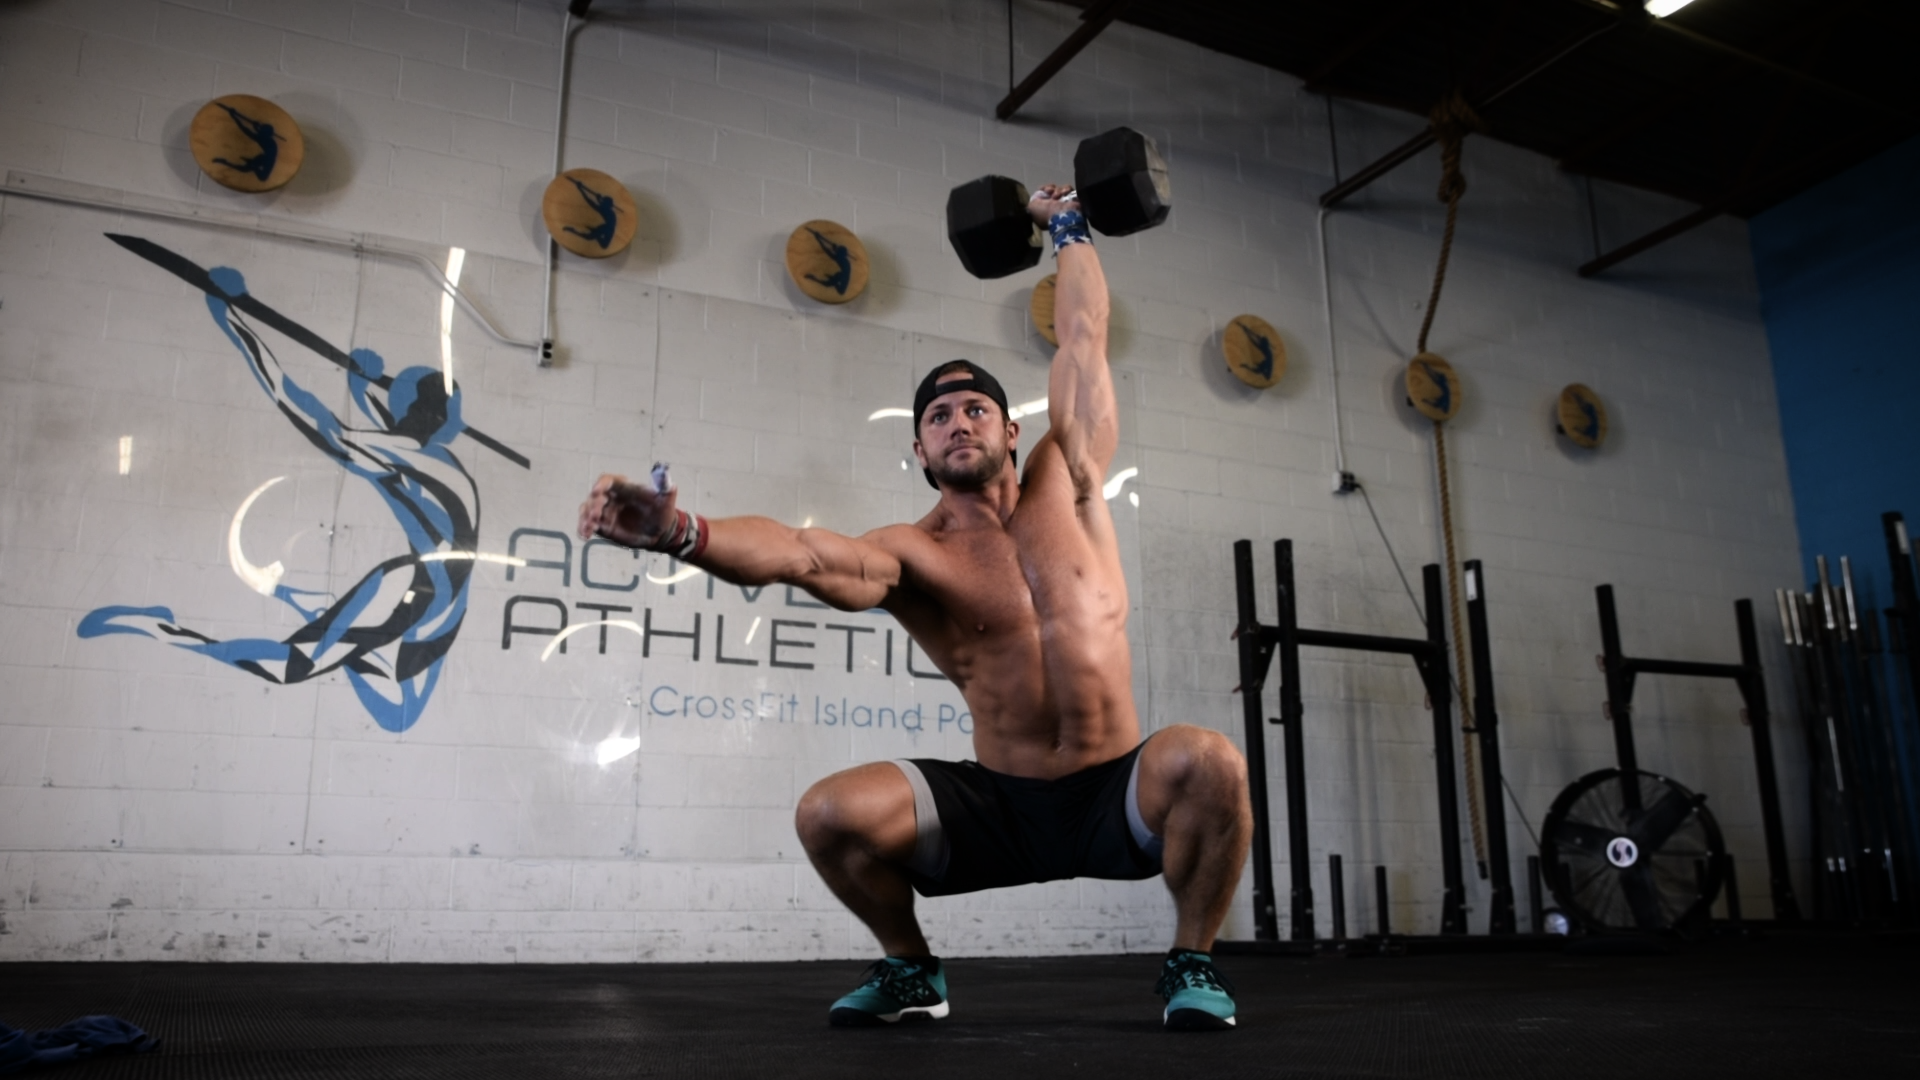
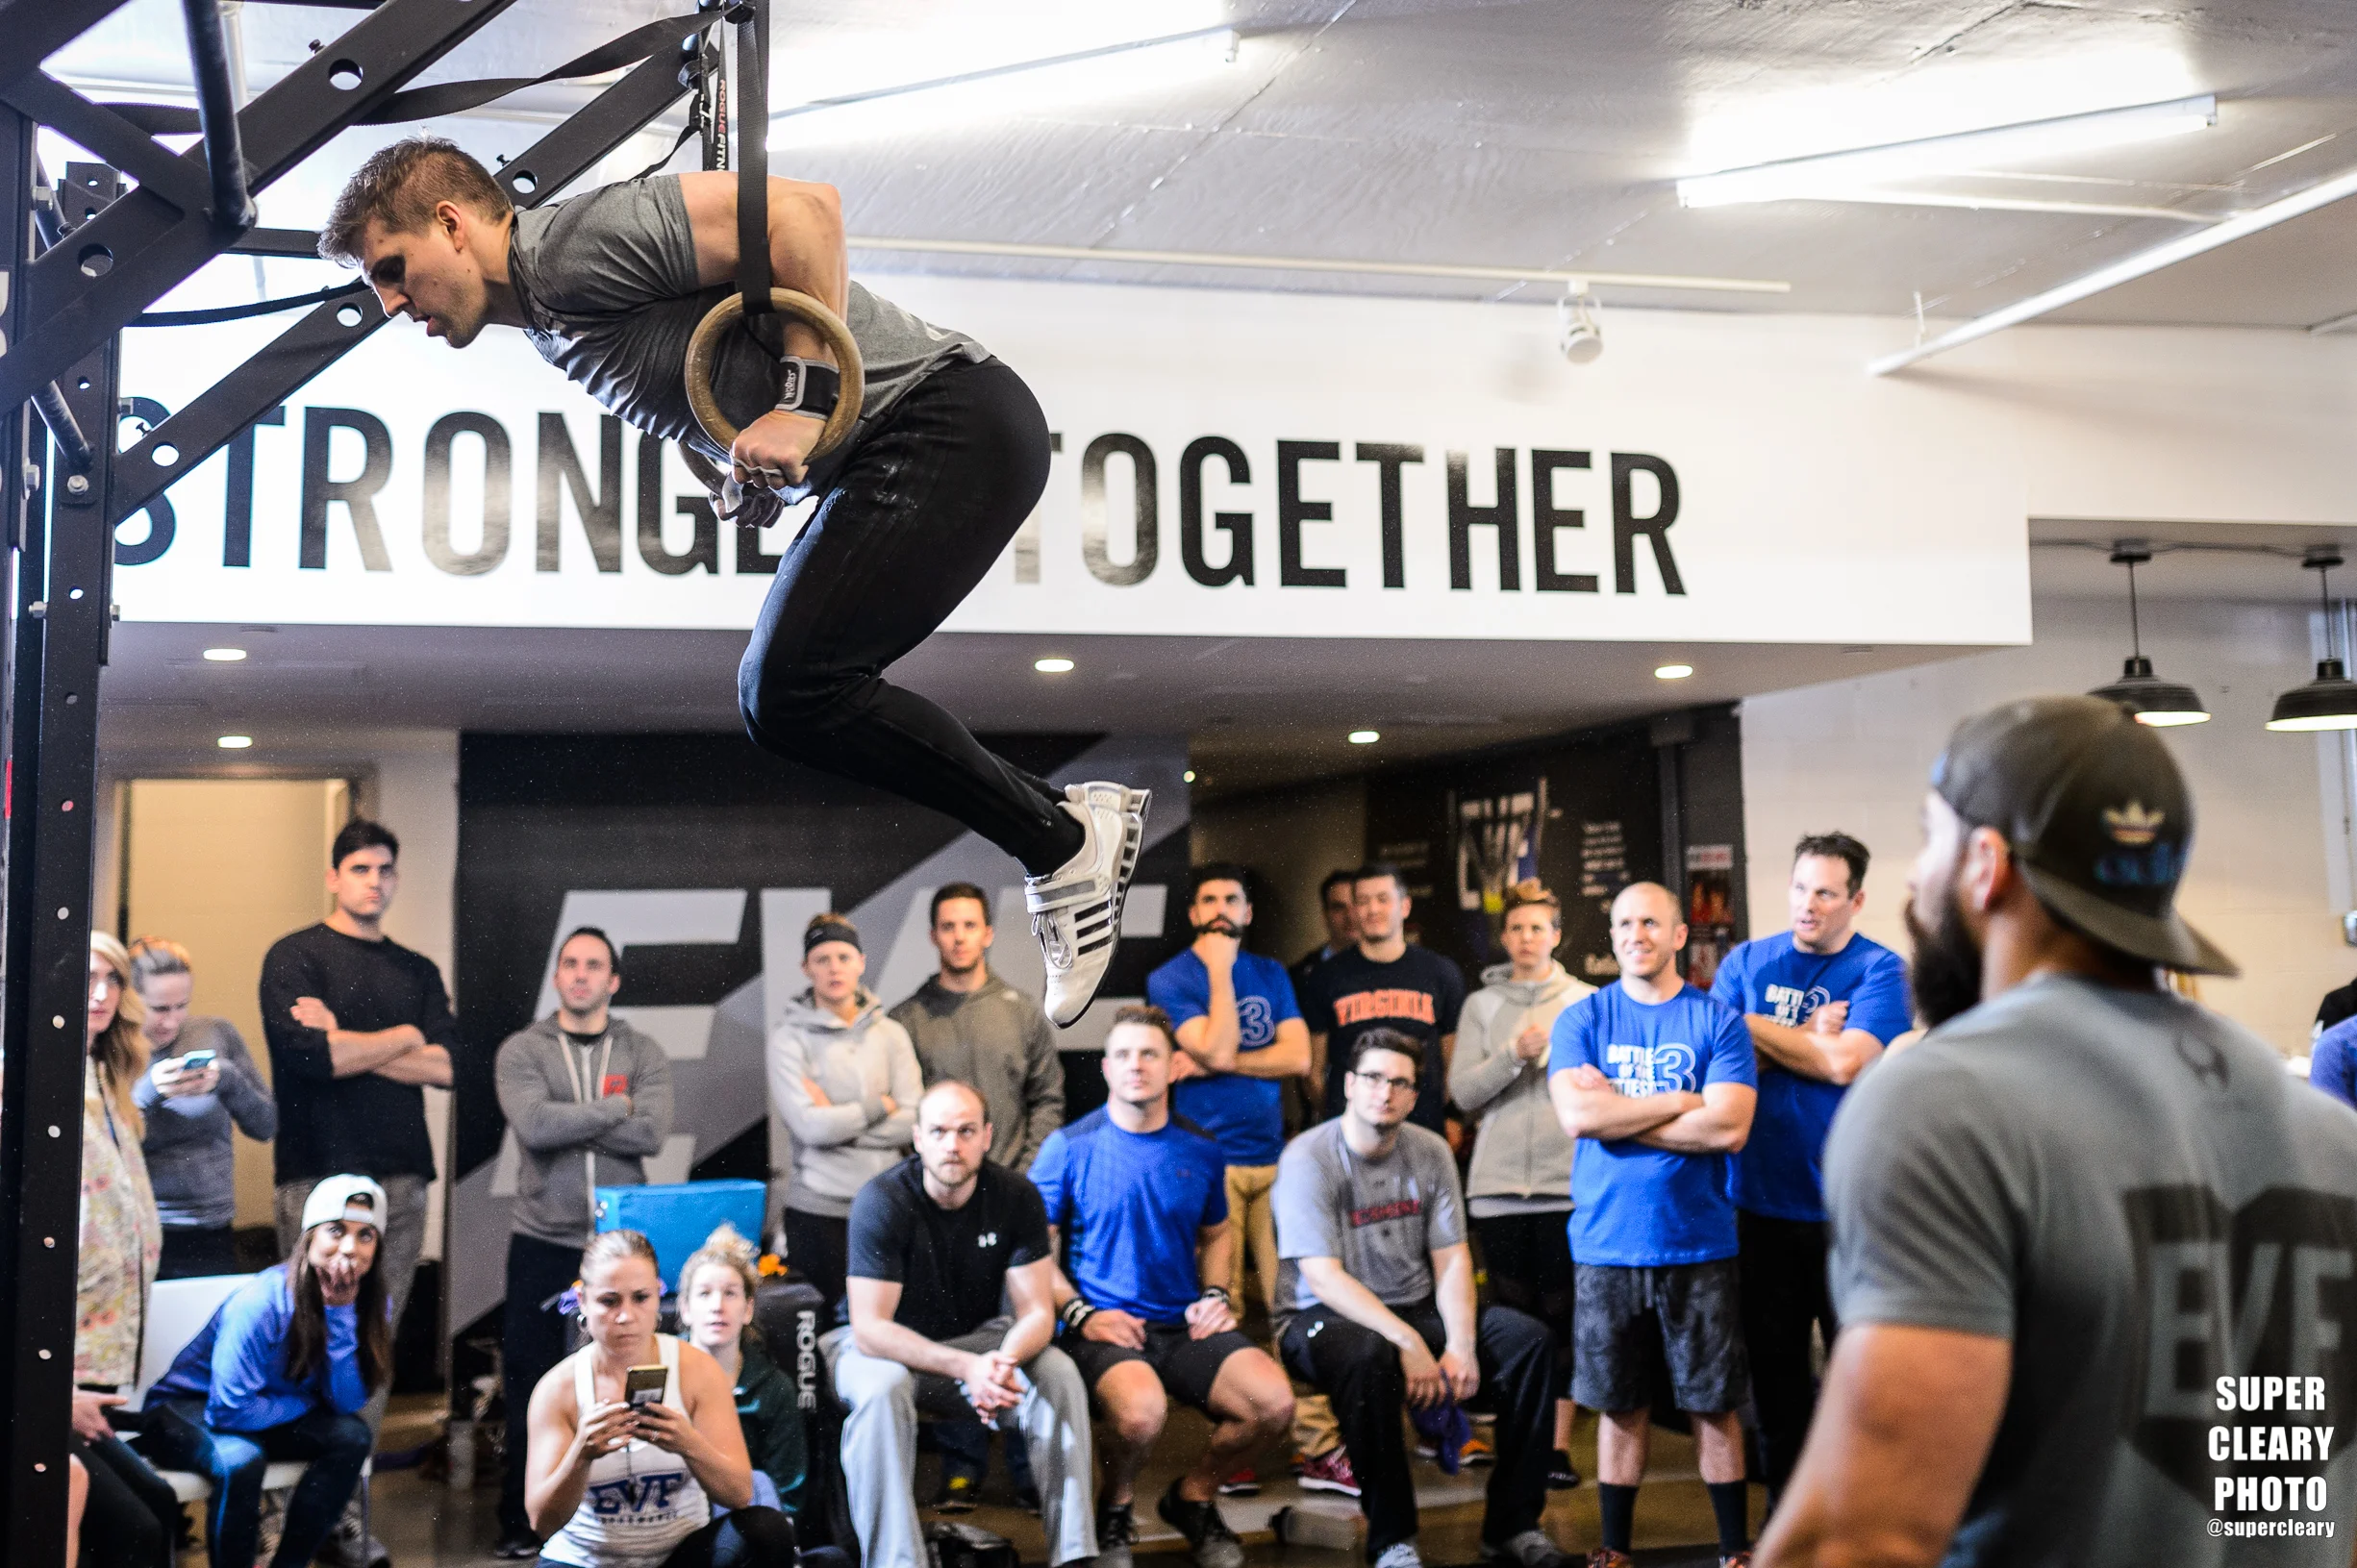
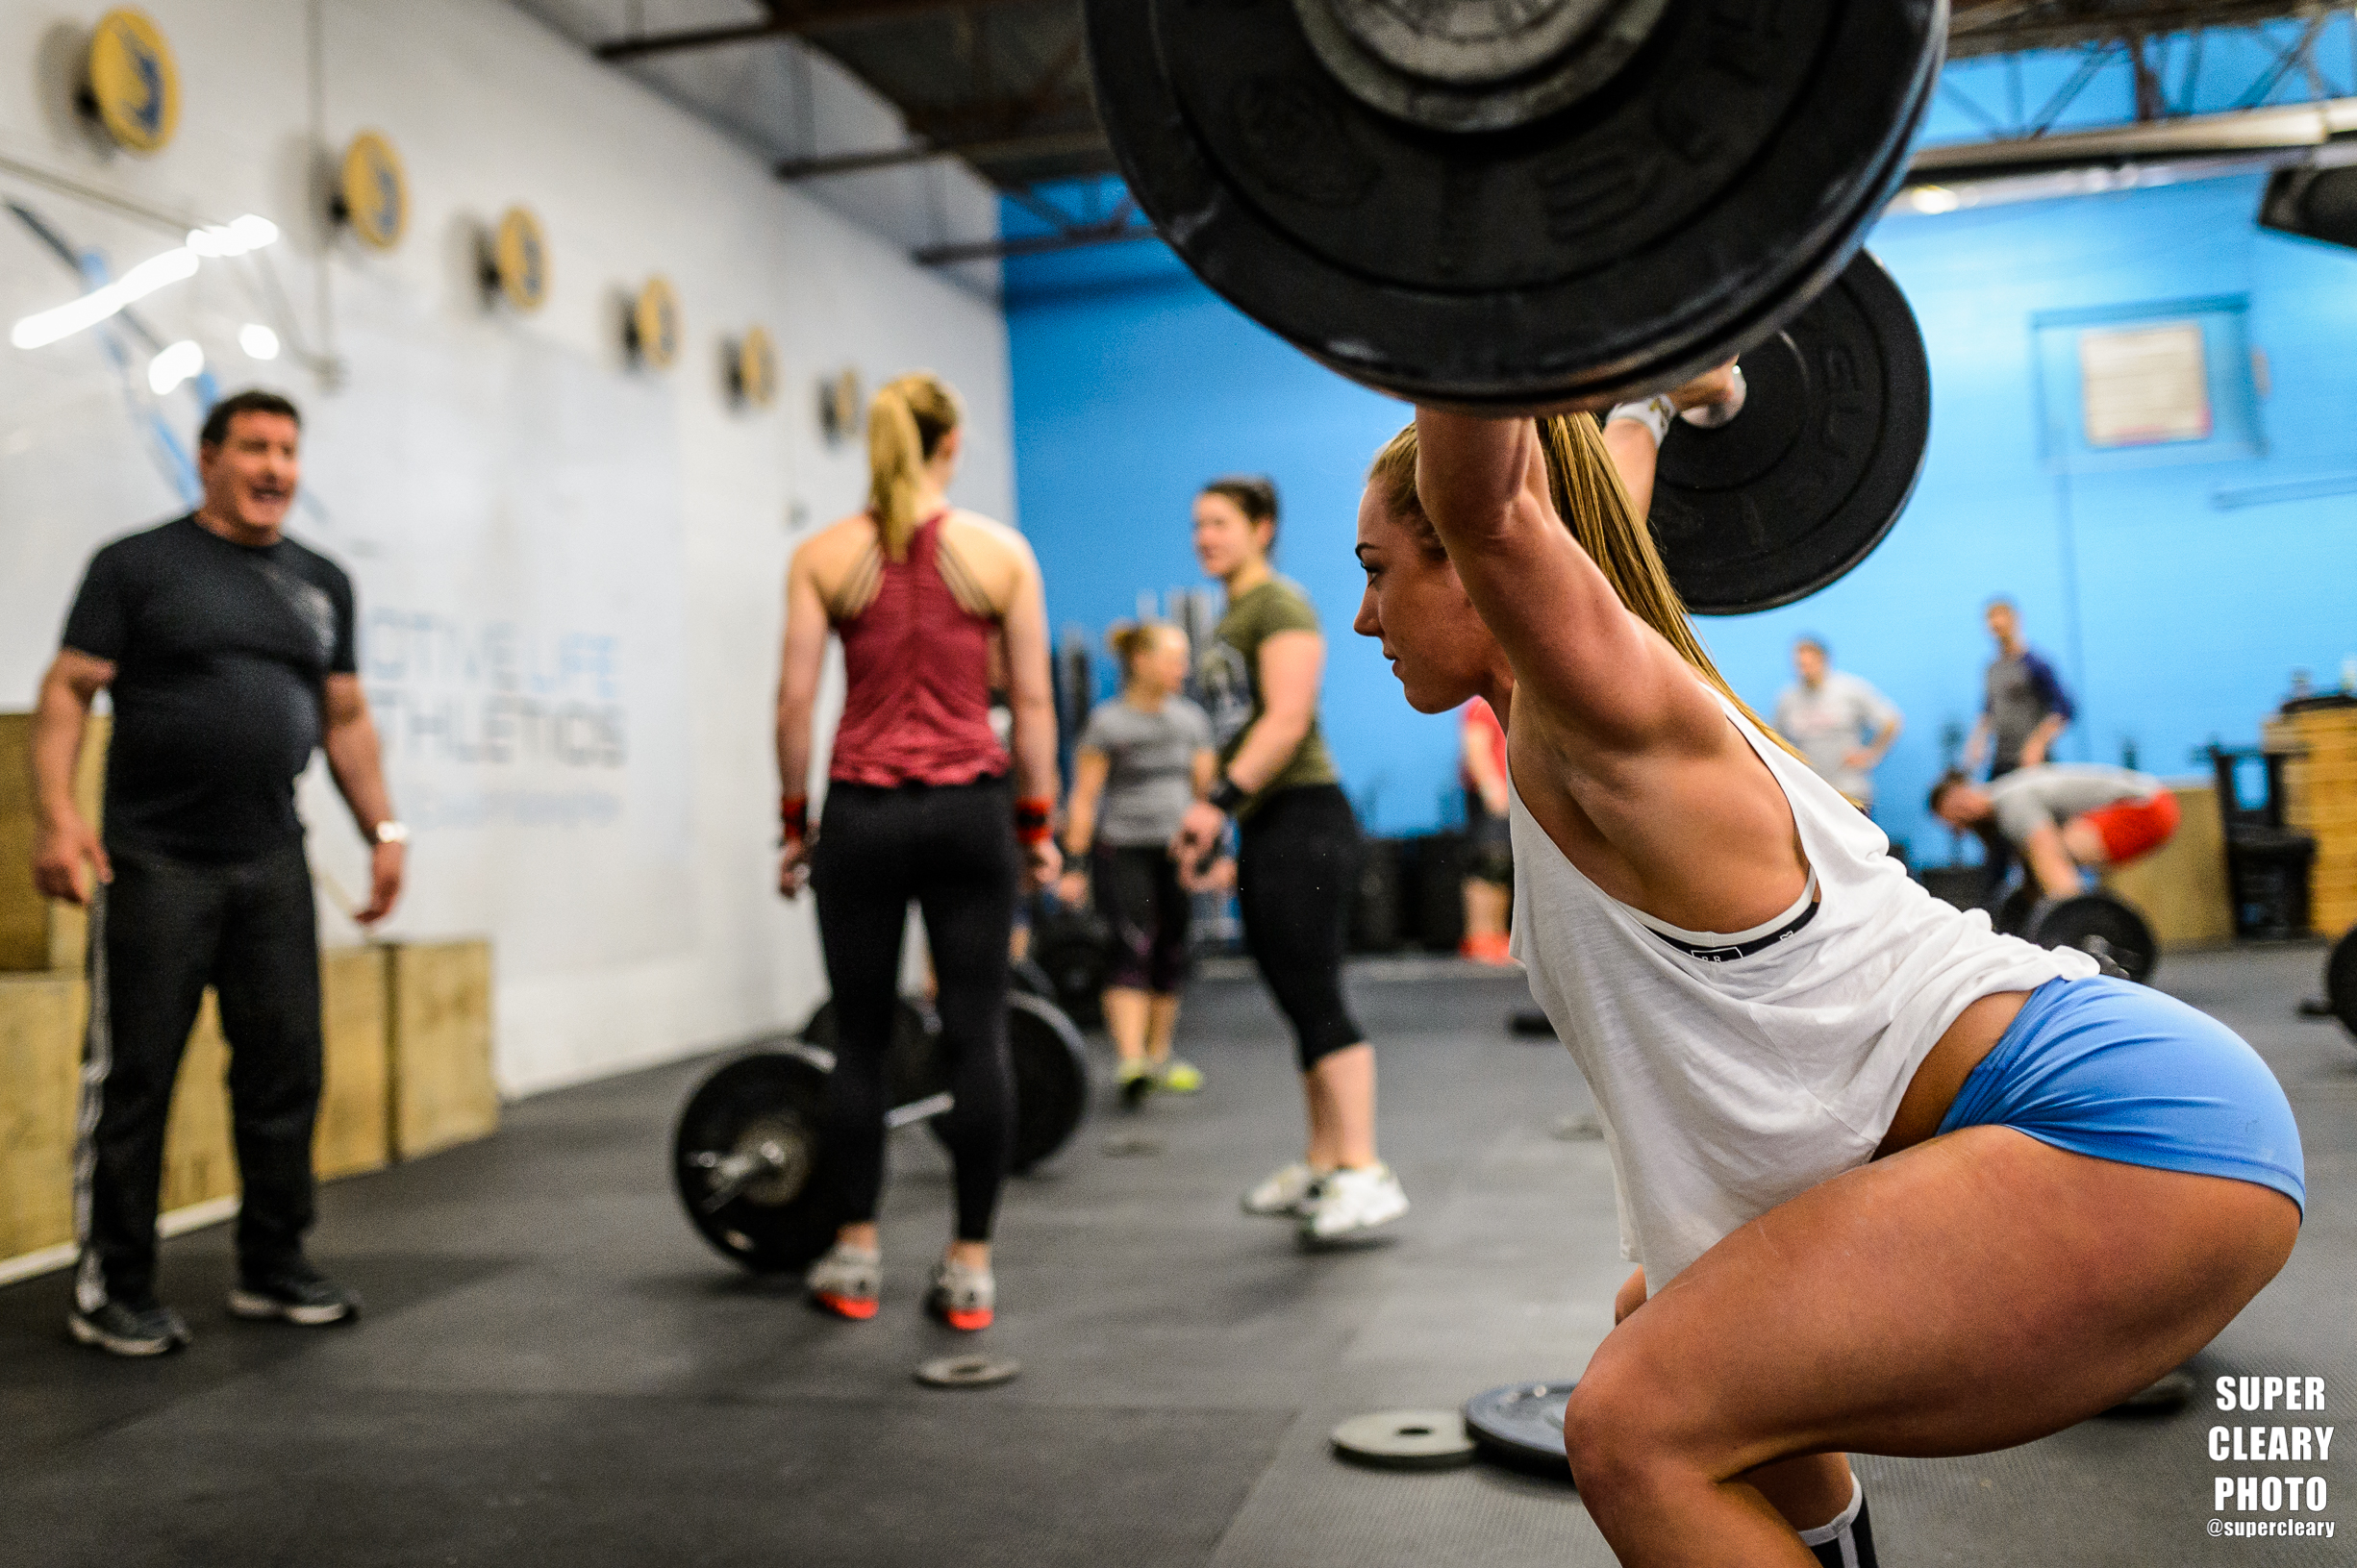
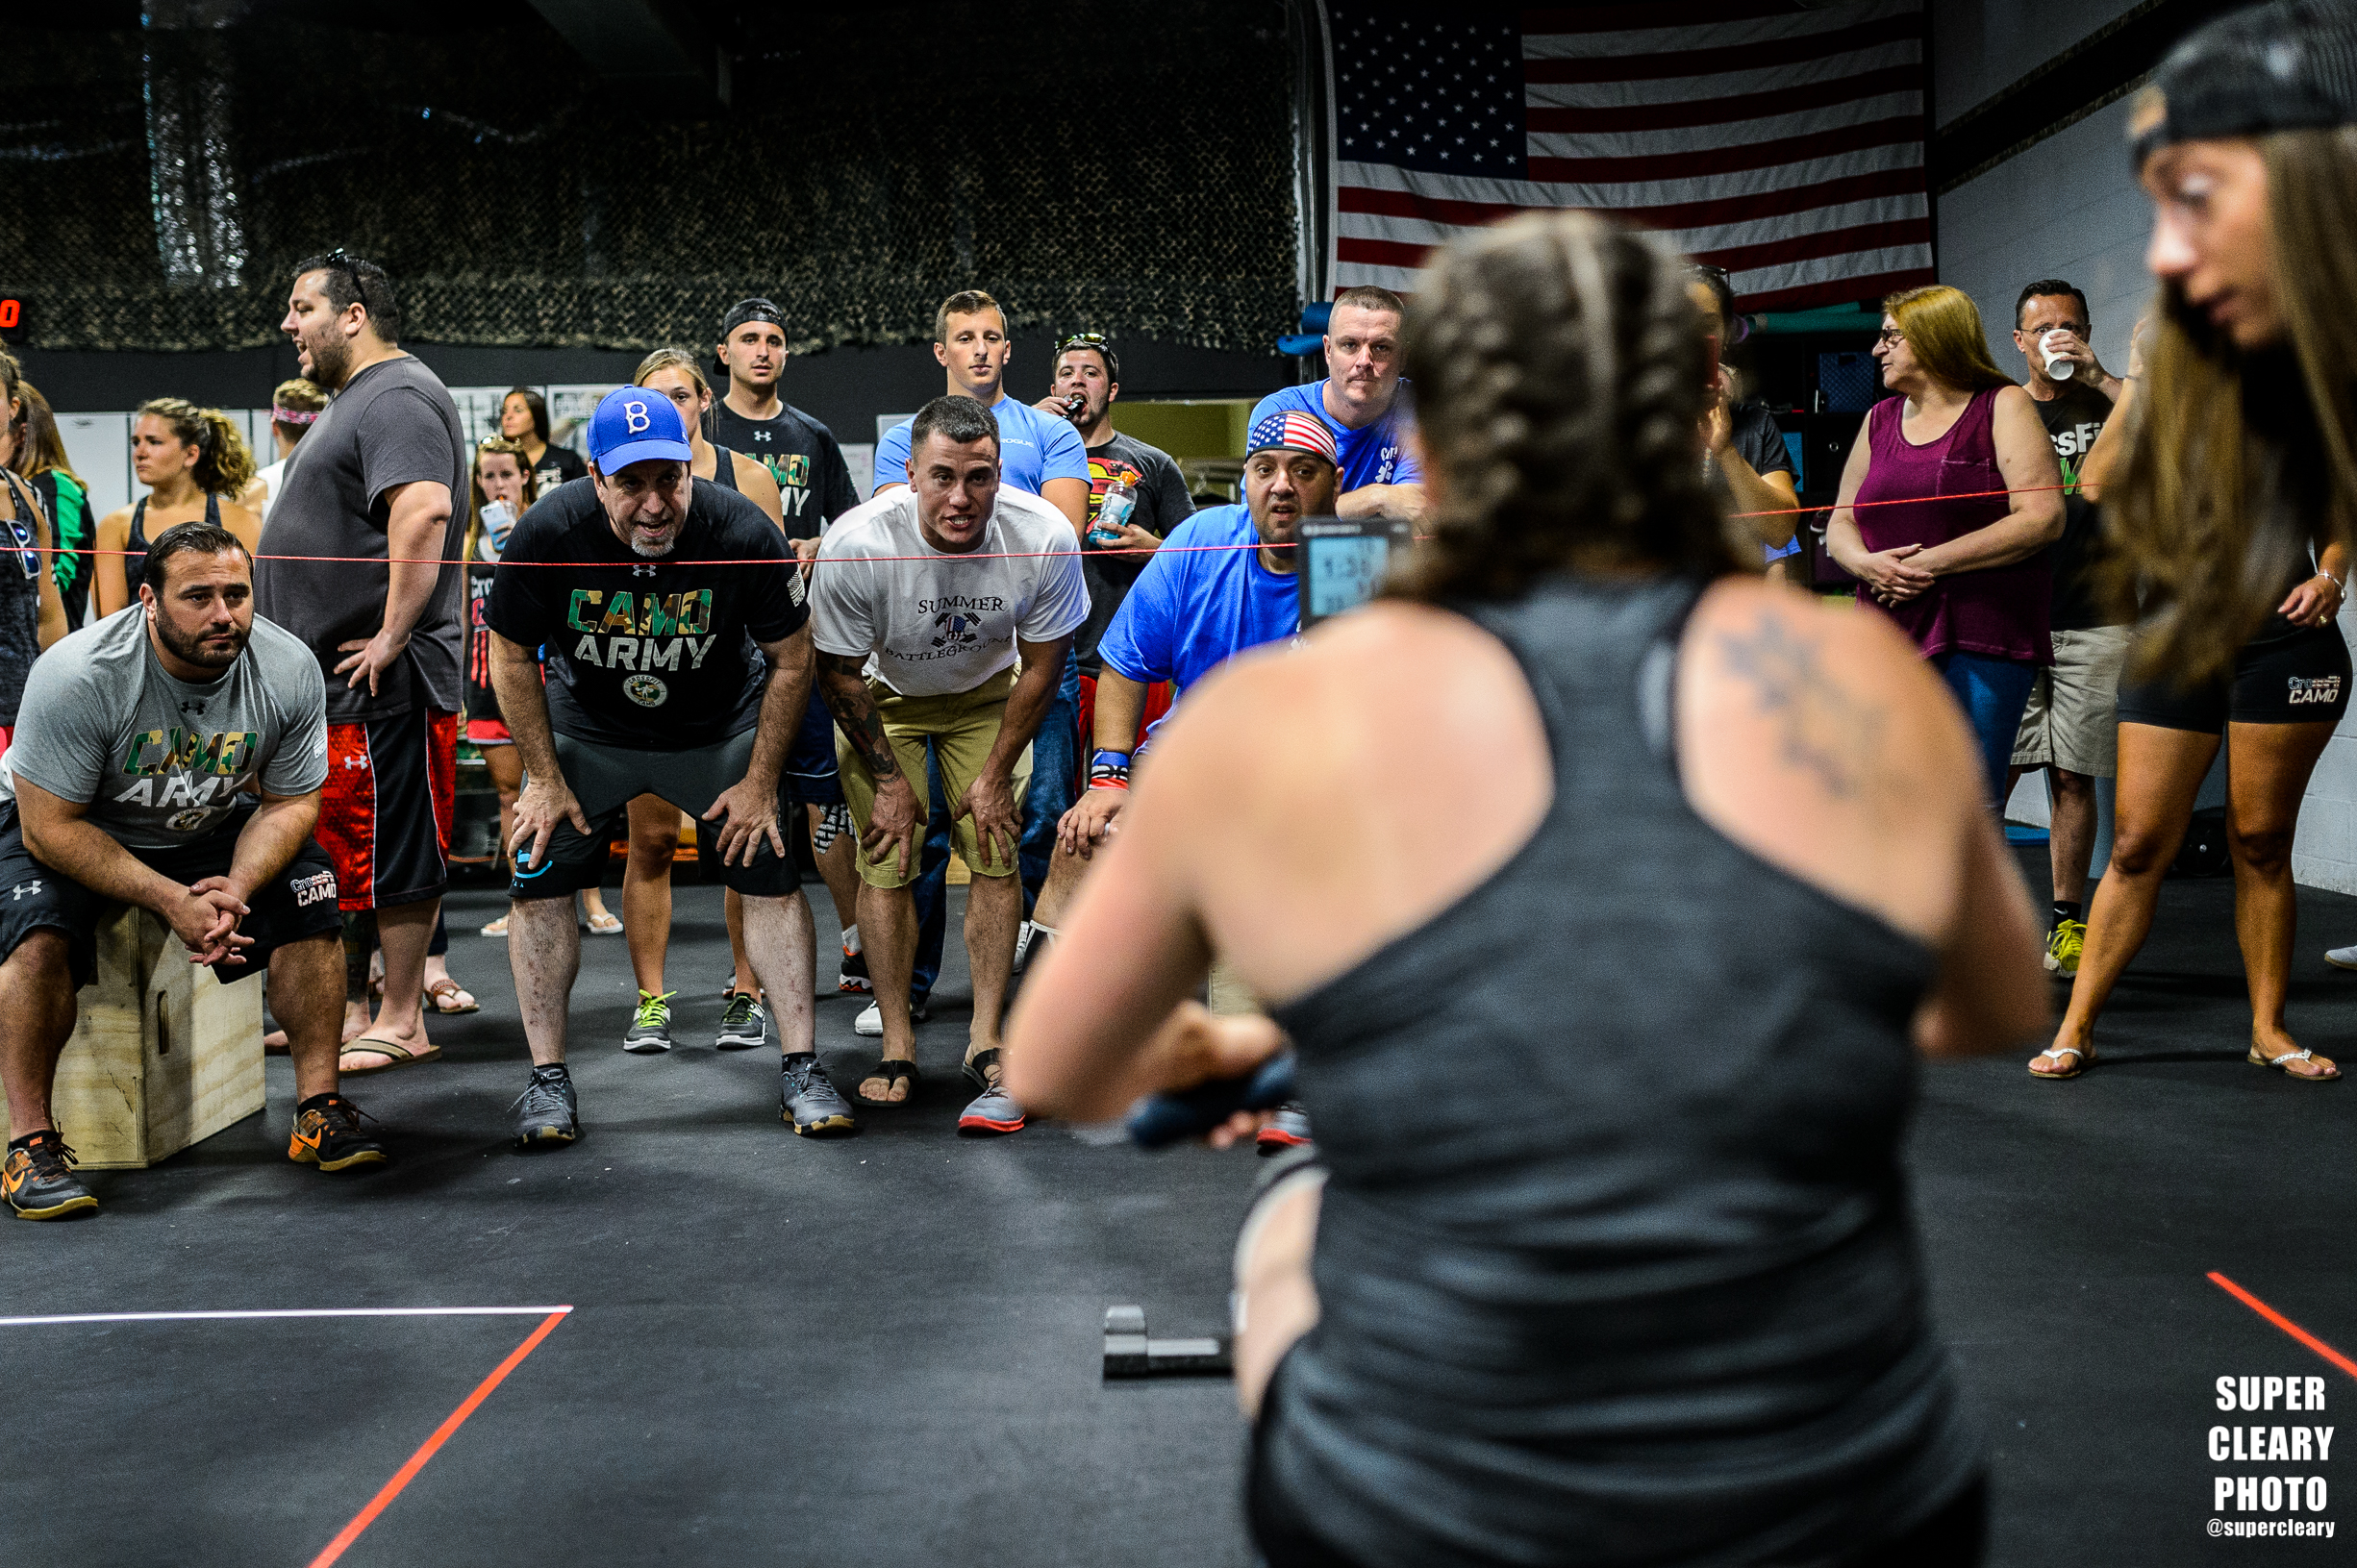
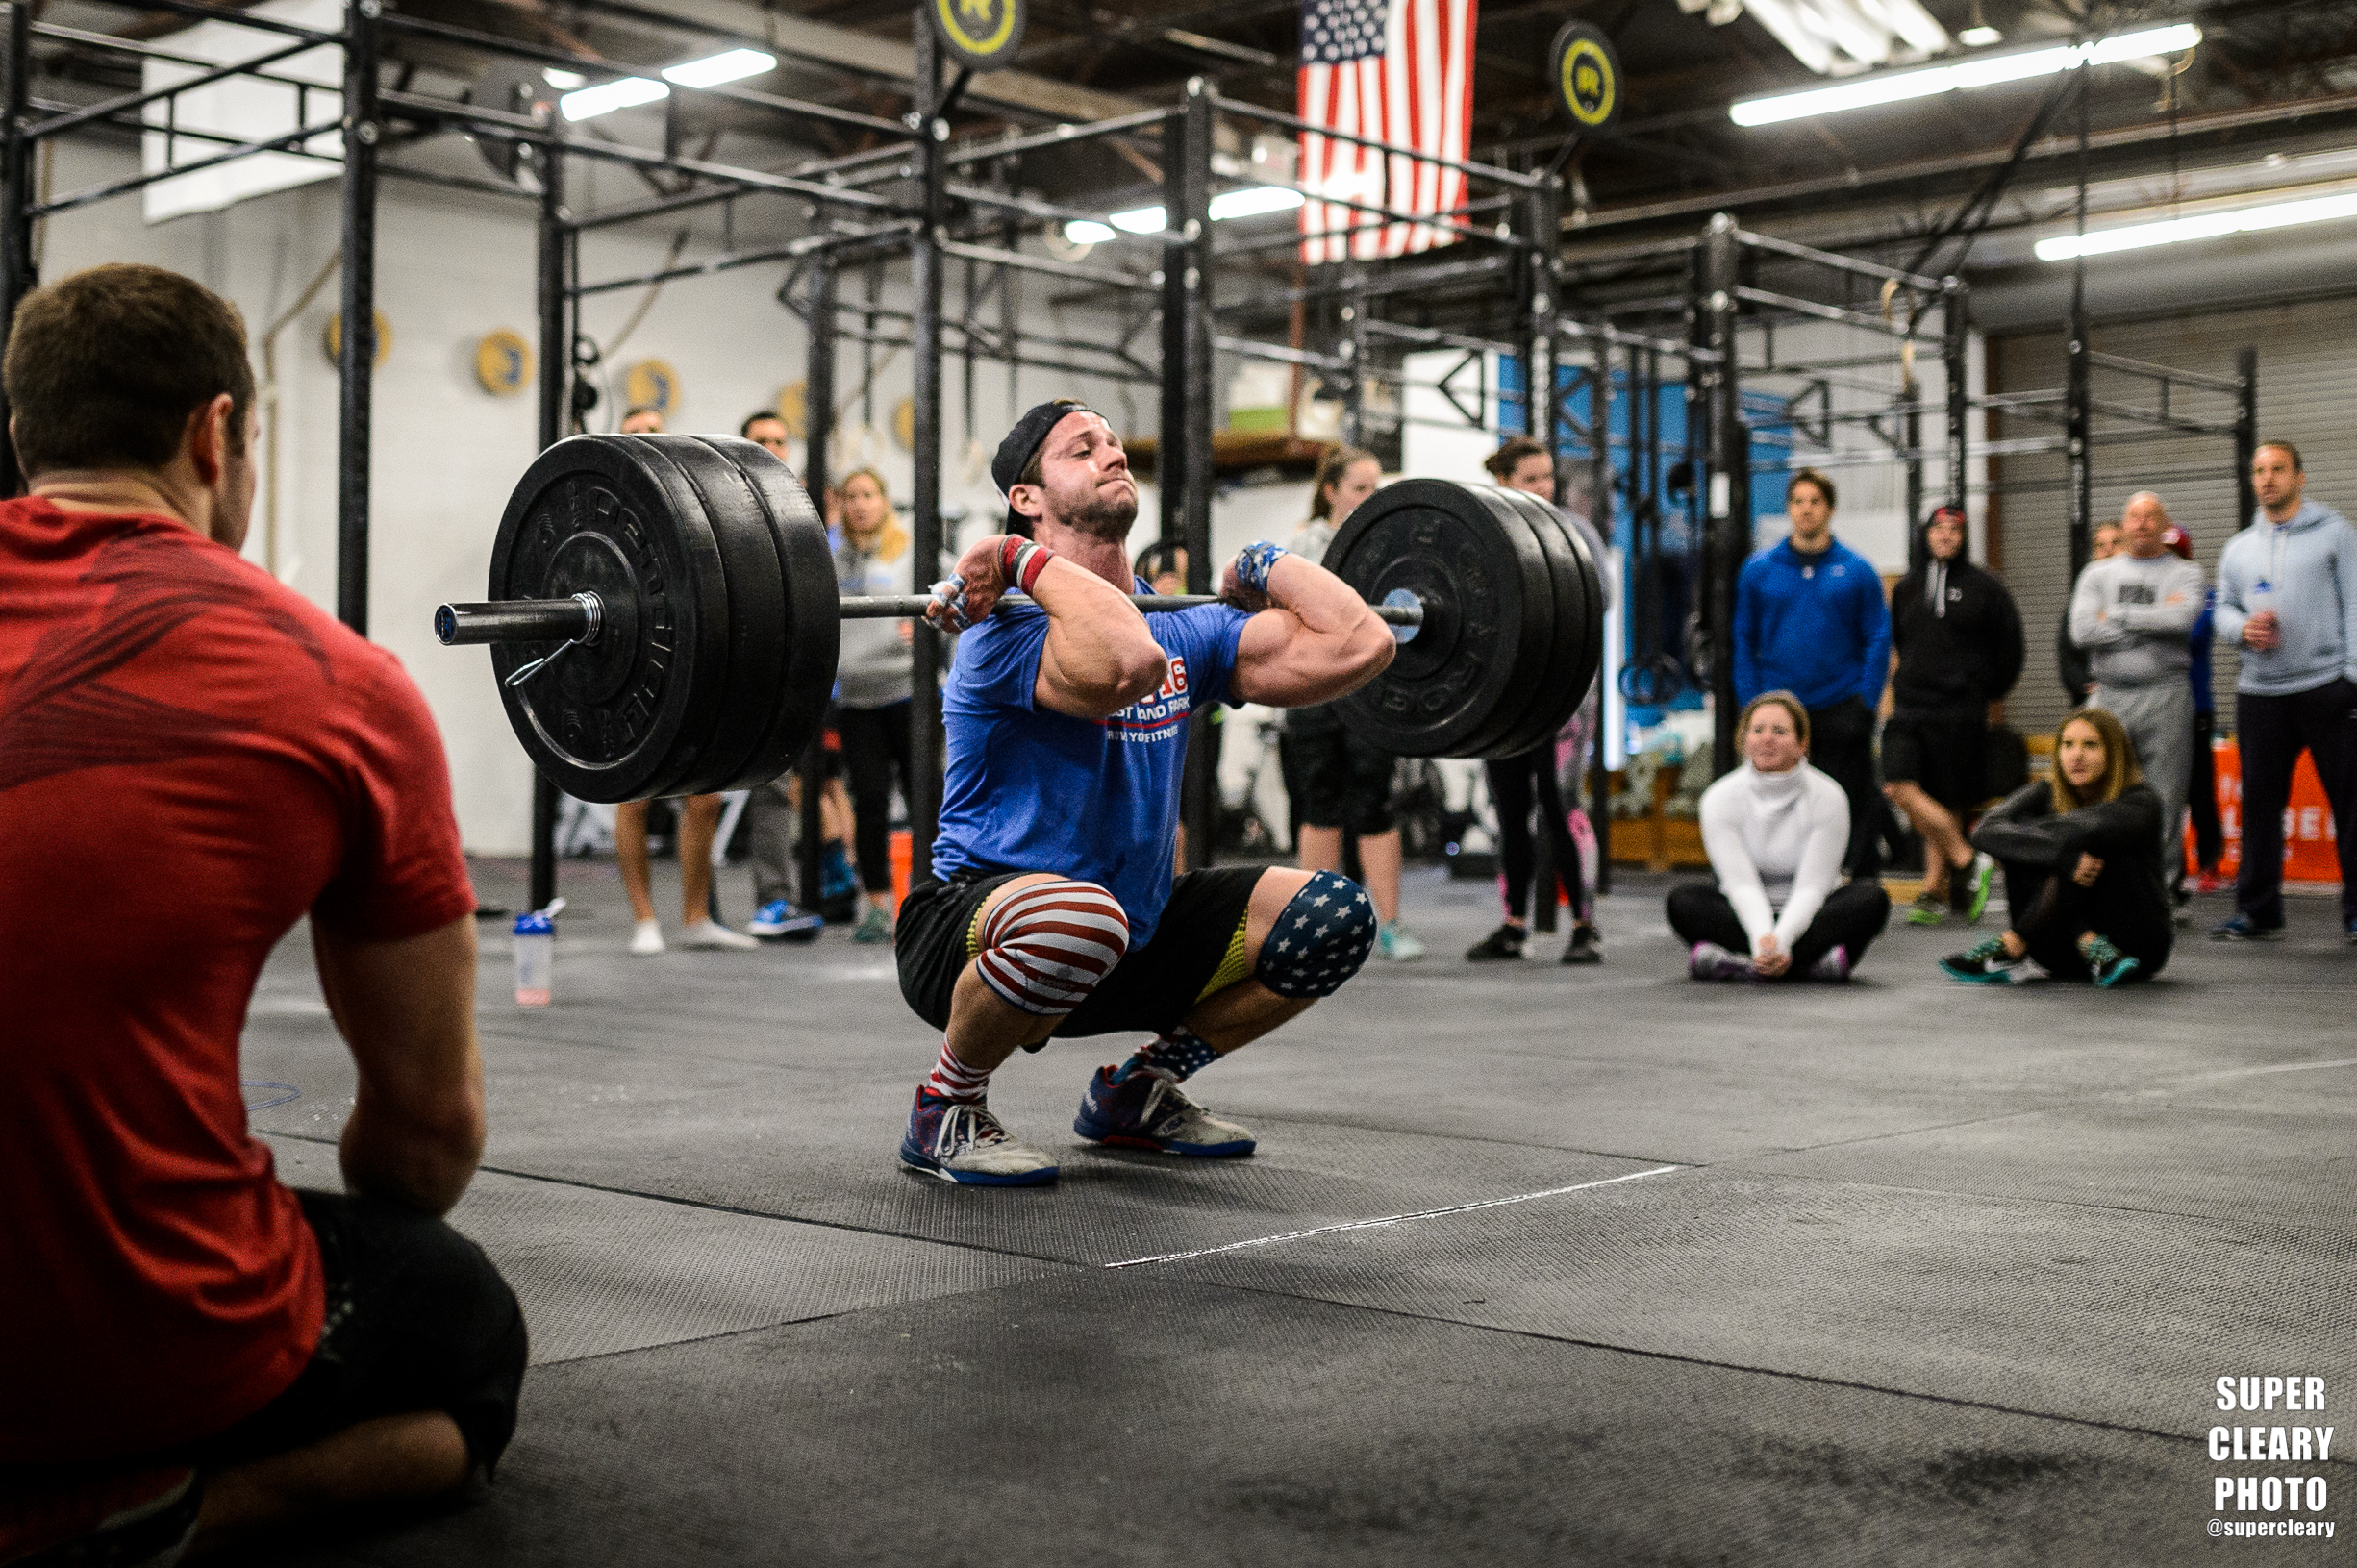
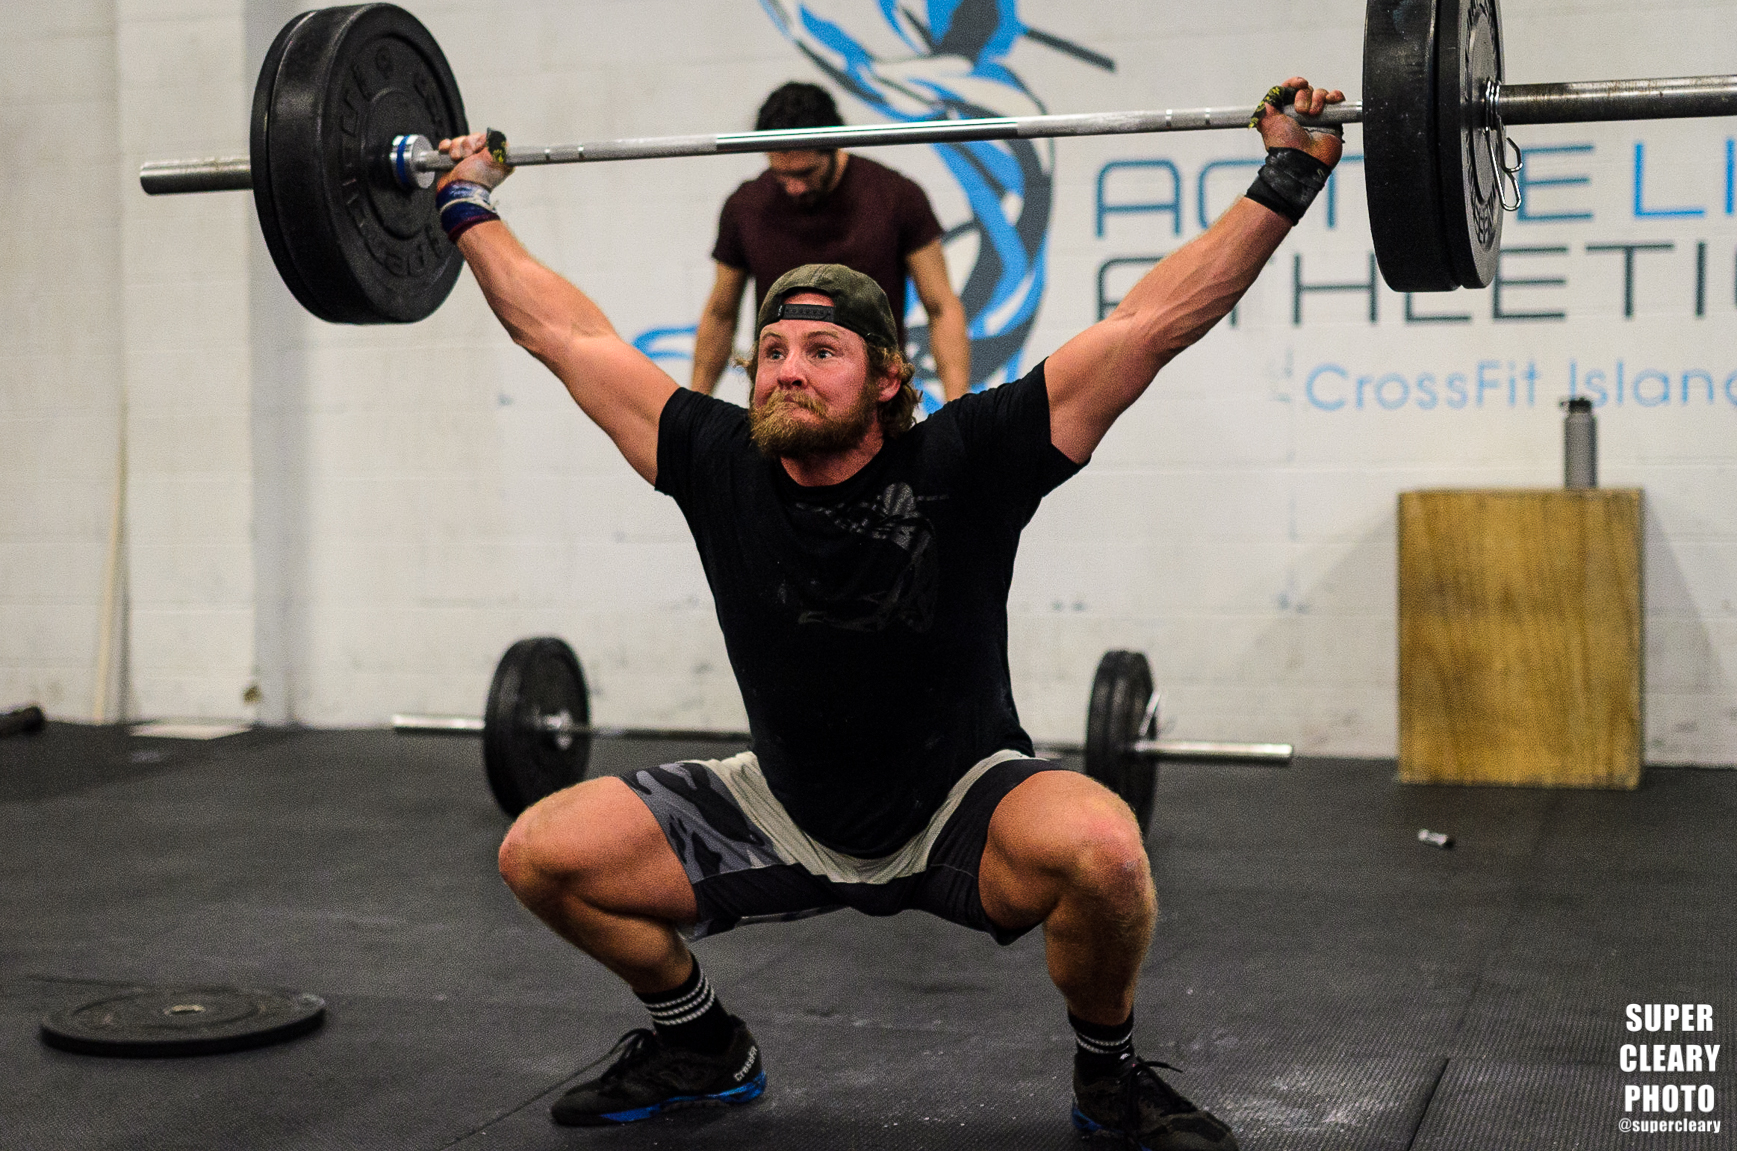
My point in all this gear talk is this, every photo in this post was shot on a five year old camera body, and half the shots even had the kit 18-55 f3.5-5.6 lens on there.  (Except of course the shot of the D5100).  Right now that setup costs $200 if you can even find one new and in stock.  The other half of images I used a Sigma 35 1.4 lens on the same body (yes, the lens cost about four times the price of the camera body).  The results though even on such a cheap camera body were great.  I was in an extremely low light gym environment and able to get solid action shots during a group class that I'd be comfortable selling to a client.  Do you need pro gear to be a pro?  Hell no, you just need to know how to shoot and you can get pro results out of any setup.

If you like what you've read, please share.  Feel free to post some content suggestions below so I know what you're looking for in my next post.  For bookings email shaun@superclearyphoto.com.  And as always, follow @supercleary on instagram and SuperClearyPhoto on Facebook.

Tags crossfit, photofit, fitness, photography, nikon, sigma, crossfit games, active life athletics, crossfit island park, nikon d5200, nikon d750, sigma 35 1.4, cheap camera, pro photographer
6 Comments

What Makes a Perfect Portfolio? (PhotoFit #20)

November 9, 2016

Last week I talked about what you need to do to get paid as a professional photographer. One of them key points I landed on was how important a portfolio is to start the conversation and easily show off your work.  I want to expand on that topic here.

I briefly mentioned a few ideas.  A portfolio should be 100% focused on the field that you want to work in.  It should be short.  And it should be perfect.  

Let me talk about the "why" first.  A portfolio is the representation of the work that you've done and the work you could do.  This is where you brag about how great you are and all the really neat things you're capable of doing.  In the modern era, you're not walking into an agency with a binder.  You're now e-mailing a link to a photo editor or client.  They are going to open up that link and look at the website for 3-10 seconds.  If they see crap, or nothing interesting, they are done.  They aren't going to call you back and they aren't going to follow-up.  You have a very short window of time to make a strong impression and prove you are what you say you are.  This is why it is so important to have a portfolio, and make sure the one you have is a quality representation of that work.


Dani Horan, Nikon D4

Dani Horan, Nikon D4

On Topic

Include the work you want to work on.  What does that mean?  If you want to be the best photographer in CrossFit, the only things in your portfolio should include CrossFit-style images.  No one cares that you've shot a wedding.  They aren't impressed by your photos of little kids.  Food photos don't matter regardless of how delicious they look.  Including these images in your portfolio makes you seem like an amateur.  Clients want to hire the best shooter in that specific field.  They don't want a mediocre wedding photographer that sometimes shoots CrossFit in his free time.  The one qualifier in all this:  If you do have multiple passions and specific types of photography you want to build out, develop different brands and portfolios that represent that.  That said, don't include all those different portfolios on the same page or you're just defeating the purpose.

Tyler McBride, Nikon D750, Sigma 35 1.4

Tyler McBride, Nikon D750, Sigma 35 1.4


Short

A portfolio should be short.  Like I said above, an editor or a client is going to click for 3-10 seconds on your portfolio.  They aren't going to drill 100 images deep.  So this is both a blessing and a curse.  You need to make your impression in 8-15 images.  Usually the challenge is cutting it to such a short set.  Some things to think about are making sure there is a variety in your set of images.  Avoid including the "same" photo over and over.  Examples would be having multiple photos of barbells locked out overhead, head to toe setup shots, or repeated exhaustion photos.  You want to include a variety of compositions and focal lengths.  Tight shots, wide shots.  Images with one athlete, as well as multiple athletes in frame.  Further, all the images shouldn't be from the exact same event.  Show that you also have worked a variety of jobs.

Perfect

Your portfolio should be perfect.  With only 8-15 impressions, each shot should have no technical mistakes.  That means the exposure is perfect, the focus is tact sharp on the subject's eye, the composition is spot on, the processing is perfect without being overdone.  When I've received portfolios from perspective shooters, I'm shocked when I see obviously out of focus images or shots where the composition is way off.  What that tells me is that the photographer doesn't understand what good focus and exposure are, and that's what I'm hiring for.  That's the end of that conversation for me, I'm not going to follow-up and ask why shot number 3 was out of focus and what shot number 5 was overexposed.  I'm not really going to spell this out more, perfect is perfect and if there is anything in your image that you think may not be, it shouldn't be included.

Dan Tyminski, Nikon D4, Tamron 24-70

Dan Tyminski, Nikon D4, Tamron 24-70

Additional Ideas

I think one of the last things you should consider including in your portfolio is spec work or basically what you could do for a client.  Meaning that you'll include shots from shoots you've financed and setup yourself, simply for the sake of demonstrating an ability, skill, or look you can do.  This is a great time to really show off the fancy gear or scenarios that you just haven't had the opportunity to do for a paying client, but think you will be able to pitch to future clients.

When I was putting this together I thought it would be a good idea to reach out to one of my colleagues and friends, Chris Nolan of MetConPhotos for his very knowledgeable opinion on what makes a perfect portfolio.  This is what he said, "accurate to the work that I specialize in, minimal in size (15-20 per section), and images chosen by a professional editor that lacks any kind of emotional attachment to the my work."  Clearly, Chris and I line up on this in a big way, but I think he brings up a huge point I omitted, selections without an "emotional attachment."  Far too often, people keep shots in their portfolio that are from "their first paying shoot," or taken with their first ever camera.  They have sentimental value, they may be neat, but they might not be perfect for your portfolio.

Dmitry Klokov, Nikon D600, Tamron 24-70

Dmitry Klokov, Nikon D600, Tamron 24-70

Writing this post was a great exercise for me because it forced me to finally sit down and spend time overhauling my website and portfolio.  The number one thing I thought I fell into the trap of was including images that I held an emotional attachment to, that should have otherwise been rejected.  The only person that thought those were "portfolio-worthy" images was me and that was because I knew the particular backstory and process that made those images special to me. I had included an image from the first event I ever shot in my portfolio and it survived revisions to my portfolio for five years!  Especially after reading Chris' advice, it finally got the axe.

My last point would be that your portfolio is just that, its yours.  It is your chance to show who you are as a photographer.  The worst thing you can do is blindly follow someone else's set of rules.  I've seen incredible portfolios that are only one image.  Others that use formats I never would have considered.  My own portfolio violates some of my ground rules because that works for my unique situation.  You do you.

If you like what you've read, please share.  Feel free to post some content suggestions below so I know what you're looking for in my next post.  For bookings email shaun@superclearyphoto.com.  And as always, follow @supercleary on instagram and SuperClearyPhoto on Facebook.


Tags portfolio, superclearyphoto, photofit, crossfit, supercleary, metconphotos, chris nolan, crossfit games
2 Comments
Brooke Ence, shot for Performance Care

Brooke Ence, shot for Performance Care

Why You're Not Getting Paid To Shoot (PhotoFit #19)

November 1, 2016

The most common question I get in my email from aspiring photographers is "how do I get paid to shoot."  This usually has the same follow-ons, 1) I've shot for free but now want to get paid, 2) I don't know what to charge, 3) I don't know what to give clients, and so on.  By no means do I have all the secrets, but I want to spell out a few of the key points in my mind to turn you from just aspiring to actually making money taking photos.

First, if you want to get paid taking photos, you need to already be a professional.  I'll go over what that means to me.

CrossFit Garden City Partner Competition - shot for CFGC

CrossFit Garden City Partner Competition - shot for CFGC

You need to have professional equipment.  No, don't run out and buy a Nikon D5 and a plethora of lens, but a basic dslr, with a basic lens will do the trick.  DSLRs are incredible now.  Even entry level DSLRs have incredible low light capabilities and can create fantastic images in the right hands, better you can get them very cheap used.  A basic crop body camera - like a used Nikon 7100 or the Canon equivalent will run you less than $600 and a 35mm 1.8 (great for the low light in a gym) is less than $200.  With a setup like that you can shoot RAW, have plenty of low light range, and can nail tact sharp photos.  With those tools you can deliver a professional product to your client that they will be happy with.

Rob Moloney - Shot for Goat Tape

Rob Moloney - Shot for Goat Tape

Next you need to have a portfolio and a social media presence, you could even get extra points and have a website.  The social media presence is easy, and everyone now has an instagram accpimt and posts photos there.  That is not a portfolio.  A portfolio is a link you can send to a client that is representative of your work.  It should be direct and short.  A portfolio should be 8-12 photos specifically of the type of work you're looking to do.  Don't send a portfolio to a gym client that includes wedding photos, or food photos.  They are trying to hire the best fitness shooter, not some person that can do a little of everything.  Your portfolio should also be perfect.  Each shot should be great, without any technical mistakes, and stand on its own.  If you're not confident in a shot, dump it.  You have every photo you've ever taken to choose from, make sure they are all winners.  More is not better here.  A client or editor isn't going to scroll through 30 images, they are going to skim a few and make a judgement.  Don't include crap.

Lastly, you could have a website.  A website might really just be your portfolio - sort of like my landing page at www.scp-fit.com.  I consider that page sort of an expanded portfolio.  It has an about me section, and a few portfolio pages that are sorely in need of an overhaul.  And a way to get in contact with me.  A website isn't a deal-breaker, but it is definitely nice to have.  I have this one hosted on Squarespace and it was very easy to put together.

Mat Fraser - Shot for East Coast Championship

Mat Fraser - Shot for East Coast Championship

So let's say having some gear, a portfolio, and a web presence is the starting point to being a professional.  Next up, getting a job.

You need to walk into your first job already knowing how your gear works and how to deliver.  Don't make a client learn the hard way that this is your first time.  The easiest way to get those bugs out of the way is to head to your gym and take photos.  Class is every hour and most people in the CrossFit space love having their photo taken.  Just clear it with the gym owner/coach/ and members and you're good to go.  Experiment, practice, and figure out how your camera works and how to get good results.

Now it just comes down to marketing.  If you want to shoot at gyms, contact local gyms!  If there are clients - whether athletes or sponsors - that you want to work for, reach out to them.  Email and social media are always easy, but phone calls work better.  Provide a link to your portfolio.  Go into this already knowing what you're going to provide.  

Beach stock shots - shot for Flex Events

Beach stock shots - shot for Flex Events

Set up some basic packages.  Here are some examples of what you could do.  2 group classes, plus coaches photos for $xxx, or 4 group classes plus coaches photos for $xxx.  Explain what your deliverables will be (100 edited photos?  200 edited photos?  Watermarks or no watermarks?, what sort of usage will the client receive?  Finally, explain what sort of turn around time you can provide.  Will they have their photos in a week or a day?  

I can't emphasis this enough.  A lot of people will just say no, or worse, not even answer you at all.  That is just how it is.  You need to cast a wide net and reach out to a lot of clients before someone will get interested in you.  From there, the haggle usually starts.  You need to know what your market is like and what your time is worth.  In your area do gyms pay $1000 for photo services?  Are they used to getting everything for free?  You need to go in with a number that will not simply insult the gym but take into account what they could actually afford.  To determine your own worth, look at the investment, first in time.  A 2 hour shoot usually include 30 mins of setup and breakdown on each end, then there is an hour of driving as well.  Let's say you're not a very speedy editor so every hour of photography you do, takes two hours of editing to process and edit your images.  Pre-shoot calls and emails are another 30mins-hour.  Delivery and follow-up are the same.  So a 2 hour shoot is actually 11 hours of work.  What do you think that time is worth per hour?  You're also walking into the shoot with a few hundred to a few thousand dollars of camera gear, as well as the computer at home, and the software you're going to use to edit.  While each client shouldn't have to pay for all of that, you could certainly assign a percentage to it to help determine your rate.  

This is often the falling off point for people who haven't landed their first client yet.  Telling someone you're worth money -- and I don't mean charging $50 for a 4 hour shoot -- but real money -- hundreds if not thousands of dollars is scary.  Sticking to your guns when a client says "can you do it for less" is tough.  That's where you just need to get some comfort in knowing what you're worth and what the lowest rate you'll shoot at is.

Emily Abbot - Shot for Wodapalooza 

Emily Abbot - Shot for Wodapalooza 

I think this is the perfect time to talk about working for free or for "exposure."  Just don't do it.  Free clients don't become pay clients.  You will forever forward be the "free guy."  Working for free also damages the local market for other photographers.  All that said, there are certainly times to work with financial compensation.  Barter is a real thing.  Plenty of working photographers have started out by getting their gym memberships in exchange for a monthly photoshoot.  That is not "working for free" you and the client are both getting something you want.  Further, there may be a particular athlete you want to work with, they might need some portfolio images, and you might want to practice with a more high profile athlete.  You're getting practice, they are getting some portfolio images.  That could be a resonable barter depending where both of you are at.  Again, it is all about valuation.  

Whenever you're working a job, make sure you have some kind of written agreement in place spelling out exactly what you are going to do and deliver, as well as what the client is required to do (pay you, when and how).  You also should have model releases for everyone that will be involved in the shoot as well as from the location owner (there are some handy apps that make this easier).  I also don't want to burst your bubble, but if you're working, you really should have a separate business insurance policy.  If someone trips on your camera bag at a gym, they can sue you, and if you don't have the proper insurance in place you can be liable for a hefty payout. 

Katrin Davidsdottir - Shot for East Coast Championship

Katrin Davidsdottir - Shot for East Coast Championship

I think this lays out the basics of "how do I get people to pay me."  To summarize, know the gear you're working with and have a portfolio.  Know what kind of clients you want to work with and what you can provide for them at what rate.  Lastly, deliver!  Do a killer job and make sure they are happy with the product you put together.

If you like what you've read, please share.  Feel free to post some content suggestions below so I know what you're looking for in my next post.  For bookings email shaun@superclearyphoto.com.  And as always, follow @supercleary on instagram and SuperClearyPhoto on Facebook.

Tags crossfit, crossfit games, brooke ence, rob moloney, katrin davidsdottir, mat fraser, photography, photofit, supercleary, superclearyphoto, nikon
2 Comments
Photo Credit Kieran Kesner, 2016 CrossFit Games

Photo Credit Kieran Kesner, 2016 CrossFit Games

Getting Unique Shots in a Crowd - Shooting the CrossFit Games Part 2 (PhotoFit #15)

October 14, 2016

In my first post about shooting the CrossFit Games I focused on the challenges of shooting with long lenses in the gigantic Soccer Stadium.  In part two, I'll cover the complexities of shooting from fixed shooting positions and trying to create unique images that help you stand out from a crowd of other photographers.

For the third year in a row I've had the pleasure of working for CrossFit Inc. as part of their photography team.  In working within that team, positions and roles are assigned.  Once the action moves to the Tennis Stadium, assignments fall into two categories: assigned seats, and floater positions.  With assigned seats, you're literally handed a seat ticket and have to stay locked in that position.  These seats usually make for an incredible view of the action.  First and foremost, I've always been a fan of the sport itself, so getting a front row seat is never something to complain about.  As a floater - you're either shooting in the media lane or wandering around the stadium looking for good sight lines - I'll cover this more in the next post.

Katrin Davidsdottir at the 2016 CrossFit Games - Sigma 120-300 - Copyright CrossFit Inc, 2016, all rights reserved

Katrin Davidsdottir at the 2016 CrossFit Games - Sigma 120-300 - Copyright CrossFit Inc, 2016, all rights reserved

The downsides of these seats from a photography perspective is that if I found myself in a seat where the action wasn't particularly close to you, or doesn't advance towards you, I sometimes found myself at a loss for how to capture great images.  The Games aren't unique in this, all major sports have assigned positions for photographers, and it's on the photographer to make the best out of those positions.

If I was in a less than optimal position for a specific WOD, I fell back on the importance of trusting in the team I was working with.  Because other shooters from the team are assigned across the rest of the stadium, I count on the fact that they are in position to get the perfect shot, and it then becomes my job to see how creative you can get in unique positions.

Katrin Davidsdottir - 2015 CrossFit Games - Sigma 120-300 - Copyright CrossFit Inc, 2016, all rights reserved

Katrin Davidsdottir - 2015 CrossFit Games - Sigma 120-300 - Copyright CrossFit Inc, 2016, all rights reserved

Lens selection varies wildly once you're in the Tennis Stadium, and I think that's a great way to become creative and stand out.  For the most part, I actually went back to my Regionals go-to, the Sigma 120-300 2.8.  I really love working with that lens, and only at the extremes was that 300 not enough reach in the Tennis Stadium.  For a few events this year, and when the action was panning across my seat in the south side, I busted out the 200-400 and tried to really get in super tight to athletes.  I always love working with the extra reach these monster lenses afford, but as the action gets closer, they get more and more restrictive.  

As a fun combo during the Ring Handstand Push-up event, I was stationed in the south seats (the finish line) and shot down the lane with the 200-400.  On my second body, I had a 70-200, and as the athletes closed for their last reps and sprint to the finish, I switched to that, to still get nice and tight, but offer a great degree more flexibility, and ease of use.

Camille Leblanc-Bazinet at the 2016 CrossFit Games - 200-400 f/4 - Copyright CrossFit Inc, 2016, all rights reserved

Camille Leblanc-Bazinet at the 2016 CrossFit Games - 200-400 f/4 - Copyright CrossFit Inc, 2016, all rights reserved

The Tennis Stadium is an incredibly unique shooting environment with the action so close, and the conditions so easy to shoot in.   When you look to your left and right there are dozens of cameras - some professional, some just part of the spectators', but you'll also notice most people are using very similar lenses.  Something I always try and think about when shooting in this sort of environment is trying to get shots other people aren't. With some base level knowledge, and because high-end equipment's price has come down so dramatically, it really doesn't take all that much to get a good result when the lighting is awesome like it is in the Tennis Stadium.  Even with a semi-entry level camera like a Nikon d5500 or a Canon 70d and a 24-120 f/4,($1000) you're going to be able to get sharp action photos with low ISO settings, and you're not even going to know it wasn't shot on a Nikon D5 with a 70-200 ($8000)

Cole Sager during the 2015 CrossFit Games - Nikon 70-200 - Copyright CrossFit Inc, 2016, all rights reserved

Cole Sager during the 2015 CrossFit Games - Nikon 70-200 - Copyright CrossFit Inc, 2016, all rights reserved

Because of that, I'm always thinking of how to mix up shots a bit so they don't just look identical to what everyone else shooting from similar positions are probably taking.  The "easy shot" is a classic head to toe of an athlete exercising with the whole athlete in frame.  Wide shots are much easier to take, and much easier to get tact-sharp focus on.  What I try to do once I get some safeties - the boring classic shots that help fill out coverage - is try to shoot very tight.  If I shoot super tight, my editors won't have to crop in post, and the image itself will have that amazing background compression and bokeh.  This is how you can get some really unique images while shooting from the exact same position as every other shooter. 

If I'm using a 70-200, I'm going to try to shoot closer to 200 and really get tight on the athletes.  If I'm on the 120-300 I try to go tighter than 200 (otherwise what's the point).  Yes, I miss a lot because of this.  Yes, I get a lot of weird crops and amputations that aren't useable.  But, when everything lines up right, the focus hits, and the crop is good, I'm able to get a really unique image that I don't think a lot of other people are going for.  

For some technical details, when I'm trying to shoot really tight during fast action, I'm going to use continuous autofocus (sorry this will all be Nikon language), and actually limit it to only 9 points.  On the D5 there are something like 51 focus points you can use, but I actually like to limit it.  As the action moves and the camera hunts for focus, if you limit the active points, you can actually track faster.  Of course, I'm using back button focusing the whole time -- read about that here if you're unfamiliar.  Something else to help get focus, I might actual close down my aperture just a bit.  With a 2.8 lens, I might actually shoot at 3.2 or 3.5.  There will be a very minor difference in the out of focus areas (especially because I'm shooting with a lot of zoom to help get compression), but I'm able to get a little more of the athlete in focus especially if they shift forward or back.  And because I'm getting a little less light, I'll just bump up the ISO more, which won't really be noticeable on pro bodies like the Nikon D4-5 / Canon 1dx mk1/2.  

Jacob Heppner - 2016 CrossFit Games - Sigma 120-300 - Copyright CrossFit Inc, 2016, all rights reserved

Jacob Heppner - 2016 CrossFit Games - Sigma 120-300 - Copyright CrossFit Inc, 2016, all rights reserved

For example, in 2016, I was shooting from the West finish line where athletes advanced during double DT.  I'll zoom all the way into the athlete's head and put my focus point on the eye.  From there, I'll hold down the back button, and grab frames during those decisive moments of peak exertion.  I will also try to frame up the shot in camera, but to get this in focus, I may select a focus point off to the left, right, top, or bottom so that focus point lines up best with the athlete's head and I'm able to fill the frame as much as possible. Another option is to use that middle focus point to get the subject in focus and then recompose the shoot.  You have to be careful doing this though, because if the athlete moves forward or back during the time you're recomposing, the shot will be out of focus.  The shot above of Jacob Heppner was snapped with the Sigma 120-300, at more than 200mm.  He was relatively close to me and it was an adventure to get everything framed up right and in focus.  Below is another shot, still useable, but includes a bit of a crop on Mat Fraser's hand which I'm not happy about.

Mat Fraser - 2016 CrossFit Games - Sigma 120-300 - Copyright CrossFit Inc, 2016, all rights reserved

Mat Fraser - 2016 CrossFit Games - Sigma 120-300 - Copyright CrossFit Inc, 2016, all rights reserved

The best part of the last two images - in my opinion is the out of focus areas.  They are just buttery mush.  It helps separate out the athlete and create what I think are really great images.  By zooming in so hard and leaving so little to need to be cropped, the background fades out into just colors.

Another type of shot I've grabbed the last three years from the same finish line is the "finish" shot.  After an athlete's done, I'll keep the lens zoomed in on them and keep clicking hoping for a great reaction.  Yes, shooting with a 24-70 is going to be much easier to make sure I don't miss anything or crop the shot in a weird way, but shooting with a 70-200 when you nail it is so worth it.  Here are a couple examples.  The first is shot very close with a 70-200 and the other is with the 120-300 handheld.  Yes, I try that shot a lot, and I have a ton of misses, but that zoomed in image, to me, is so much stronger than a boring wide shot.

Scott Panchik's finish double DT at the 2016 CrossFit Games - Nikon 70-200 - Copyright CrossFit Inc, 2016, all rights reserved

Scott Panchik's finish double DT at the 2016 CrossFit Games - Nikon 70-200 - Copyright CrossFit Inc, 2016, all rights reserved

CLB at the 2015 CrossFit Games - Sigma 120-300 - Copyright CrossFit Inc, 2016, all rights reserved

CLB at the 2015 CrossFit Games - Sigma 120-300 - Copyright CrossFit Inc, 2016, all rights reserved

For some takeaways - I'd always recommend trying to shoot much tighter than you normally would.  Wide shots, while useful, are really easy to get and easy to duplicate.  To get your images to stand out in a stack of other images from the same event, try taking the harder shots - zoomed tight and into the action.  You're going to miss a whole bunch, but the hits are much better.  In my next piece of the Games, I'll talk about shooting from float positions in the Tennis Stadium and working to get the best shots in those scenarios.

If you like what you've read, please share.  Feel free to post some content suggestions below so I know what you're looking for in my next post.  For bookings email shaun@superclearyphoto.com.  And as always, follow @supercleary on instagram and SuperClearyPhoto on Facebook.


Tags crossfit, photofit, nikon, sigma, crossfit games, mat frase, mat fraser, camille leblanc-bazinet, katrin davidsdottir, jacob heppner, kari pearce, cole sager, scott panchik, photography, superclearyphoto
Comment
Dan Bailey taking on the Obstacle Course at the 2015 CrossFit Games, Nikon 200-400 with 1.4x, Nikon D4s -- Copyright CrossFit Inc, 2016, all rights reserved

Dan Bailey taking on the Obstacle Course at the 2015 CrossFit Games, Nikon 200-400 with 1.4x, Nikon D4s -- Copyright CrossFit Inc, 2016, all rights reserved

Big Lenses and Big Pressure - Shooting the CrossFit Games Part 1 (PhotoFit 14)

September 28, 2016

I had the pleasure of shooting the CrossFit Games for the third year in a row for CrossFit HQ this summer.  Shooting the SuperBowl of exercise is a huge job that requires a monstrous quiver of lenses to really capture those unique moments across a series of differing arenas.  I'll try to write a few different posts about shooting the Games, but this one is going to be specifically focused on shooting with long lenses, and trying (and sometimes failing) to get good results using them.

Shooting for CrossFit Inc. has some serious perks.  First off, you're not on your own, you're part of a large team - anywhere from 8-12 photographers, plus a few onsite editors, as well an incredible group of volunteers.  Next you get access to an arsenal of loaned long lenses and tele convertors.  To begin with, I own the Sigma 120-300 2.8 (new version).  I picked it up two years ago before regionals and it quickly became my CrossFit work horse.  All of my favorite images from Regionals over the last three year came from that lens.  Those extra 100mm really just add so much punch and reach that I really think they create something special.

Josh Bridges at the 2016 California Regional - Sigma 120-300 2.8, Nikon D4. -- Copyright CrossFit Inc, 2016, all rights reserved

Josh Bridges at the 2016 California Regional - Sigma 120-300 2.8, Nikon D4. -- Copyright CrossFit Inc, 2016, all rights reserved


At the Games, it's a different story though.  The soccer field at the Stubhub Center literally eats lenses.  70-200mm?  No way.  The starting point is 200 and that's only enough to get a wide shot. On the Nikon side the team had access to the following -- Nikon 200-400 f/4, Nikon 300 f2.8, Nikon 400 f/2.8, Nikon 600 f/4, and a Nikon 1.4x and 2x.

Let's talk some basics of shooting with monster lenses before I get into some of my experiences over the last few years.  First off, shooting with with lens around 300 and above, a monopod becomes a must.  These guys are heavy and the idea of handholding them may work for a shot or two, but not for any extended period of shooting.  Without a monopod, grabbing any sort of focus is basically impossible.  And longer lenses at 400 and above are basically impossible to operate without being staked into the ground.  Just because you're on a monopod though, the basic rules of composition don't change.  Simply standing there with a monster lens at eye level will get you just as boring images, even though it's much easier on the body to shoot that way.  I'll usually work to have the mono as close to the ground as possible, or at the lowest part of the guardrail that wraps the stadium.  From there I'll shoot taking a knee on the ground to help keep the camera that much more stable.  When that starts getting boring, I like to get rid of the mono and just shoot from the ground in the prone position.  While certainly a crapshoot, images from this angle in a huge stadium all the way zoomed can really came out incredible.  Anytime in an image when you can make that stadium look huge (and crowded) wrapping around the subject really creates a better story and more impact.  Shooting from the ground up angle is always a surefire way to make an athlete look huge and their accomplishments that much more impressive.

Shooting with the Nikon 200-400 during the "climbing worm" WOD at the 2016 CrossFit Games

Shooting with the Nikon 200-400 during the "climbing worm" WOD at the 2016 CrossFit Games

With these sorts of extreme focal lengths too, another challenge is amputations.  When you're framing up a shot, it is easier than ever to cut off a limb / hand / foot.  You have to take that much extra care to either make sure you frame things in such a way that you don't cut off anything, or if you have to, you do it strategically that aesthetically works.

Shooting during big field events like those at the CrossFit Games you're not allowed to simply walk wherever you want.  You're required to stay off the sidelines and around the perimeter.  Because of that, you're not always able to be exactly where you want to nail the shot.  You also have to deal with myriad video guys, judges, and other staff on the field constantly walking across, or blocking your frame.  That's simply the name of the game though.  I'd love to fill my feed with the number of judges backs and videographer photos I've taken, when I thought I was about to nail the perfect shot.  These sorts of restrictions though force you to always consider what type of lens you're going to bring out to shoot - fast moving events, zooms are usually easier.  Slower events, primes can workout great.  Action close to you?  Maybe more standard lenses in the 24-200 range will work out better.

In terms of settings, you're generally dealing with extremely bright daylight filtering into the stadium during the middle of the day.  In the morning and afternoon there is a horrific split light between the rising/setting sun and shade which makes for some really tough exposures.  While many shooters prefer aperture priority during an outdoor shoot like this, I always prefer manual.  My issue with shooting in Aperture priority is that the camera's computer can easily be fooled by extreme differences in exposure.  What do I mean?  Say you're shooting straight on at an athlete coming towards you.  You're lying on the ground.  Those first couple frames just have the stadium behind the subject, the image comes out great.  As the subject gets closer the angle gets more extreme and that super bright sky is now half the background.  Depending on what metering setting you have your camera on, you may get an extremely underexposed image as the camera's meter focuses too much on the sky and not enough on the subject.  Yes, there are different metering techniques to compensate for this and you could also always use exposure compensation.  But now there are two extra steps you have to take and you may still get an exposure off.  For me, I'd rather take a few tests shots and get a good baseline.  From there, I'll slowly adjust my shutter speed up or down to compensate for changes in the ambient light while keeping my subject exposed well.  While this technique may lead to a series of images that are a little overexposed or underexposed, you're not going to get extremes unless the lighting radically changes and you simply forget to compensate.

I rarely shoot at ISO 100.  I'd much prefer to sit around 400-800 because I can then have a super fast shutter speed -- generally 1/1000th as a baseline.  Remember, these larger lenses are usually f/4 so you're loosing a lot of light from the normally quick f 2.8 lenses.  With the amazing camera bodies out there now, you can easily shoot all the way up to ISO 1600 before you even notice the slightest flicker of noise.

The full collection of Nikon gear at the 2016 CrossFit Games

The full collection of Nikon gear at the 2016 CrossFit Games


My first year at the Games in 2014, and really inexperienced at shooting in such large fields, I gravitated towards the 200-400 f/4.  Even though it's an f/4 lens, shooting outdoors during the day means that basically doesn't matter.  You're able to use that ISO range from 100-1000 to maintain fast shutter speeds and 0 noise. I like the flexibility a zoom provides and it feels much more similar to shooting with a 70-200 in a regular field.  It's crazy though shooting with lenses in this range.  At 400mm you're able to get so close and tight to the action in the lanes closer to your sideline that you're able to get a view almost no one else can.  Regardless of what the internet says, I think 2014 was the hottest year in my time at the Stubhub Center.  The added joy of working with these huge lenses in big events is you have to lug them for our media office - two plus stories up in the press box - and get them back and forth to the field.  Add in some 100 degree sun and 20 minute heats, and you get the idea.  I can't go on enough though about how amazing the volunteer squad that we have was (and continues to be).  All with a smile, they would gladly carry the heaviest gear, run for water and snacks, sprint memory cards up and down flights of stairs, and just be otherwise awesome.  Without them, handling this gear all day would be a real struggle.

2014 CrossFit Games - I take naps whenever possible.  Always trying to keep the batteries on full.  Copyright CrossFit Inc, 2016, all rights reserved Photo by Tai Randall

2014 CrossFit Games - I take naps whenever possible.  Always trying to keep the batteries on full.  Copyright CrossFit Inc, 2016, all rights reserved Photo by Tai Randall

Working with a larger team requires you to operate much more differently than you would if you were the sole shooter for the event.  We received assignments from our manager, putting us on different sides of the field and required to cover the action from there.  Some events aren't overly conducive to the money shots from some sides, but even from the worst shooting position, you're still able to occasionally capture a really unique moment.  And really, you're only given this opportunity because you can count on the other shooters in their positions nailing their shots.  This does a lot of things for you though.  You're able to sit back and really compose your images.  You don't need to take 1000 photos of the back of athletes heads if they're moving away from you.  You have the time to get the right lens and work to get a unique shot that you wouldn't be able to do if you were required to cover the entire event yourself.

In 2015, I was much more comfortable working with the larger zoom lens so wanted to try my hand at some of the more exotic glass the team had, the big primes and also teles.  While I absolutely love shooting with primes in the gym environment - the Sigma 35 1.4 to be specific - I find the big primes extremely restrictive and challenging in big field sports.  The first issue working with them is they are gigantic and heavy.  A monopod is a must, be on top of that they simply suck to lug around.  Beyond that, their handling requires the fine touch of a steady hand.  The slightest shakes back and forth or side to side can knock a perfectly level shot off, or knock a well composed frame into dutch angle hell.  The most obvious challenge of primes though is that they aren't zooms.  Once you plop that monopod in the ground, that's your position.  Assuming you picked the perfect spot at that moment, the athletes will inevitably be moving closer or farther from you, requiring you to shift positions as you track the action.  

Shooting with the Nikon 600 F/4 at the 2016 CrossFit Games, image credit Jason Morrison (@dubtastic)

Shooting with the Nikon 600 F/4 at the 2016 CrossFit Games, image credit Jason Morrison (@dubtastic)

When I shoot, I want to do the best I can to fill the frame in the camera and leave as little cropping as possible for post.  Filling the frame in camera creates the largest possible useable file and the easiest to edit.  Further, you're going to get the best possible bokeh, whereas if you crop into the image, you're not going to get any additional quality in those out of focus areas.  Especially when working with editors that might not see what you're seeing, you want to leave as little to the imagination as possible.  Nailing the shot in camera is that much more important.  With a prime in the Soccer Stadium though, setup on the sidelines, you might only really be able to fill the frame with one or two lanes of athletes, limiting your section for that perfect shot.  Because of that, you're constantly needing to reset your position as the action develops, or worse, sit idle as you watch as those critical moments are happening either too close or too far from your position.

Now that's not to say primes are all bad - or bad at all.  When you set yourself in the perfect position, and the action develops just right, the moments you can capture with a prime are stunning.  The sharpness and bokeh are incredible, and simply can't be reproduced with a zoom lens.  It requires a lot of patience and a bit of luck, and you can nail some killer shots.  Me though?  Not so much.  I struggled working with primes in the fast moving action on the soccer field.  Looking back through my images, I found my hit rate much lower when working with primes, and even some really good shots, needed a lot of cropping in post to get the look I wanted.  Again, when you're shots are being sorted and edited on the fly, shots that aren't quite right like that get passed by in place of better composed images.

Katrin Davidsdottir - 2016 CrossFit Games during the Snail WOD - Nikon 600 F/4 - Copyright CrossFit Inc, 2016, all rights reserved

Katrin Davidsdottir - 2016 CrossFit Games during the Snail WOD - Nikon 600 F/4 - Copyright CrossFit Inc, 2016, all rights reserved

Another experiment in 2015 was working with teleconvertors to try and get a reach that isn't attainable with lenses even like the 400mm.  The common caution against using teleconvertors is that they "soften" the image, and in my experience I think that is partially true.  The first example I can think of was during the team event that included a series of rope climbs in the middle of the massive Zeus rig.  I was down in the endzone and wanted something that could reach all the way into the rig.  So I created what I affectionally called the "hubble" -- the 600 f/4 with a 1.4x tele, effectively making it a 840mm lens.  While the reach I got was nuts, and the background compression was incredible, a close review of the images after the fact revealed many of the shots I thought I "nailed" were actually soft and the sharp focus was just not there.  I'm not saying the teles were the cause of that, I think it was a lot more operator error than anything else, but it certainly cautioned me from falling for the desire for that extra reach the next year.  I had a similar experience working with the 1.4x on the 200-400.  While that extra reach was great, I really found it that much harder to get that tact sharp focus in my images.

Pondering tacos with the Nikon 200-400.  Photo Cred CrossFit Inc, Colleen Baz

Pondering tacos with the Nikon 200-400.  Photo Cred CrossFit Inc, Colleen Baz

Starting in 2015, we also worked to get our edits even faster with the introduction of a private wifi network on the field, and all cameras transmitting small jpeg images over that network direct to the editors.  When it worked, it was crazy to take what you think was a killer photo in the heat of a WOD, and a few minutes later notice on facebook or instagram, it was already edited on and online.

For 2016, we had a similar quiver of equipment and after reviewing my work from the previous years - what got good results and what didn't - I had a different gameplan.  For the soccer stadium, I went back to the basics and stuck to the gear I knew worked for me and the way I shoot.  I balanced using the 200-400 in the soccer field with just a sprinkling of the 400 and 600 during some of the slower events where I had more time to plan and compose shots.  

Katrin Davidsdottir and Tia-Clair Toomey at the 2016 CrossFit Games, Nikon 70-200, Nikon D4s -- Copyright CrossFit Inc, 2016, all rights reserved

Katrin Davidsdottir and Tia-Clair Toomey at the 2016 CrossFit Games, Nikon 70-200, Nikon D4s -- Copyright CrossFit Inc, 2016, all rights reserved

Something I never really used much in previous years was my old standby, the Nikon 70-200.  Because of the ease of handling this "small" lens, it was much quicker to get down on the ground and take some shots from the prone positions, especially on the fast and dramatic turn of the suicide sprint WOD.  Ironically, the first mainsite image I got during the 2016 CrossFit Games, was taken with the 70-200 in the soccer field, not one of the $7000 prime lenses.

 Regardless of the venue, the most important thing to me is getting right in the action.  Sometimes you can do that with gigantic lenses, other times you just need to still be physically close to where the action is going to be, and hope everything lines up just right.  My take aways from working with these big lenses is that a monopod quickly becomes your best friend, and good planning is important.  On paper a 400 f2.8 might be the most magical lens ever, but if you find yourself assigned to a position where that can't catch that action, it's worthless.  Point being that you want to go into a shoot - any shoot really - knowing where you're going to be and what's the best tool to help get the shot.  For me, it is tough to beat the versatility of zooms like the Nikon 200-400 f/4 for shooting big field sports like this.  From one position you're able to cover multiple lanes of action, and within a single lane, on one athlete you can get multiple looks depending on how much you zoom.

Stay tuned for part 2 where I take things into the Tennis Stadium where I go over a whole different slew of challenges.

When given the opportunity to take a break, a nap is always crucial

When given the opportunity to take a break, a nap is always crucial


If you like what you've read, please share.  Feel free to post some content suggestions below so I know what you're looking for in my next post.  For bookings email shaun@superclearyphoto.com.  And as always, follow @supercleary on instagram and SuperClearyPhoto on Facebook.


Tags photofit, photography, crossfit, fitness, nikon, prime lenses, nikon 200-400, nikon 600, dan bailey, katrin davidsdottir, crossfit games, supercleary, superclearyphoto
Comment

How to Make Video Edits that Don't Suck (PhotoFit #12)

September 14, 2016

More and more, photographers on the job are asked by clients "oh can you also do a quick video?"  And more and more, photographers are branching out into video and saying, "yes."  As someone who has made that same move, I'd love to spell out a few tips to help make quick video edits that don't suck, coming from someone that has made every conceivable error.  I'm going to talk more about broad concepts and ideas here as opposed to settings and nitty gritty video editing.  If you're looking for tips on that too, please comment below and I'll get to it!

For a quick start on on shooting DSLR video, please refer to this PhotoFit post

Story

The single most important part of a shooting a video edit that doesn't suck is this: you have to tell a story.  If you remember nothing else, when you shoot a video, it always needs to tell a story, no matter how long or how short. Every story has a beginning, a middle, and an end, so use that to help plan what you're trying to shoot. That is far more important than camera settings, technical skill, or equipment.  Once you have an idea of what your story is, you can move on.  Because a video is a story, plan what you're trying to do, and then what types of shots you will need to tell that story.  Don't just point a camera and hope something will develop.  Certainly, as a shoot continues or in the edit process, you may change what your vision is, but going into a shoot without a direction will almost always lead to a disaster.

Basic Setup

You need a camera and a way to capture audio, whether that is the on-board microphone or something added on.  You also need some way to stabilize your camera, whether that's your hand or something fancier.  With video, lighting is even more crucial, try to have your subject lit by natural light, whether parking them next to a window or an open garage door, or you can get fancy adding lights.  

Camera settings essentials: pick a frame rate (it's pretty standard to shoot at 23.9 for a "film" feel), and set a shutter speed that is double that frame rate (this can't be changed).  Example: setting a 23.9 shutter speed means you lock in a 1/50th of a second shutter speed.  These two settings go hand and hand, and can't be changed without changing the other.  The rest of your exposure works just like in a photo so set accordingly.  White balance matters more in video because it can't easily be changed in post.  Make sure to preset a white balance based on your scene so it doesn't "shift" as the shoot develops if you leave it in auto.

Focus.  Like in photo, your shots need to be in focus.  One of the fun parts of video though, is your subject does not have to be in focus at all times during a particular clip.  Generally, as long as your subject comes in focus during some point of your clip, the shot will "make sense" to the viewer.  This can be used to great artistic extremes, but for your general video work, you want to make sure your shots are actually in focus most of the time.  To help facilitate that, shooting at apertures between f5.6 and f8.0 increase your depth of field, and make the job of focus much easier on fast moving subjects.

I'll include this in your "setup" as well, how long do you plan your edit to be?  Generally, shorter is always better.  Long videos get skipped, if you can get your point across in 15-30 seconds, you likely have a more compelling video that people will actually watch.  Knowing how long the end result will be will also help you know how much you need to shoot and what the critical shots are going to have to be.

Shot List

So you have a story and your gear is setup: onto your shot list.  When you take a photo you have to compose the shot and then everything is captured within it to tell the story in one frame.  With video though, you need to tell the story by compiling different types of shots - whether tight/medium/wide, and through motion.

Whether you use them in the final product or not, it is essential to include the three main camera shots: wides to establish the scene and orient the viewer about the space and what's going on.  Mediums to bring the camera closer to the subject and connect better, and finally tight shots to highlight details and critical moments.

Motion is a huge subject in videography and I'm just briefly going to touch on what I think works and what to avoid.  Generally, don't move your camera during a shot.  Let the subject move through the frame, but leave the camera locked in a position.  Using that as a guiding principal though, motion can then be introduced to add to the story.  Motion in practice looks like a few different thing, pans, tilts, zooms, and different types of slides.  All of these movements should be done in such a way that they are adding to the story you are trying to tell.  Just like in the balancing of shot selection between wide/medium/tight, one should also be careful to make sure there is a mix between stationary shots, as well as motion shots, while mixing different motions.  A really easy way to see these concepts in practice is to watch literally any movie.  You're going to see this mix - the camera stationary, the camera moving, close-ups, wide shots to establish, details.  

  Let's really get into one of the only technical areas I think every photographer turned videographer needs to read, and needs to read over and over: stabilization.  When you shoot video, you have to stabilize your camera or you will almost always have the "blair witch" look to your shots.  Every slight vibration and twitch are amplified ten-fold and your shots look amateur when you simply point and handhold your camera.  I'll go through different ways to stabilize your camera and pros/cons of each.

Handheld:  Should only be done in an emergency.  Shots will generally be very shaky and tough to use.  Ways to mitigate this are to first lean against something, or better, prop the camera on a sturdy surface and then don't move.  

Shoulder Rig:  A shoulder rig is a series of components that will have the camera on a base plate, some rails, and then either resting on your shoulder or against your shoulder to help stabilize the camera.   Shoulder rigs allow for "run and gun" style shoots where you need to move often to setup for different shots and include a lot of flexibility.  They help in reducing shake in dslr shooting, but I've found them to be more trouble than they are worth.  They are usually costly and often impact the composition of the shots you're trying to create because of the position of the rig on your body.  Further, because the rig is only as stable as your body, vibration and shake can very easily creep in still.

Monopod:  I think the video monopod is probably the best go-to for dslr video shooting.  They are cheapish and can help achieve almost every shot you're going to be looking for, including some basic camera movements.  By planting the camera on top of the monopod and then composing your shot, all shake and wobble is gone from your clips.  They are also small and light and can easily be repositioned to change height and angle of shots.  The only real drawbacks is more complicated moves like slides and zooms aren't possible.

Tripod:  Like a monopod, this is the gold standard for stable camera shots.  More sturdy than a monopod, a tripod will produce even smoother, cleaner shots, but it comes at the expense of greater setup time, and less flexibility.  Other than your tilts and pans, camera movements aren't feasible with this setup.

Gimbals:  Now we're getting fancy, and into the "hot" video tool of the times now.  Gimbals are devices, whether motorized or just using a balance system, designed to keep a camera stable while the rig moves.  Examples include the Movi, Ronin, Osmos, and Glidecam.  Ranging from very expensive to cheap, these all work on the same principals to "float" the camera to create amazingly smooth and stable camera motion.  The majority of videographers in the CrossFit space now work to some degree with these rigs because they allow for the shooter to help keep up with the dynamic movements of the sport.  I've worked extensively with a Ronin and have found it indispensable. 

There are several drawbacks to working with gimbals.  First, because they require two hands to operate, focus can't easily be changed on the fly.  As a subject moves, they can easily go out of focus, and unless you're using an extremely expensive gimbal setup, you cannot change focus during the shot to track the subject.  Because of that, more narrow apertures with wider depth of field are used (like f8).  That's great for making sure your subject is in focus, but now more and more of your background is in focus, sometimes creating more boring shots.  Another drawback, and this is commonly a mistake of the operator and not the rig itself, is that shots pulled from this setup are always in motion.  Yes, this is one of the best devices for stabilizing camera motion, but that does not mean every shot with it is required to include a pan/slide/zoom.  Like any tool it should be used in moderation to have the greatest impact.  And, while not technically a drawback, these rigs are usually heavy and complicated to setup.  While not a dealbreaker by any means, other than the Osmos - which is little more than a stabilized camera phone - these rigs require preproduction to work with and can sometimes limit flexibility in some surprising ways.

A few of your stabilizer options

A few of your stabilizer options

Audio

One of the biggest places the photographer turned videographer struggle is in the audio.  Photos don't have sound, videos do, so this is a totally new world for the photographer.  Audio can be as important if not more important than the footage itself.  During your planning phase you should have an idea of what sort of audio you're looking to capture.  Is this a piece about an athlete?  Should there be an interview with them and will that be the main focus meaning you'll need to mic the athlete.  Is this a highlight reel from a competition so you just need some exciting music?  Will you use the ambient sound from the gym environment like the barbells crashing and the athletes communicating: meaning you'll need to have a mic on your camera.

The number one pitfall photographers, well basically everyone, makes in their video edits that they use unlicensed music in video edits.  You simply can't do this.  If you are a professional, meaning you are making this for money, or are making this to promote your business in any way, you must have a commercial use license to use music created by anyone other than you.  I've heard over and over this idea that there is a "fair use" exemption or if you keep the music under a certain length that you somehow have the right to use it.  That is simply not true.  Beyond stealing another artist's property, you open up yourself and your client to massive liability that can result with you being on the hook for a lots of money.  To be clear, if you want to use music - any music - in your video edits you must have the rights to do so. I use subscription services to provide my stock content because I pay once and have access to a huge library, but for better quality music you will have to buy it per track and per project.  

Without getting into the real specifics of how to mic different sorts of sounds, audio settings, and whatnot, I'll again focus on broad ideas.  When recording sound, you want it to be as clean as possible.  Just like getting the clutter out of a background in a photo, you want to do as much as you can to remove the "clutter" in your sound landscape.  In the gym, that's going to mean **gasp** turning off the music.  Yes, people get grumpy when you do that, but it will make for cleaner better audio in the end.  And look at things like fans and loud refrigerators, they can add a lot of low noise in the background that can be very difficult to edit out in post.  And think about easy fixes too, closing doors and windows can do wonders for giving you a cleaner sound.

Assembling Your Edit

So you've done your shoot, you've got your clips and you're ready to edit.  What now?  First off I want to review everything I've shot and select out of each clip what the best parts are and cut them into a timeline to start sorting.  From there I want to start assembling these clips in an order to tell the story I want.  Once I have a rough order from beginning to end of my clips and I can start thinking about fine tuning that edit - meaning sliding shots around or shortening/lengthening clips to make them flow into each other better.  Now is a great time to make sure your shots have some variety between wide/medium/tight as well as motion.

Usually at this point I like to start thinking about audio.  If I'm going to just run a highlight style video, I'm going to lower, if not mute, the audio in all the video and then drop the music clip I have into another audio track.  From there I want to go back and line up some of the cuts between clips to the beat of the song so the video/audio appear to be connected better.  I may also want to start adding back the audio from some of the clips if there are some good yells, grunts, barbell clanks, or ambient gym noises.  That helps keep that connection between what the viewer sees and hears.  Once you have a basic audio layout, it is so important to go back and play through and make sure everything works well together and the audio levels from clip to clip are consistent.

One of the last things I'm going to do is go through and color grade the look of the video, whether in the individual clips or across the whole edit.  Color grading is basically photo editing for video.  Each program has its own way of doing this but what you'll see very quickly is that working with video is much more restrictive than editing RAW photos.  You are going to be able to tweak exposure and color less so it is that much more critical to get things right in the camera while you shoot.  The grading process helps balance shots from clip to clip and keeps a continuous look through your whole edit.

Edits in Action

To try and demonstrate this, here's a quick edit I put together for PerformanceCarerRX.com.  Because this was a really quick last minute shoot I actually handheld the camera.  To help stabilize though, I have the camera leaning on the ground, or braced against my body.  To watch through the edit, I start off with a series of tight shots, and then move to a wide establishing shot showing Rob doing the snatch.  From there, I move to a medium shot and then back through a wide shot showing the entire movement.  Finally I finish off the story with the weight hitting the ground - and included ambient audio of that as well - to help punctuate the end of the lift and the story.  It is nothing fancy, but it goes through a variety of shots to help tell a very simple story - Rob snatching a heavy dumbbell.  The product is reinforced through some text banners added in.  Yes, with more time and production there are a lot of things that could be done better.  First off, the handheld clips would be shot on a monopod on ronin to stabilize them either eliminate camera movement, or smooth the movement that is there.  Beyond that I'm happy with the result, and the client was too.

And for the nerds, a quick look at the timeline for that edit.

And for the nerds, a quick look at the timeline for that edit.

Quick review.  To help make sure your video edit doesn't suck, start with a story.  Make sure that edit tells a story.  From there, include a variety of different types of shots as well as basic smooth camera motions.  From there, include audio that helps support that story.  Keep your edits short and concise so that they stay on topic and are easily consumable by the viewer.

So get shooting and edit up some masterpieces.

If you like what you've read, please share.  Feel free to post some content suggestions below so I know what you're looking for in my next post.  For bookings email shaun@superclearyphoto.com.  And as always, follow @supercleary on instagram and SuperClearyPhoto on Facebook.


Tags photofit, photography, video, dslr, crossfit, crossfit games, supercleary, superclearyphoto
1 Comment
Dani Horan, Nikon D4, Sigma 35 1.4, 1/500th, f1.8, ISO 2000

Dani Horan, Nikon D4, Sigma 35 1.4, 1/500th, f1.8, ISO 2000

Prime Lenses for Lowlight Elite Fitness Photography (PhotoFit #11)

September 7, 2016

Read the previous #photofit columns here

Shooting in any kind of gym environment - from CrossFit to MMA - you're normally stuck in dimly lit, dark boxes that have lackluster windows and worse fluorescent lighting.  At a certain point, unless you're going to add lights (we'll talk about that later), you can't push your ISO anymore or slow your shutter further.  There is simply no way to get a bright enough exposure with standard zoom lens, lenses that for the most part can't shoot faster than f2.8.  The only place to go from there is Prime.

Nikon D4, Sigma 35 1.4, 1/500th, F1.8, ISO 3200

Nikon D4, Sigma 35 1.4, 1/500th, F1.8, ISO 3200

Just as a refresher on the exposure triangle, you control light with three settings - shutter speed, aperture, and ISO.  To generally get "sharp" photos of action, you're going to need to shoot around 1/500th of a second.  So in a dark setting, you're going to shoot wide open - as close to f2.8 as your lens allows - and then start cranking up your ISO as high as your camera allows.  If all these parameters are maxed out and you still have an underexposed image, there's not much you can do with your current setup.  That's where prime lenses come in.  A prime lens does not zoom, but the trade-off is your aperture can open wider than f2.8 - usually f1.8 on cheaper primes and f1.4 on more expensive variants.  Because of this, you now have another option to get the right exposure - going from f2.8 to wider apertures - f2.2, f2.0, f1.8, f1.6, and f1.4 - and letting more light in.  Each of these allow more light into the camera, hopefully getting you close to that perfect exposure.

Jared Stevens, Nikon D4, Sigma 35 1.4, 1/500th, f1.8, ISO 3200

Jared Stevens, Nikon D4, Sigma 35 1.4, 1/500th, f1.8, ISO 3200

Working with Primes

Handling prime lenses adds a couple of challenges, namely getting your shots in focus, and understanding how to zoom with your feet.  

Focus:  As you go to wider apertures, the plane of focus gets more and more narrow as you get that increase in light.  What that means in practice is if at f2.8 you focus on an athletes chest, his eyes/face will still be in focus.  At f1.4, if you focus on the exact same point, you will very likely get a tack sharp chest, but an eyeball that is completely out of focus.  And to be clear, if the eye is not in focus on the subject, the image is out of focus and useless.  Don't give me this "artsy/focusish" crap.  If your subjects eyeballs are out of focus, the shot isn't really useable.  So you've solved your first problem, the exposure is now right because you're letting in more light, but now your focus sucks.

There are a lot of ways to deal with this.  First off, just because your fancy prime lens goes to f1/4 doesn't mean you should actually shoot at that.  There are a lot of stops between that and f 2.8, and even shooting at f1.6 or f1.8 will give you a great deal more light, but still give you some wiggle room in your focus.

Nikon D4, Sigma 35 1.4, 1/500th, f1.8, ISO 3200

Nikon D4, Sigma 35 1.4, 1/500th, f1.8, ISO 3200

Secondly, I can't emphasize how important back button focus is when working with primes.  (If you have no idea what that is, follow the link here).  To nail focus I want to make sure that focus point is locked onto the subject's head.  Again, because I'm all fancy and using my back button to grab focus, if the movement is say a snatch or a clean, during the setup I'm going to grab focus, and then during the lift I'm not going to refocus as long as the lifter doesn't move closer or farther away from me.  If I used an "autofocus" mode and held down the focus the whole time, what would likely happen is the focus would grab onto the chest/bar/shoulder of the athlete and because of depth of field is so shallow, the end result image will be out of focus.  Sticking with a back button technique and pre-focusing on where my subject will be should lead to more in-focus images at the end of the day.

Zoom/Composition: The other big challenge when working with a Prime is that you no longer have the ability to zoom in or out.  But really, you still have that ability, it is just with your feet.  So clearly a limitation exists when using primes at events.  During big competition style events, you're not going to be able to go anywhere you want or zoom with your feet as close as you may need.  That would then mean in the largest event settings you need to know where you will be and where your action will be and bring the appropriate lens.

Nikon D4, Sigma 35 1.4, 1/250th, f1.8, ISO 800

Nikon D4, Sigma 35 1.4, 1/250th, f1.8, ISO 800

In most applications though, you're going to be able to go wherever you need and that's where primes like a 35mm or 50mm will really shine.  Again, because you can't zoom, you need to anticipate how an athlete will move through the frame while you're taking the shot.  If you frame up the shot perfectly during the setup to a lift, the lifter will very likely have their head or feet cutoff if you keep shooting without reframing.  Because of that, I want to think about what shot I am really looking for, because I very likely can't do both during the same lift.  As a rule of thumb, give yourself a little breathing room in your frame so that you don't cut any limbs off and then crop in post.

Nikon D4, Sigma 35 1.4, 1/640th, f1.8, ISO 2500

Nikon D4, Sigma 35 1.4, 1/640th, f1.8, ISO 2500

So after all that it may seem like more challenges than it's worth, but primes have a lot of benefits beyond just letting more light in.  Primes are incredibly sharp.  Across the board, nearly all primes are sharper than a comparable zoom lens like a 24-70 f2.8.  When you nail focus with a prime, the image quality is truly remarkable when compared to their zoom counterparts.

Now the magic really lives in the bokeh (out of focus areas).  As that depth of field gets shallower, the out of focus areas turn into mush and help draw the eye into the subject.  If you go wild and shoot at f1.4, you will get some really unique results when you nail focus.

Nikon D4, Sigma 35 1.4, 1/640th, f1.8, ISO 2500

Nikon D4, Sigma 35 1.4, 1/640th, f1.8, ISO 2500

My Setup

My go-to lens for most shoots is a prime actually, the Sigma 35 1.4 art series  I find that the 35mm is perfect for most situations to capture subjects head to toe, while still allowing me to get tighter if I just take a couple steps forward.  Even in relatively dark gyms, I'll shoot at ISO 1600, 1/500th, f1.8.  This starting point allows me plenty of leeway to crank up the ISO if I need to.  Only once my ISO is maxed out around 6400-8000, will I move to f1.6 or f1.4.  Only in the most desire situations will I play around at those super wide apertures.  Unless you have a lot of time to setup and a lot of chances to nail the shot, those apertures are extremely difficult to work with on run and gun scenarios.  My thought process would have me moving my ISO up several stops before I consider going to those super wide open apertures.

Nikon D4, Sigma 35 1.4, 1/500th, f1.8, ISO 3200

Nikon D4, Sigma 35 1.4, 1/500th, f1.8, ISO 3200

I've also been having so much fun with this setup over the last two years that I picked up the Sigma 50mm 1.4 art lens recently.  I've really enjoyed the results and the different focal length coming from shooting with a 35mm so much.  I think for most CrossFit-style shoots in the gyms, the 50mm is a little more restrictive and leads to a few more amputations than I like.  But, when everything lines up right, the results are fantastic.

And primes don't have to be expensive.  Nikon and Canon both make a 50mm 1.8 that you can pick up used for around $100.  I've used my Nikon 50mm f1.8 for years in professional work and no one has ever asked me, or realized that the lens is in the bargain bin at most stores.  If you have the cash though, I can't praise the Sigma art series enough.  There 35 has been a backbone of my camera bag for over two years, and the 50 has quickly found a place in my regular rotation of lenses.  They are also about half the cost of their Nikon/Canon equivalents, while also delivering better or comparable results in head to head testing.

Brooke Wells, Nikon D4, Sigma 35 1.4, 1/500th, f1.8, ISO 3200

Brooke Wells, Nikon D4, Sigma 35 1.4, 1/500th, f1.8, ISO 3200

So there you have it, the secret to shooting in extremely dark rooms:  prime lenses.  They come with a few challenges, but as long as you understand how to work around that, you can go from a shoot that would be a disaster to one that you can deliver great results.  

If you like what you've read, please share.  Feel free to post some content suggestions below so I know what you're looking for in my next post.  For bookings email shaun@superclearyphoto.com.  And as always, follow @supercleary on instagram and SuperClearyPhoto on Facebook.

Kaitlyn Fitzgerald, Nikon D4, Sigma 35 1.4, 1/500th, f1.8, ISO 3200

Kaitlyn Fitzgerald, Nikon D4, Sigma 35 1.4, 1/500th, f1.8, ISO 3200

Keith Van Wickler, Nikon D4, Sigma 35 1.4, 1/500th, f1.8, ISO 3200

Keith Van Wickler, Nikon D4, Sigma 35 1.4, 1/500th, f1.8, ISO 3200

Nikon D4, Sigma 35 1.4, 1/500th, f2.0, ISO 3200

Nikon D4, Sigma 35 1.4, 1/500th, f2.0, ISO 3200

Rob Moloney, Nikon D4, Sigma 35 1.4, 1/500th, f1.8, ISO 3200

Rob Moloney, Nikon D4, Sigma 35 1.4, 1/500th, f1.8, ISO 3200

In photofit Tags photofit, photography, sigma, nikon, supercleary, superclearyphoto, crossfit, crossfit games, rob moloney, brooke wells, jared stevens, dani horan
1 Comment
Great product shoot this week for @musclebutterusa 
#productphotography #sociallydistanced #easysubject
Great product shoot this week for @musclebutterusa 
#productphotography #sociallydistanced #easysubject
Great product shoot this week for @musclebutterusa 
#productphotography #sociallydistanced #easysubject
EVF Battle of the Fittest VII | Only 48 hours left to get your @evfperformance photos! Head to SuperClearyPhoto.com. #crossfit #fitness #motivation #training #inspiration
A whole lot of fitness last weekend @evfperformance — make sure to get your photos at SuperClearyPhoto.com 40% off for only a few more days. 
#crossfit #evfperformance #fitness #training #motivation
A whole lot of fitness last weekend @evfperformance — make sure to get your photos at SuperClearyPhoto.com 40% off for only a few more days. 
#crossfit #evfperformance #fitness #training #motivation
A whole lot of fitness last weekend @evfperformance — make sure to get your photos at SuperClearyPhoto.com 40% off for only a few more days. 
#crossfit #evfperformance #fitness #training #motivation
@evfperformance Battle of the Fittest 2020 | all photos at SuperClearyPhoto.com
#crossfit #fitness #motivation #inspiration